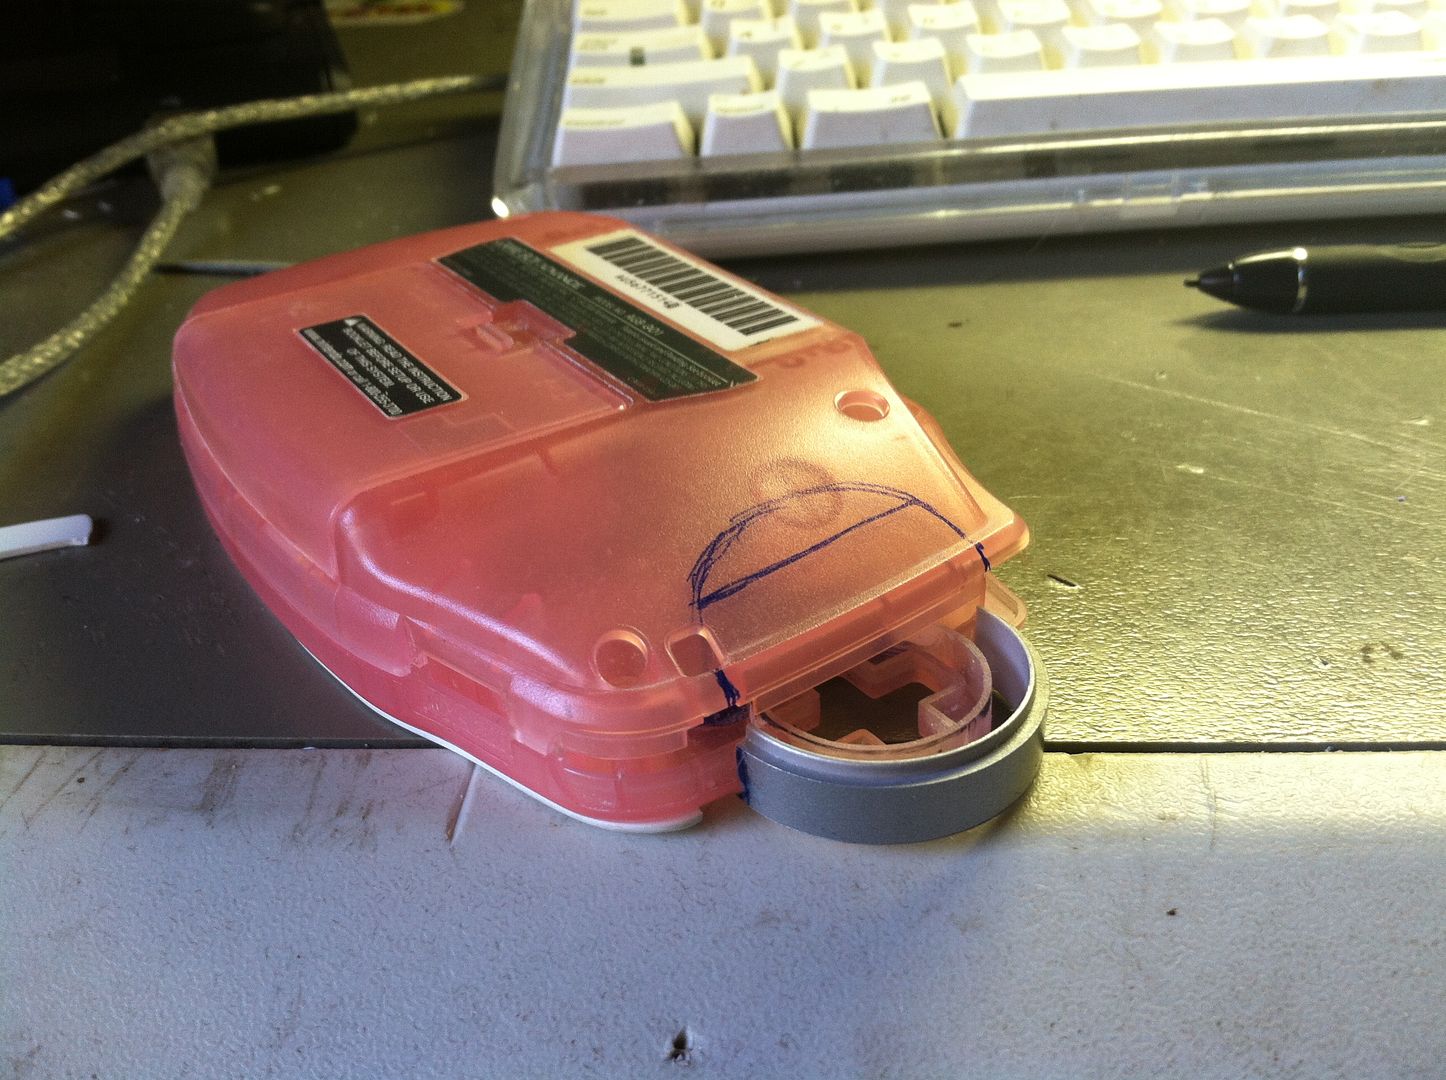
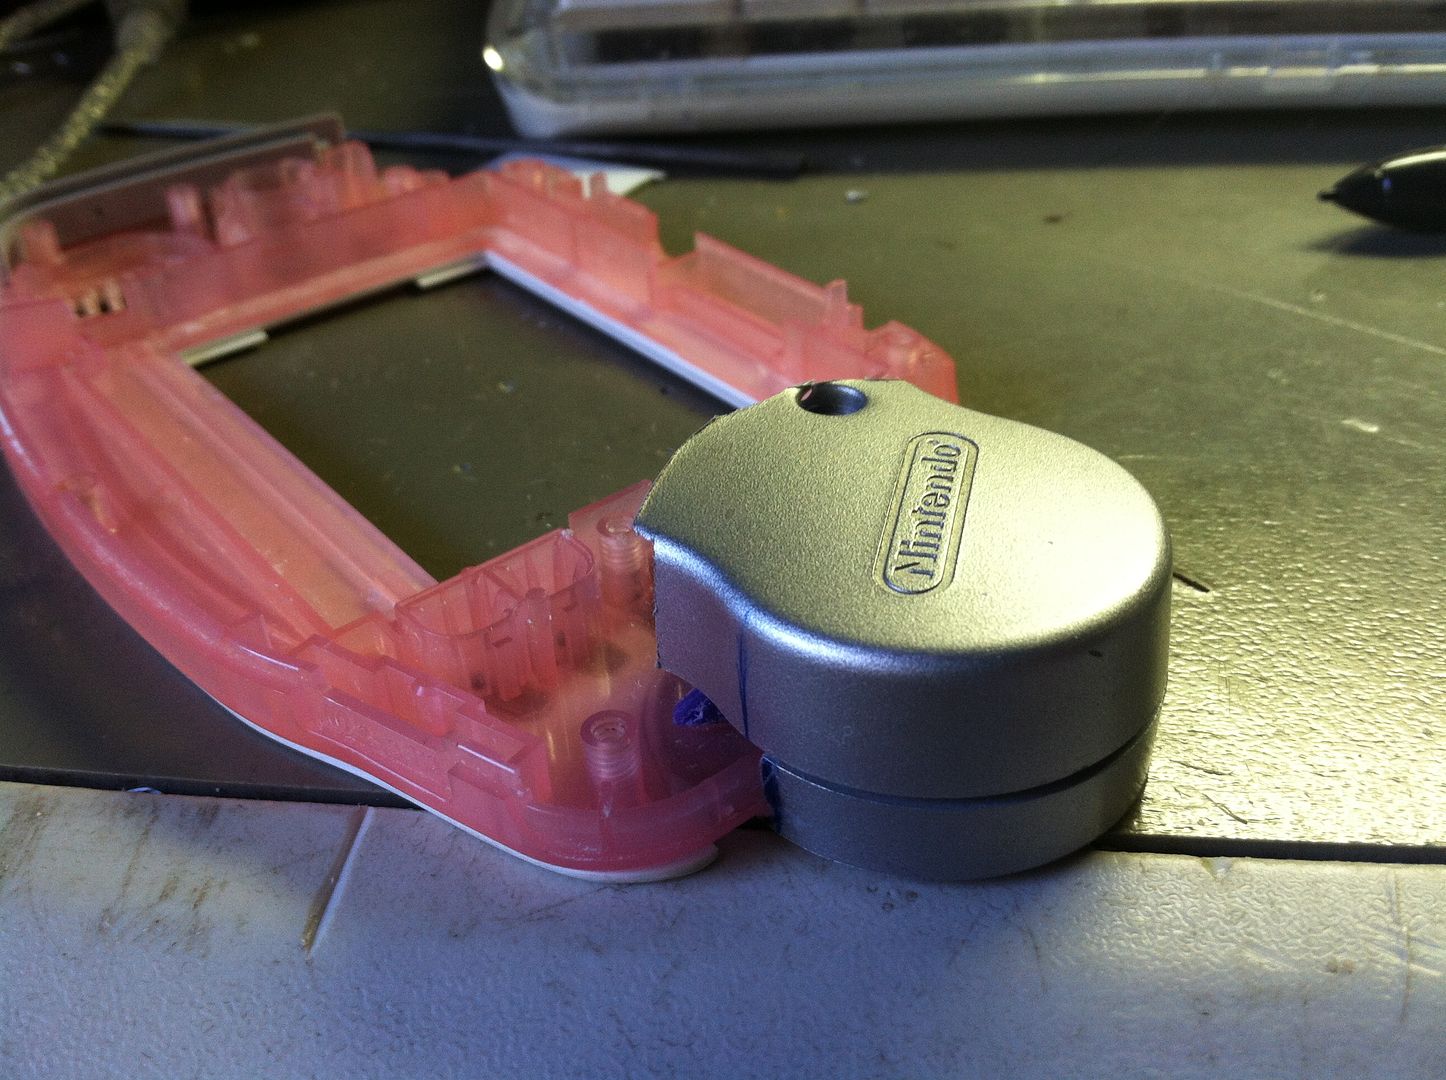
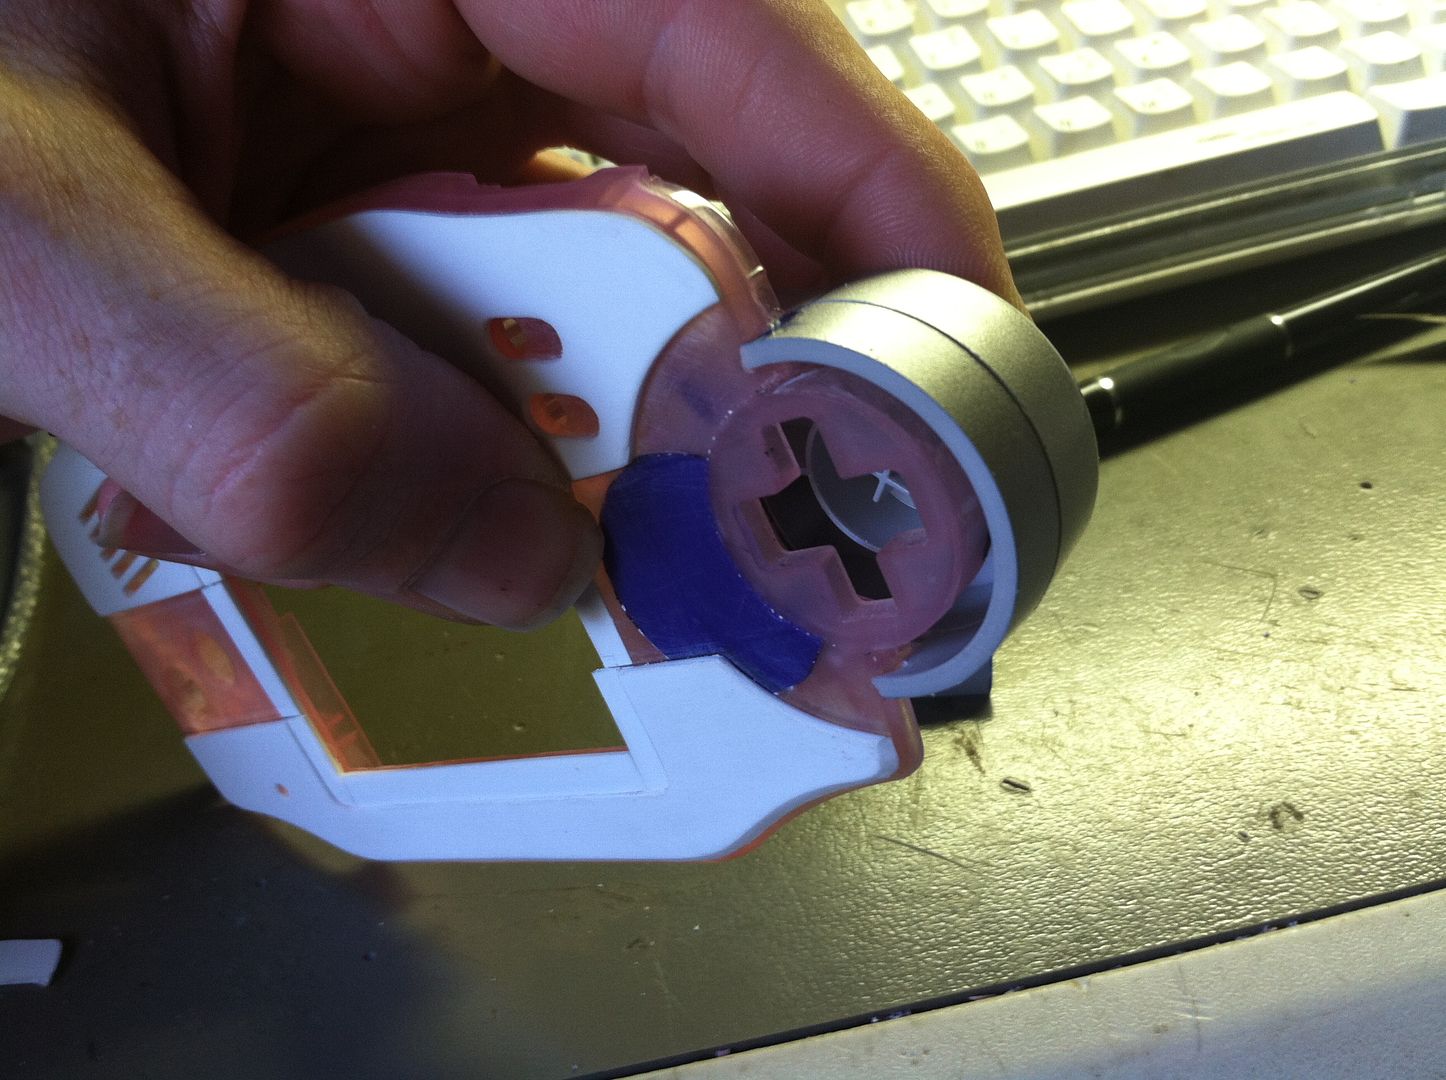
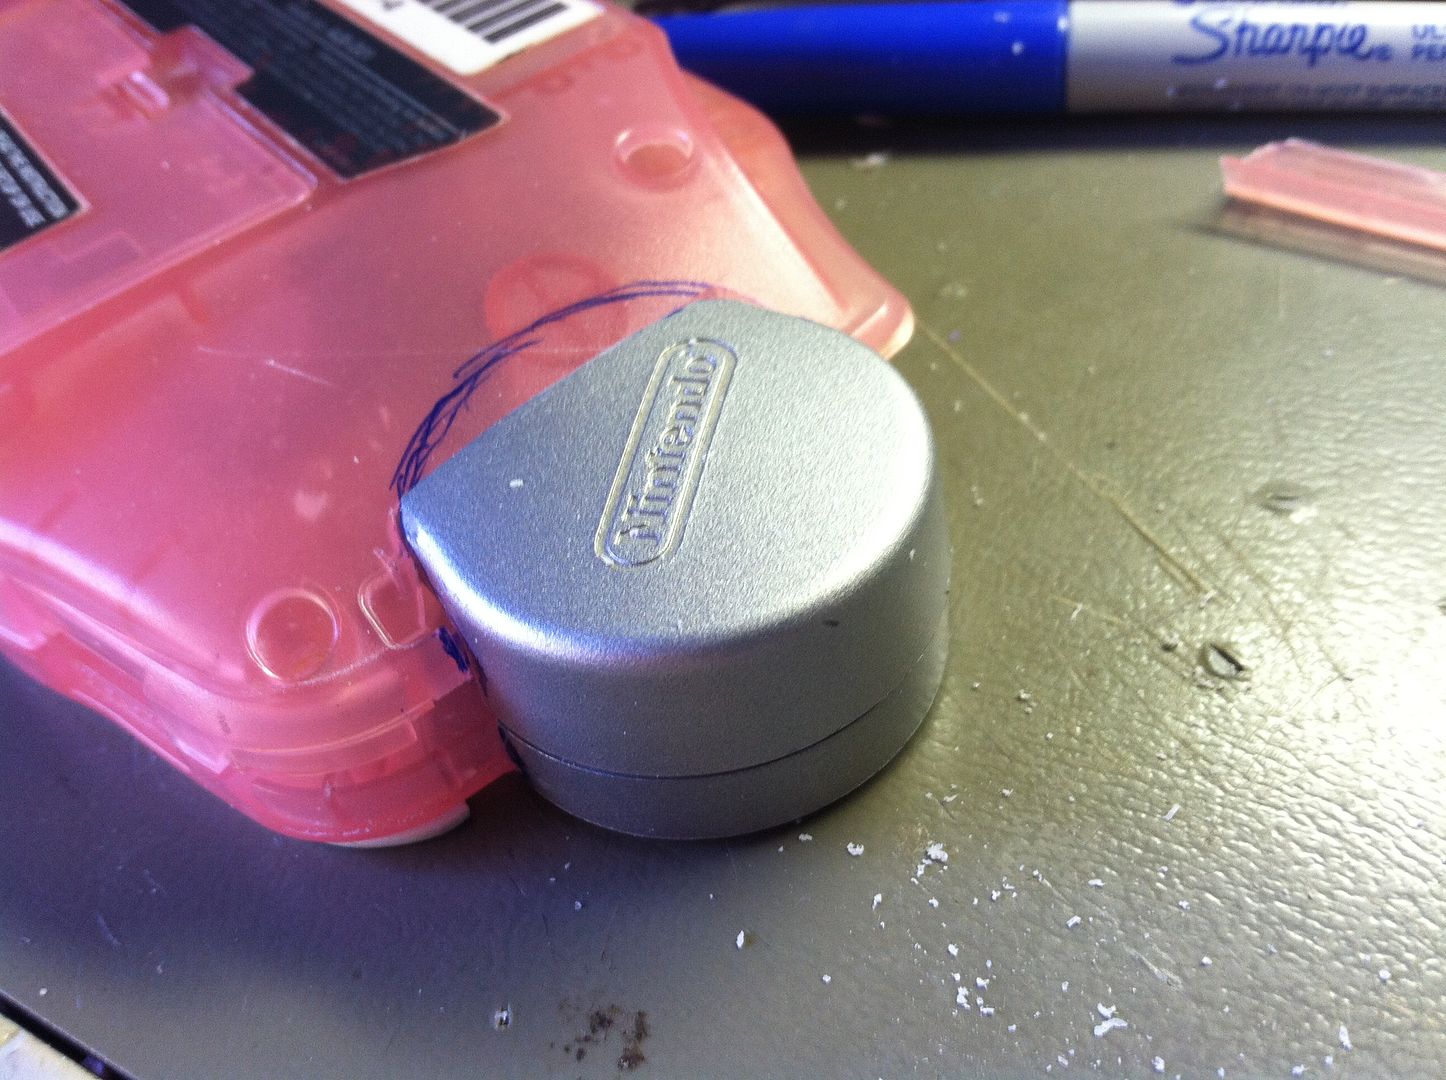
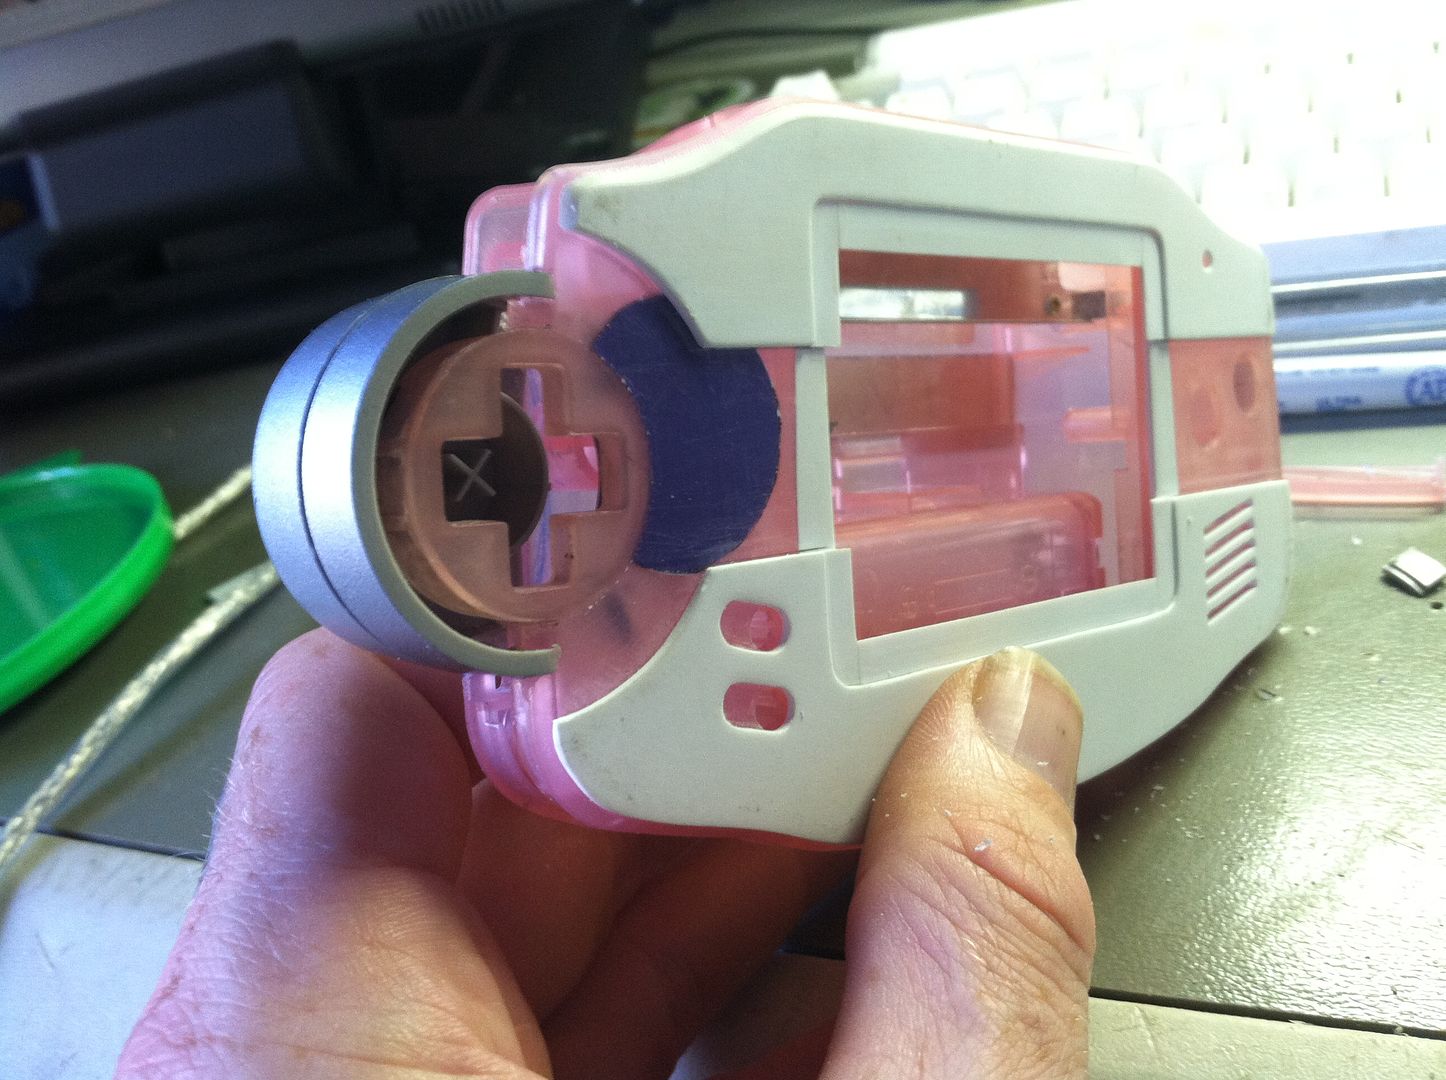
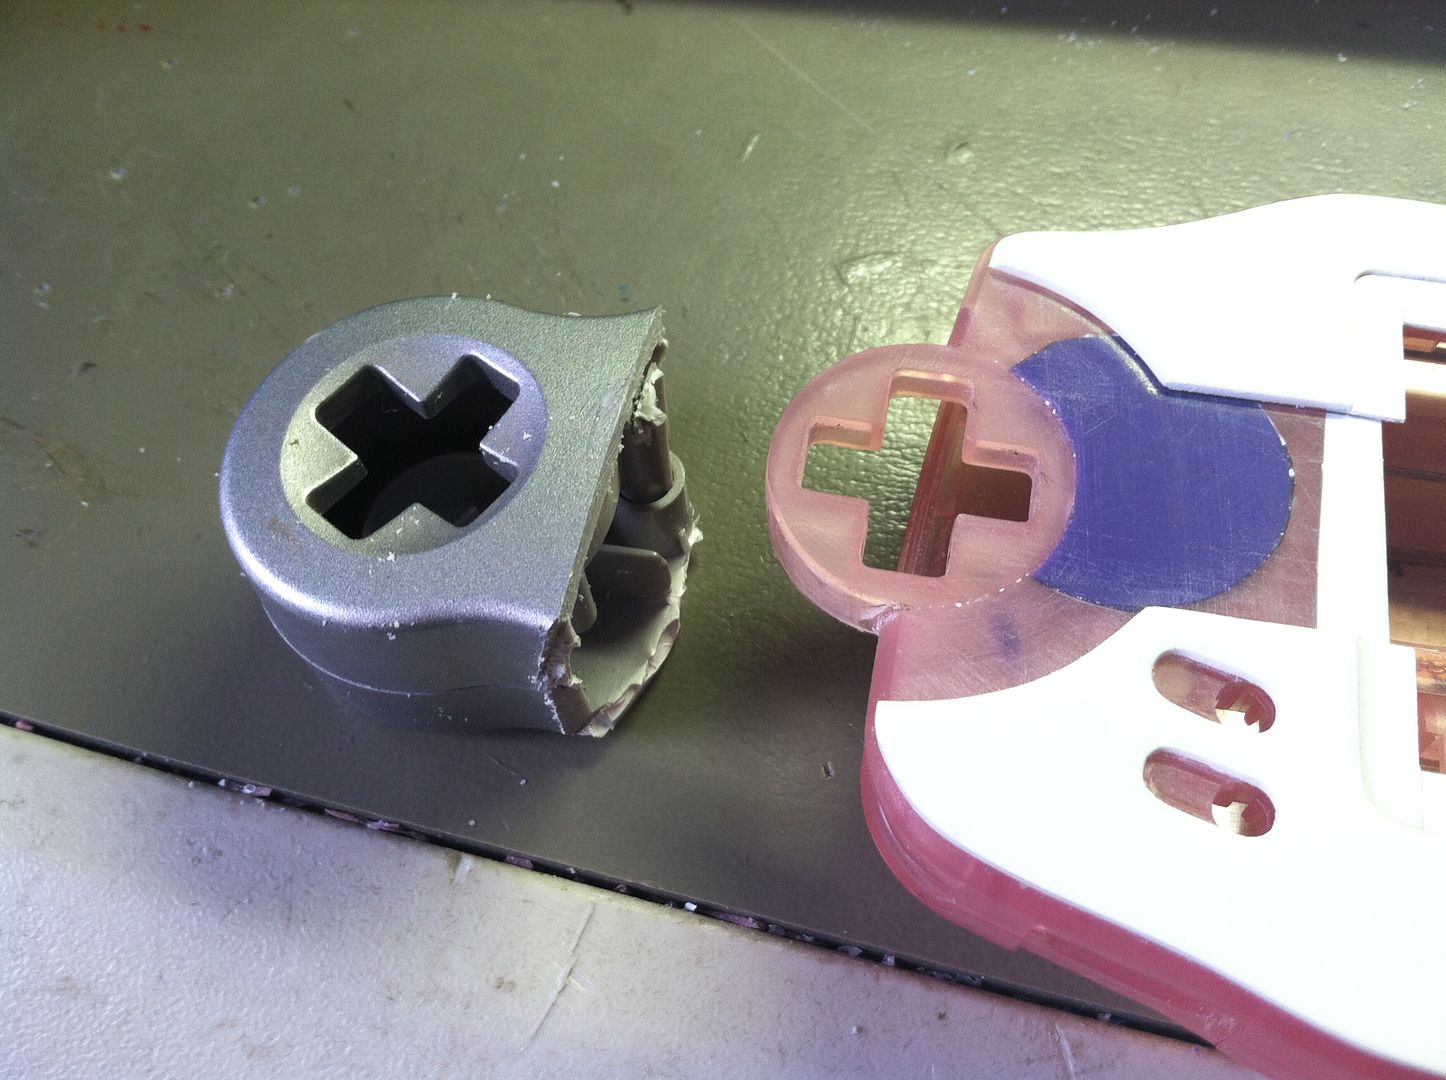
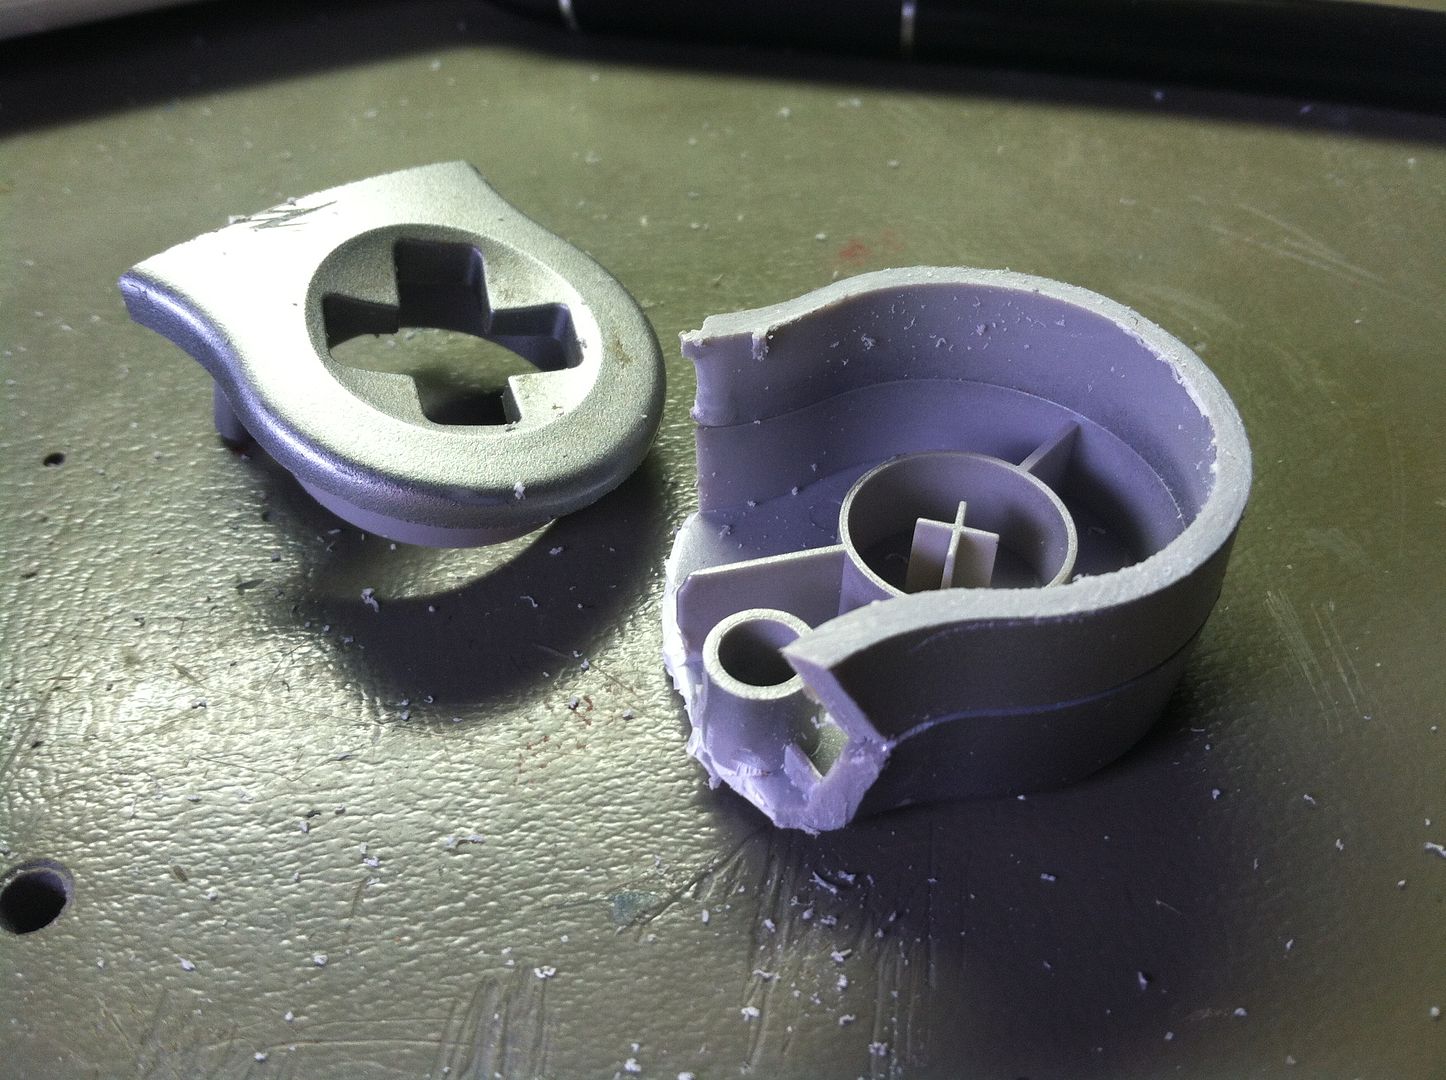
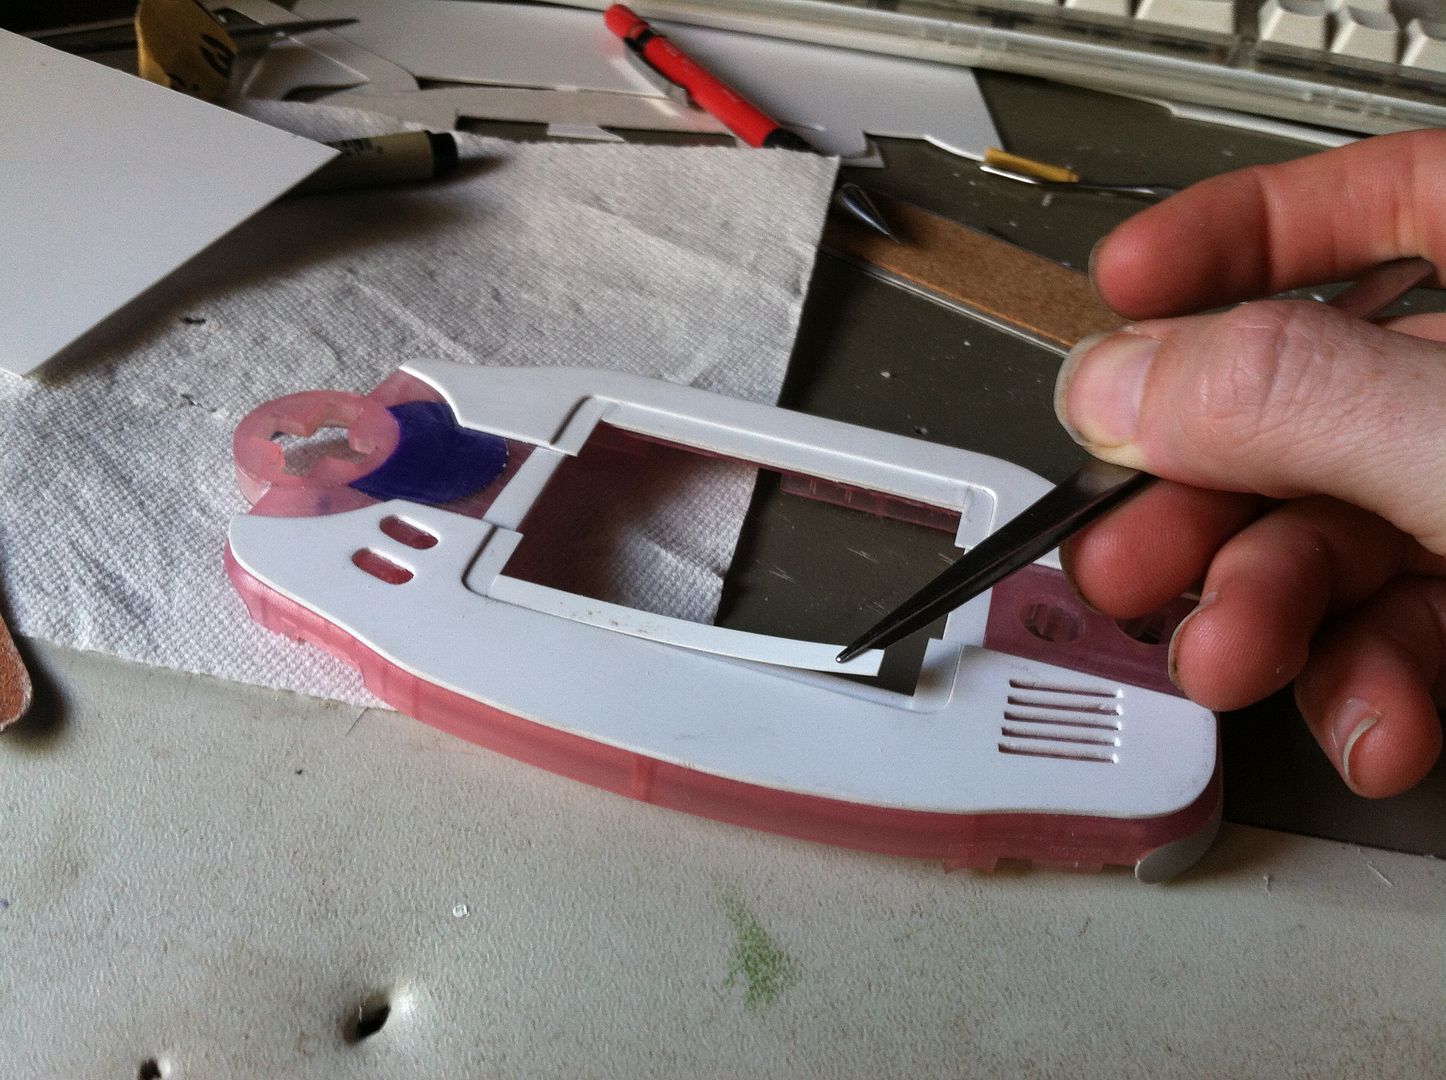
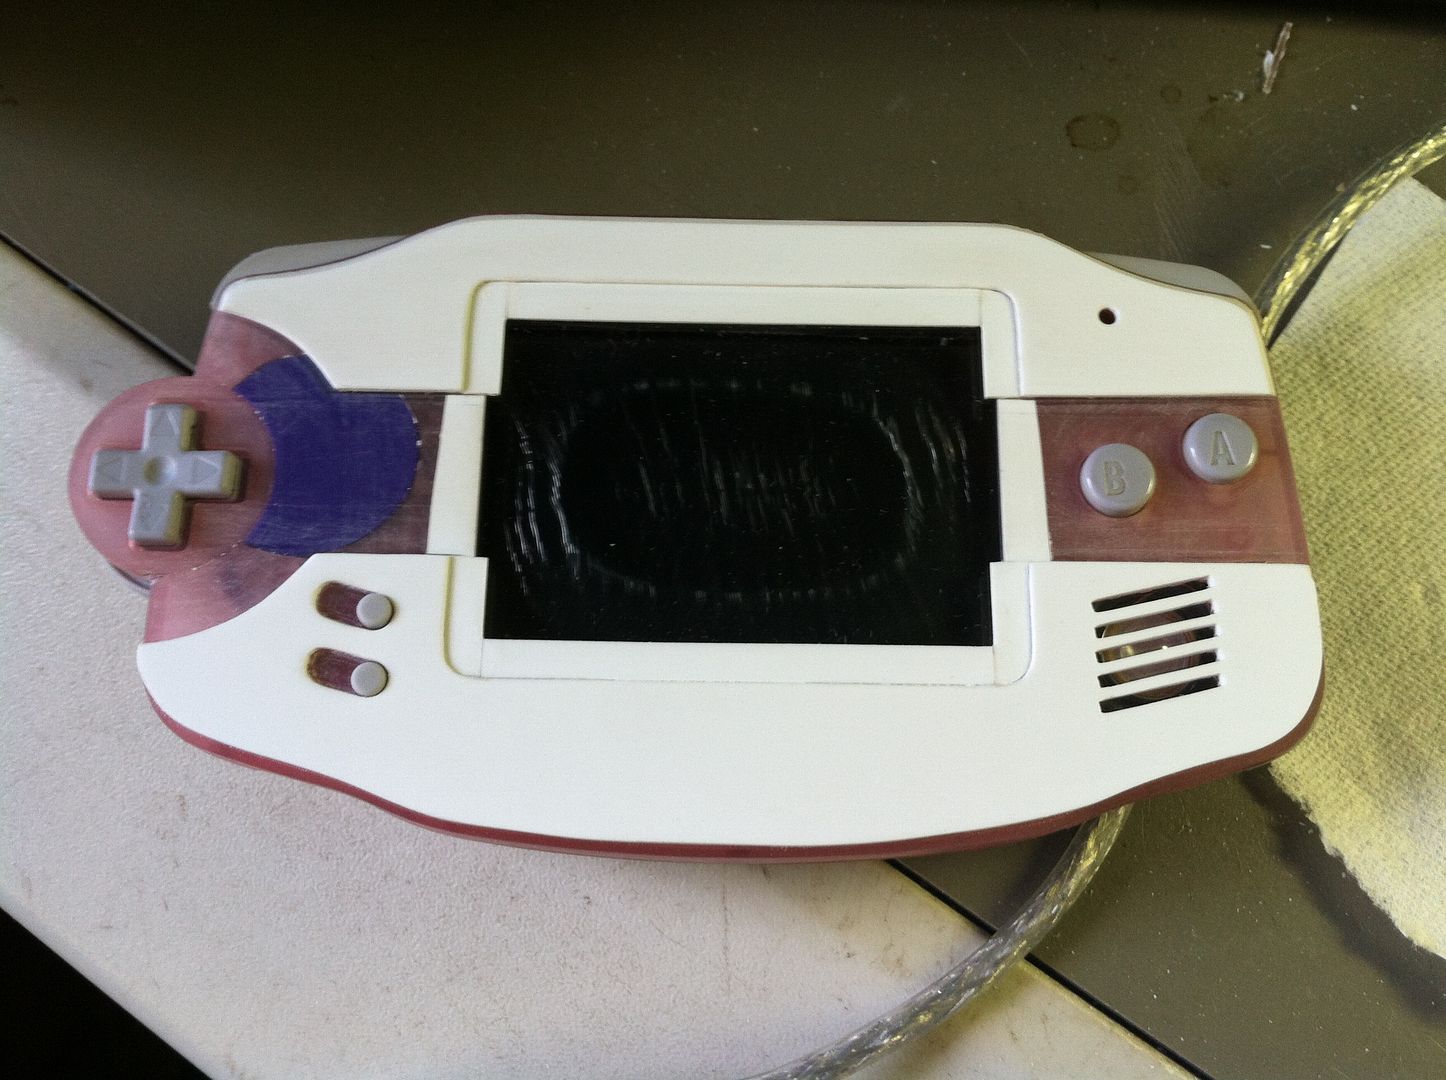
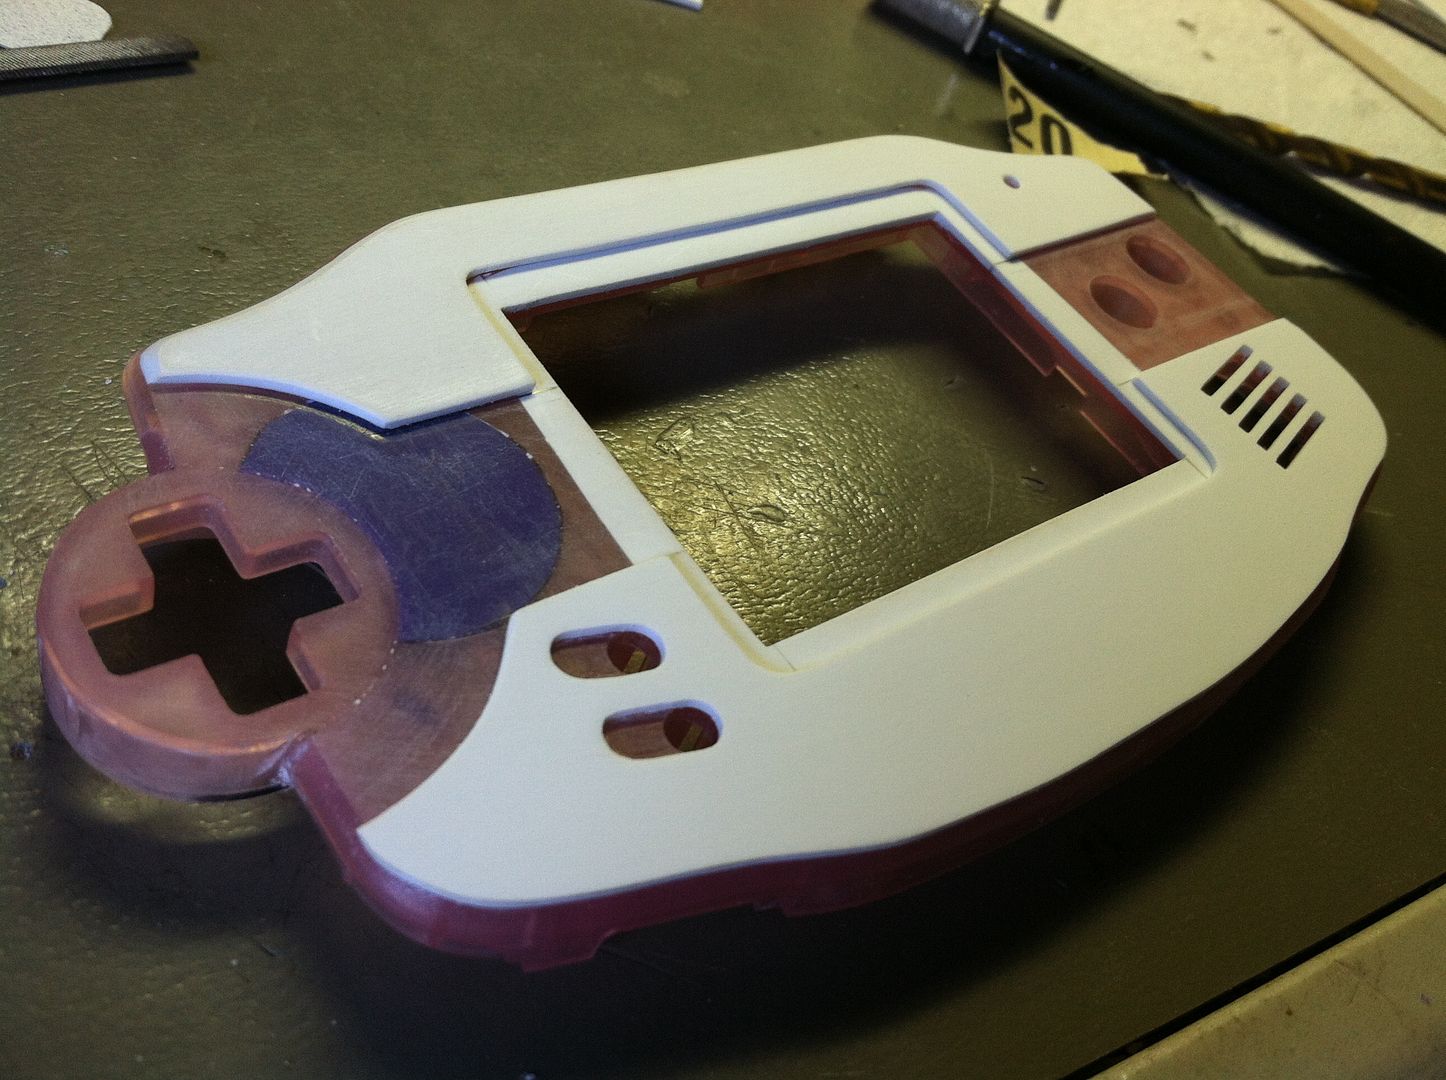
Now it's time to do the thing with the face of the D-pad housing.
Not sure how to explain it in words, but I thing the photos manage to make the process pretty clear.
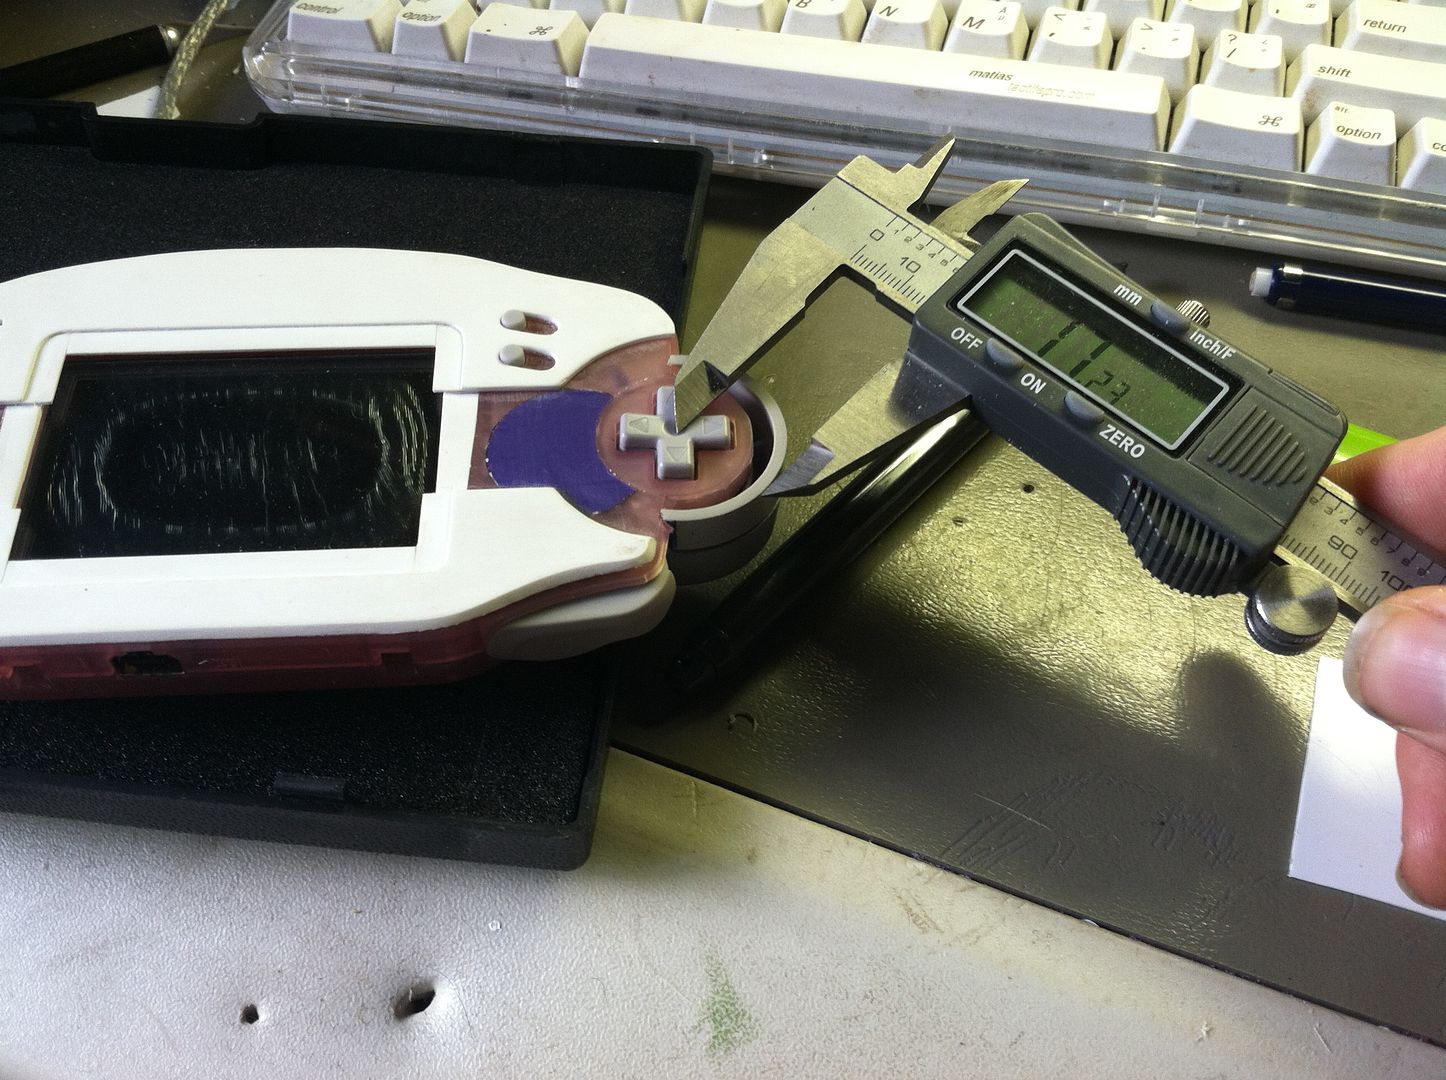
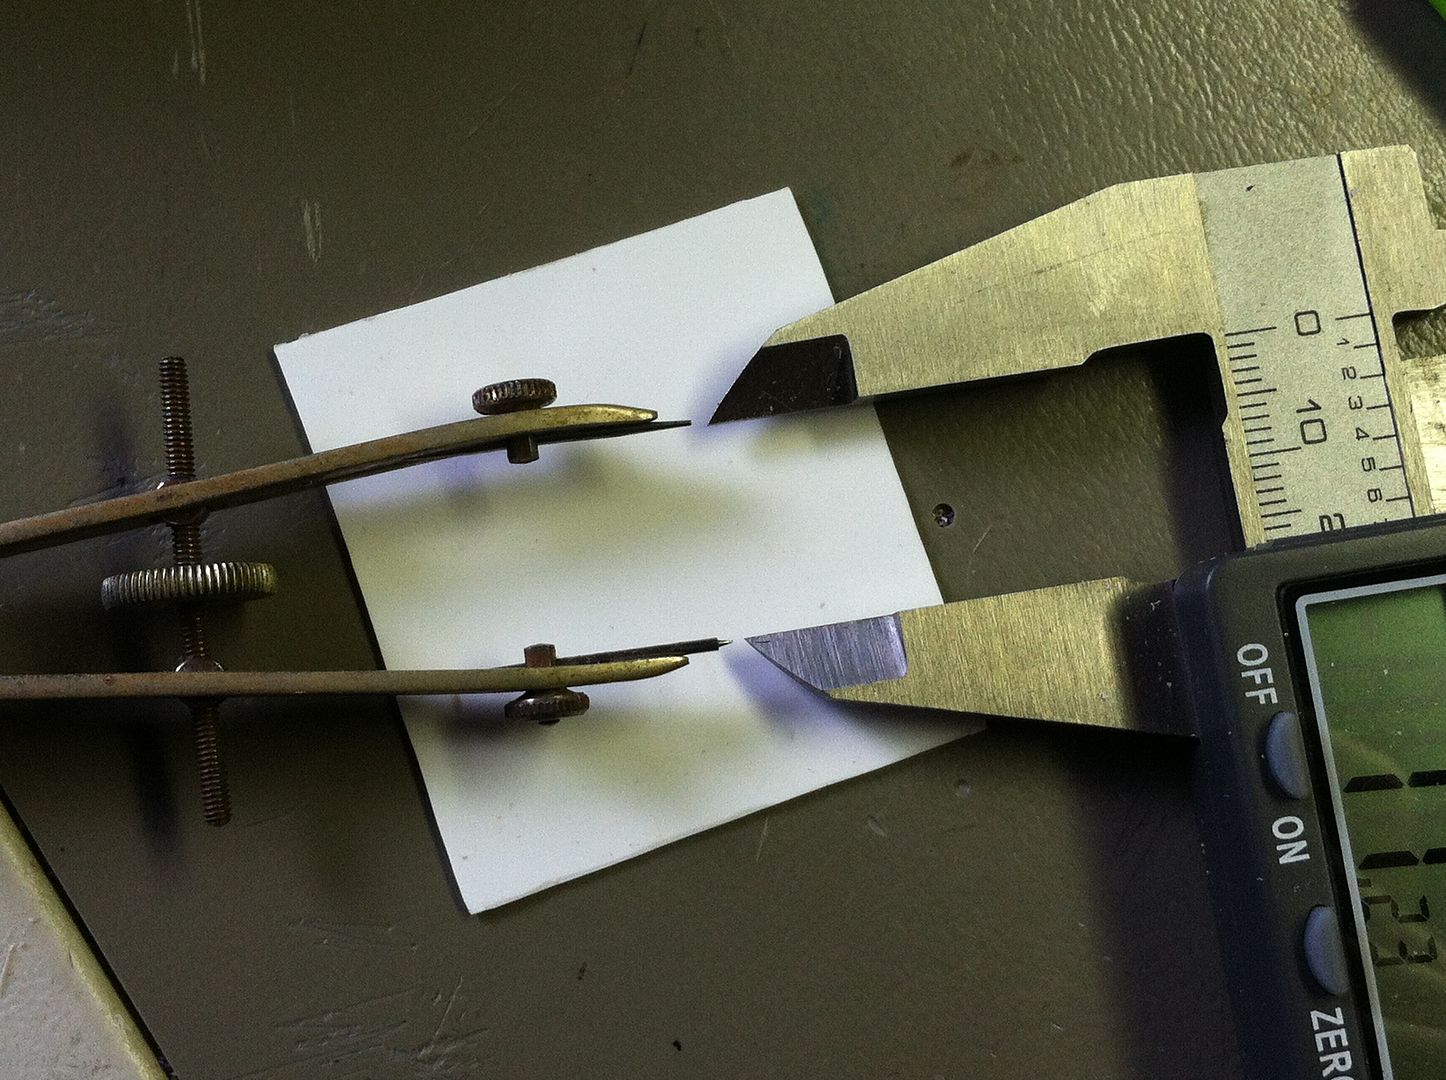
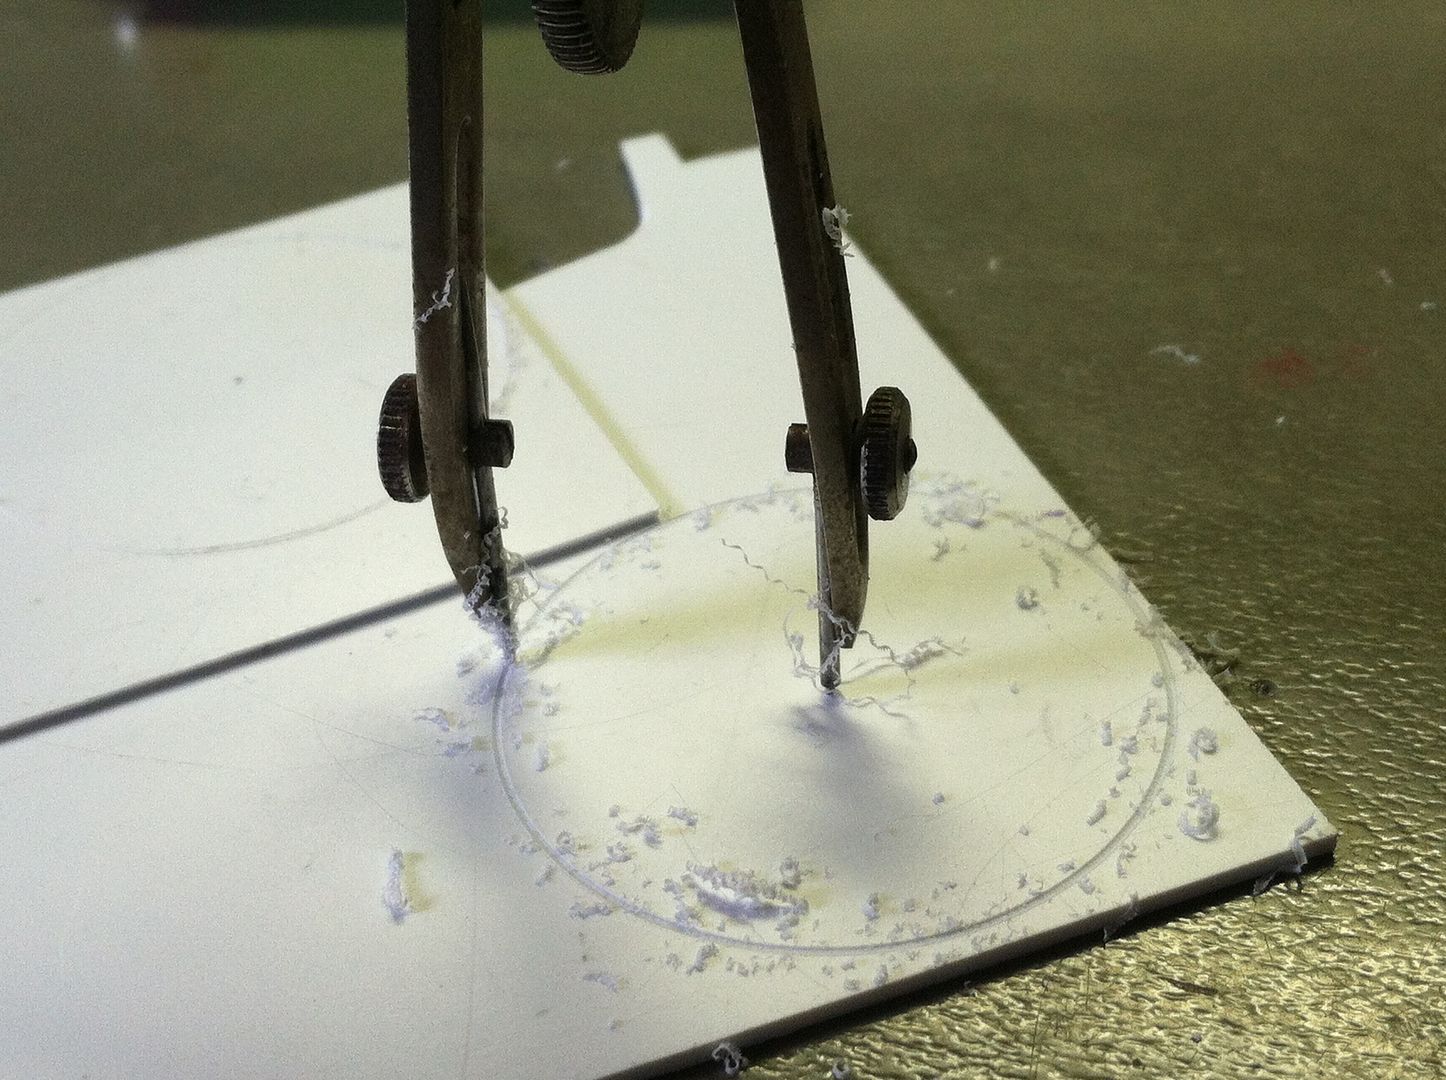
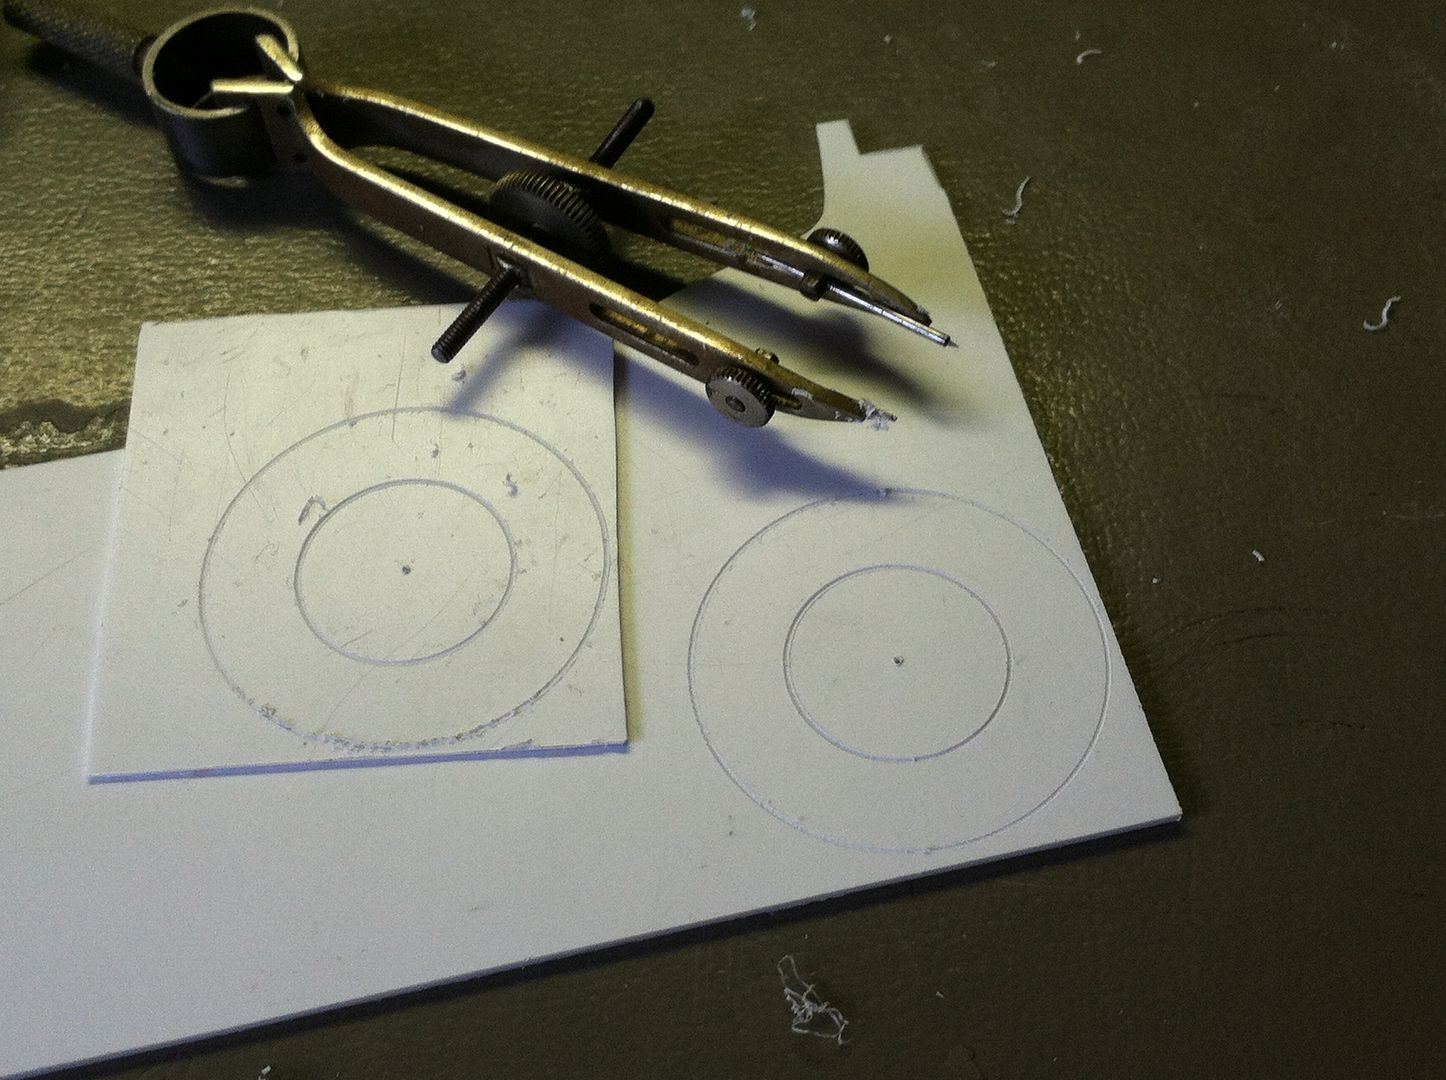
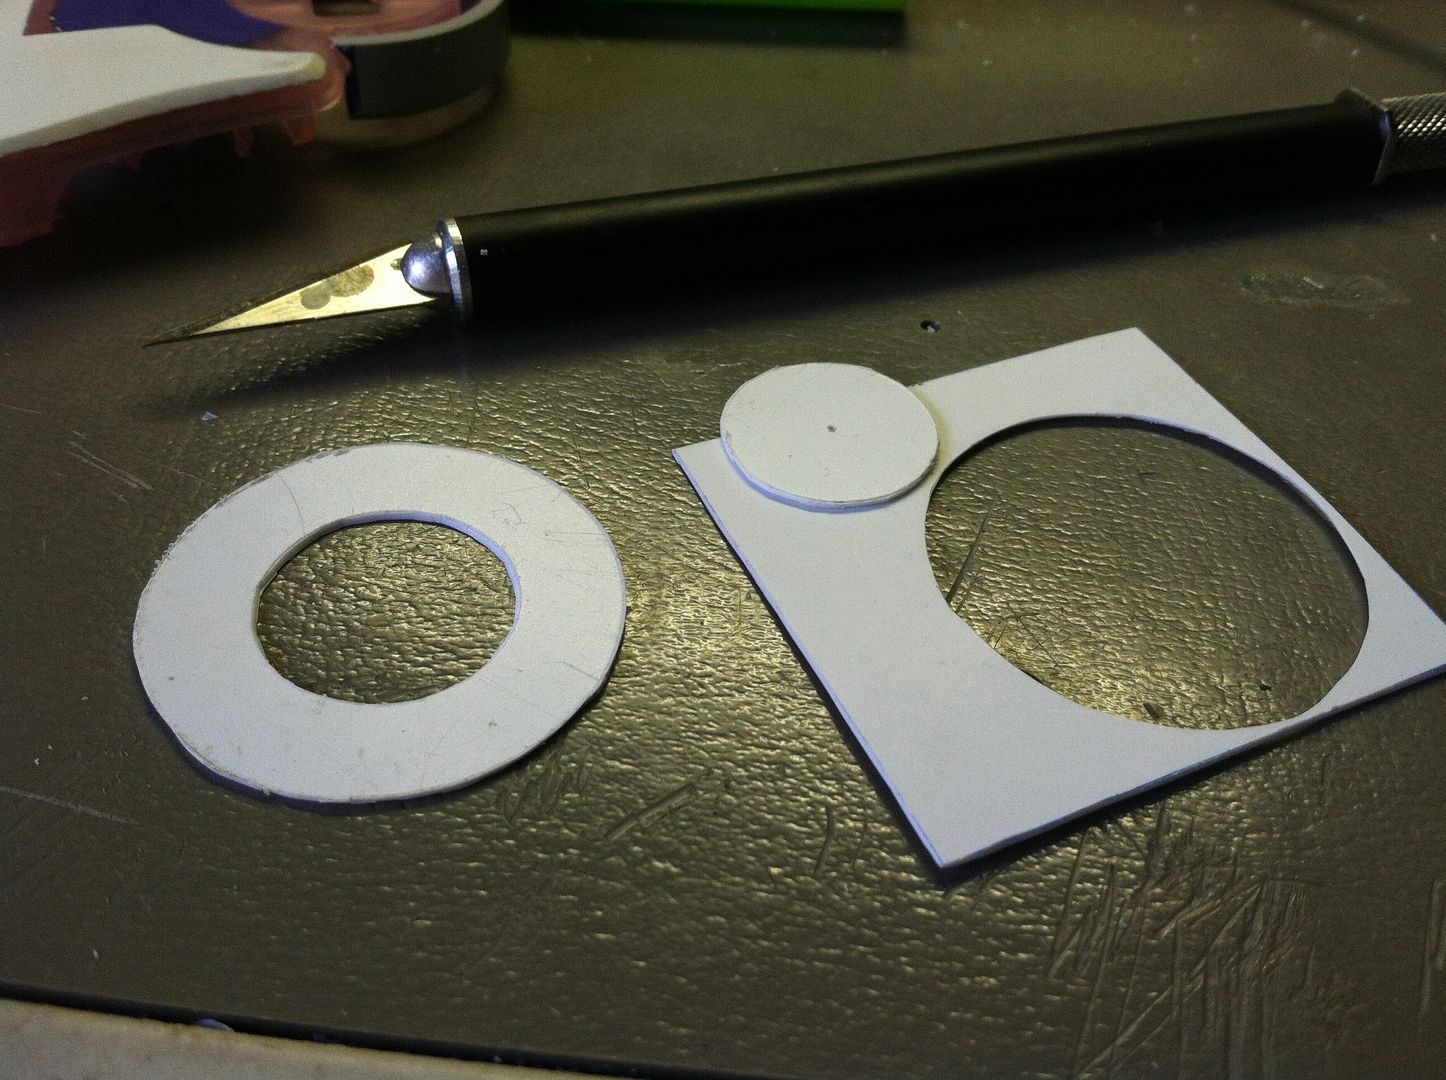
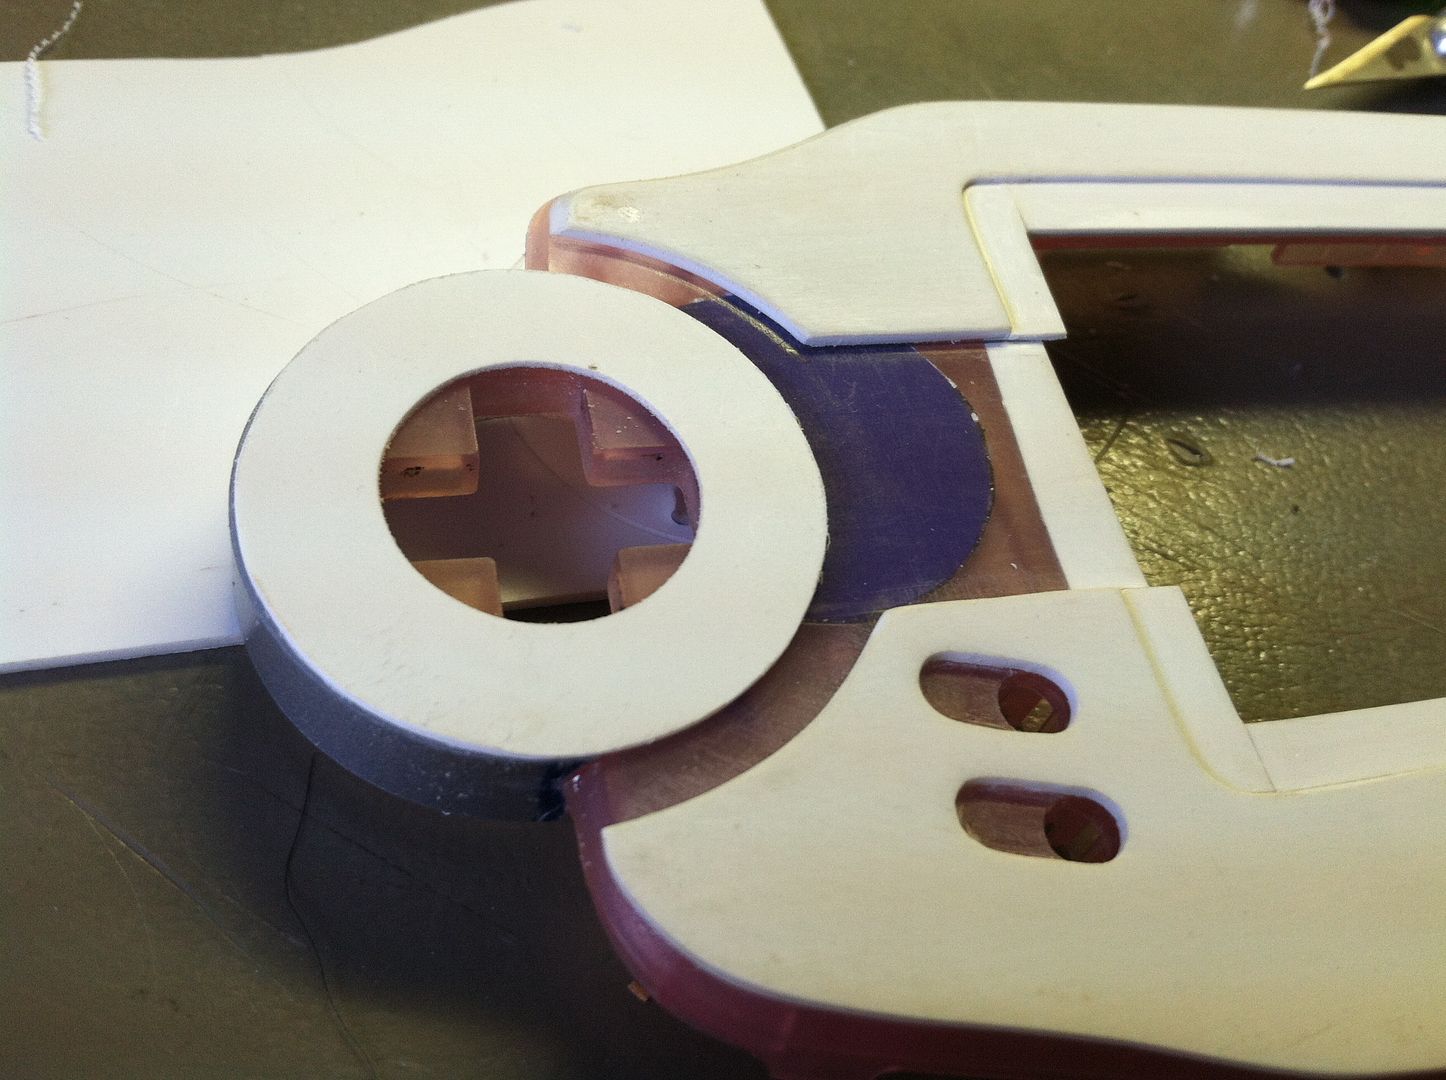
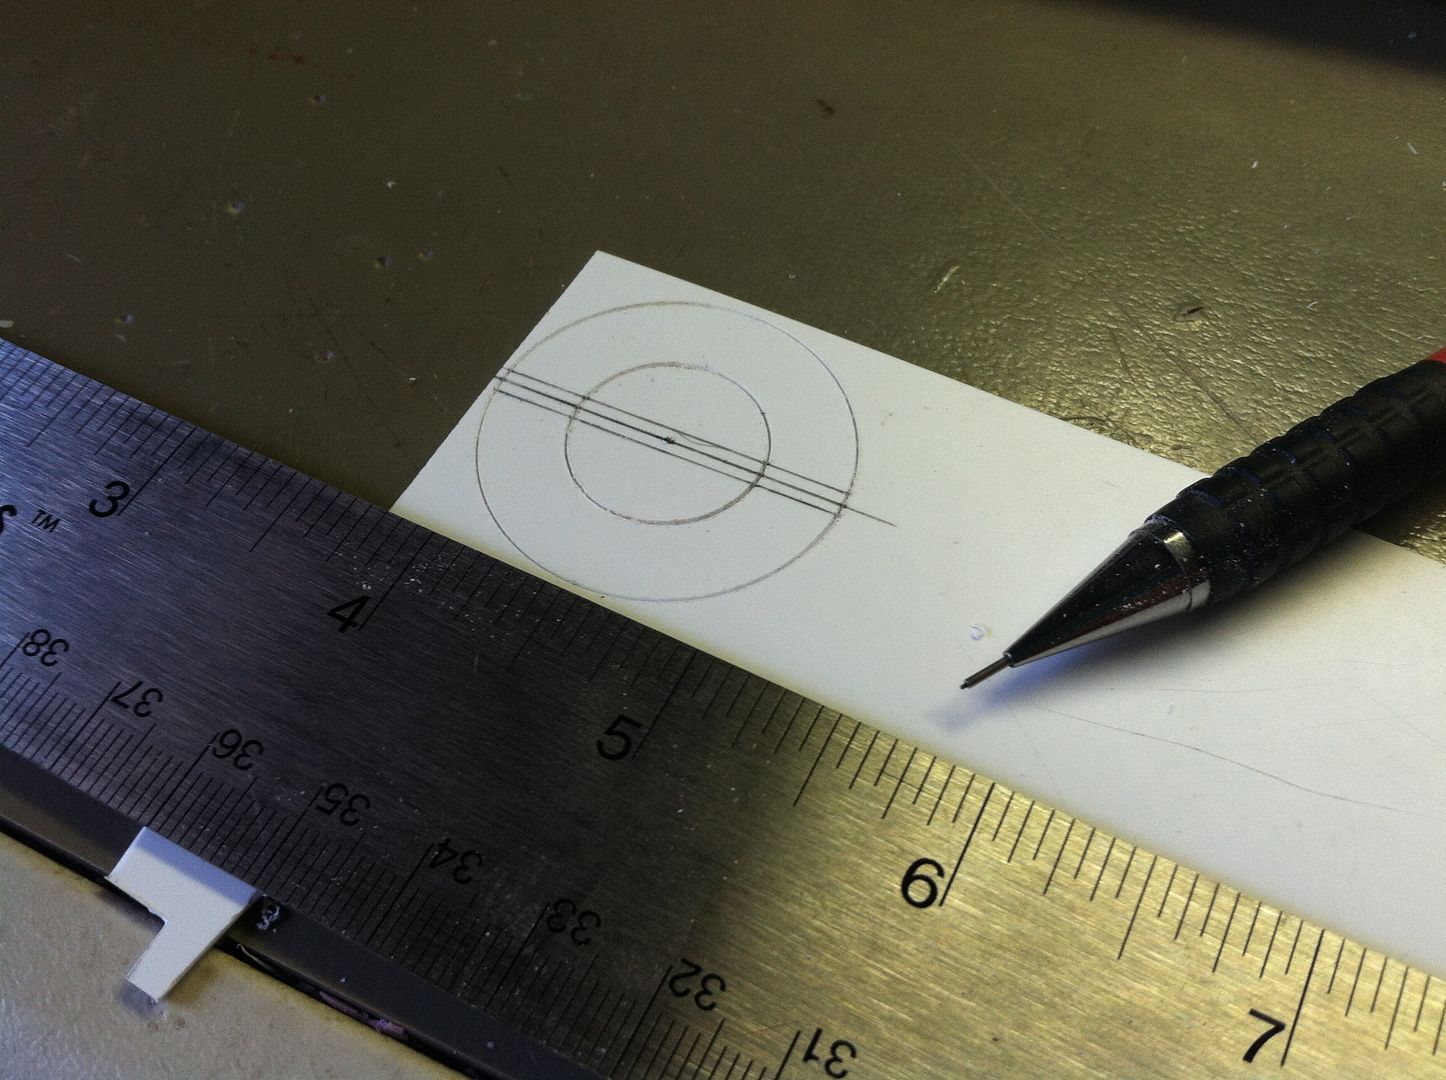
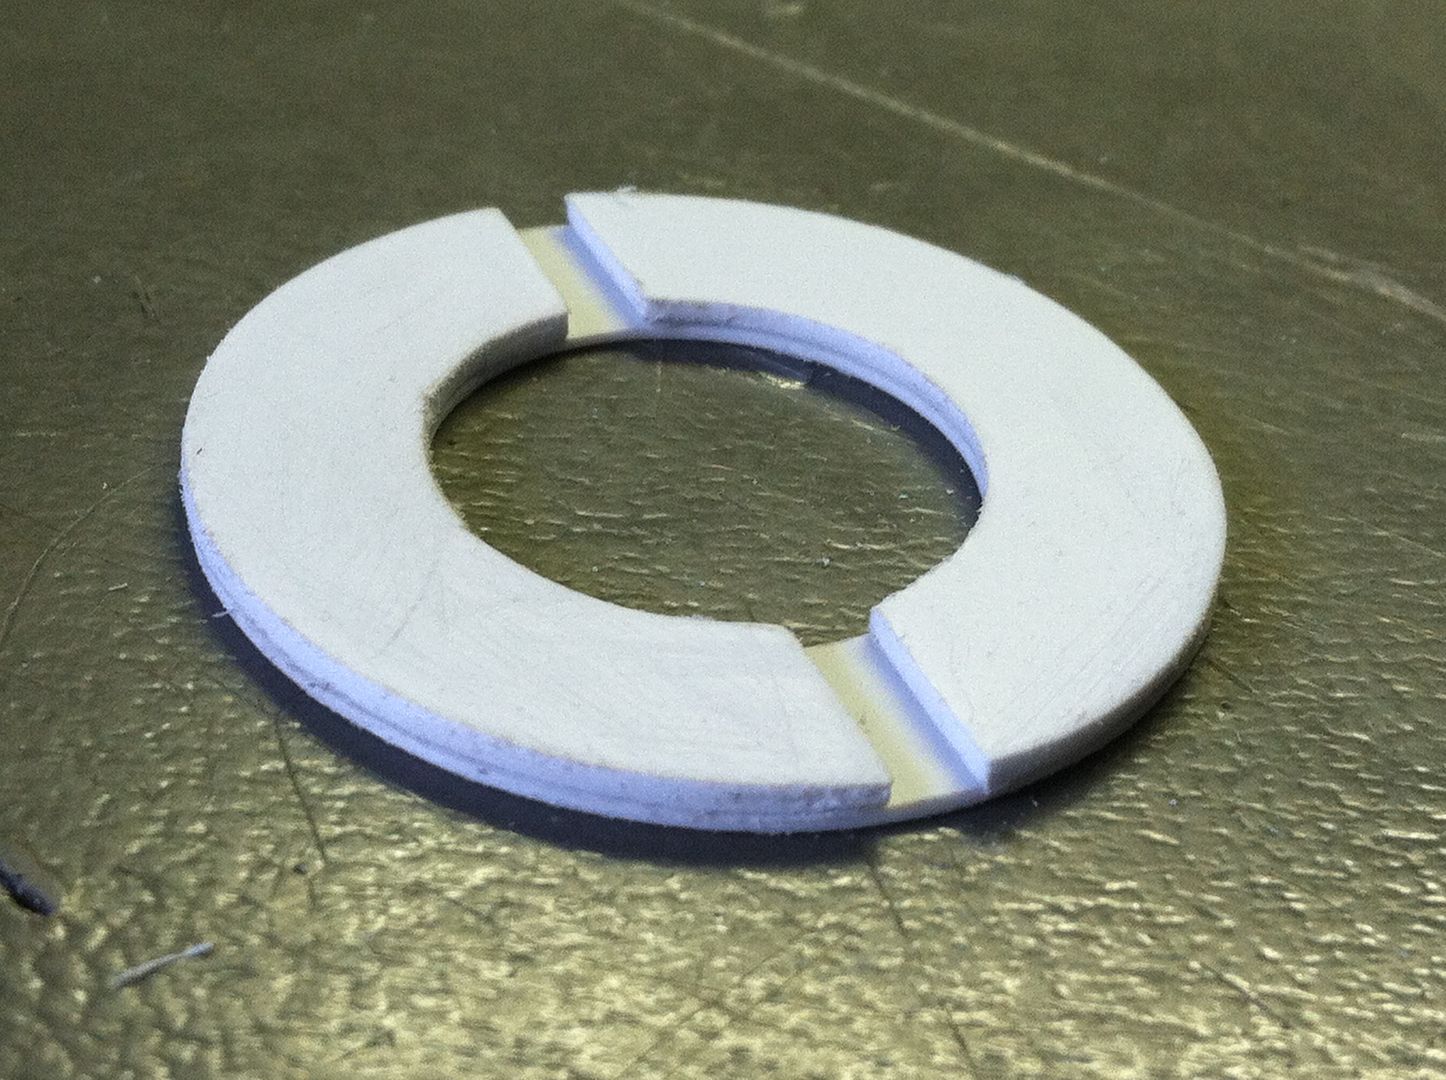
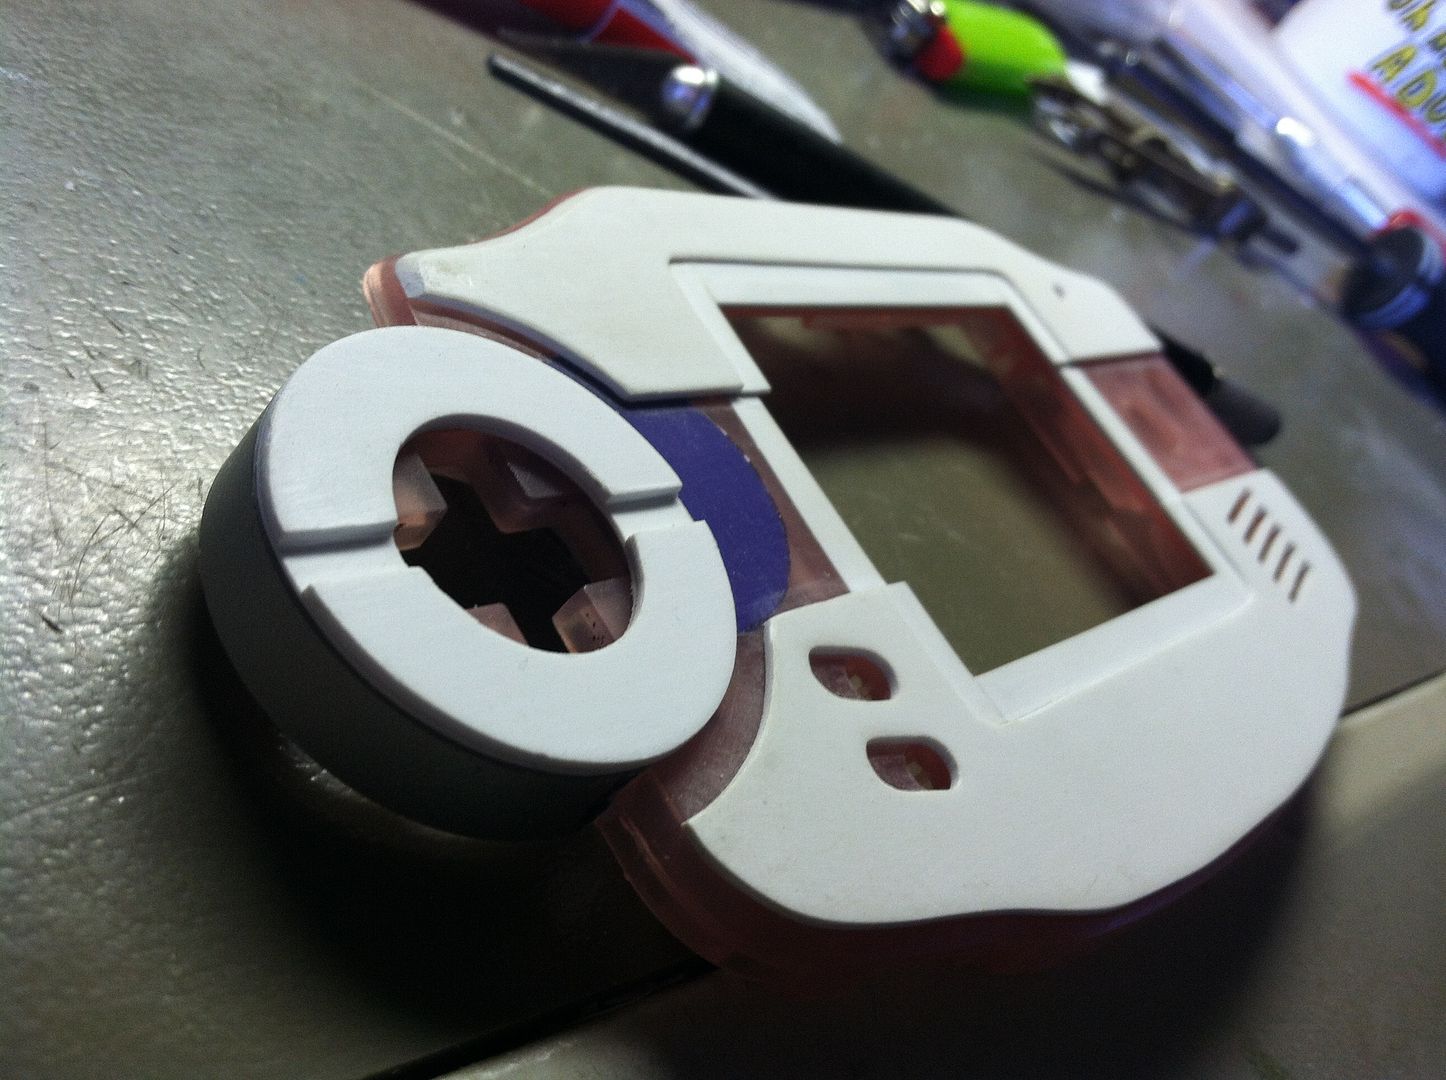
I'm not gonna lie; this was pretty fidgety, but I'm very pleased with the results.
chipmusic.org is an online community in respect and relation to chip music, art and its parallels.
You are not logged in. Please login or register.
ChipMusic.org / Forums / Posts by Teh D3th St4r
Now it's time to do the thing with the face of the D-pad housing.
Not sure how to explain it in words, but I thing the photos manage to make the process pretty clear.
I'm not gonna lie; this was pretty fidgety, but I'm very pleased with the results.
TylerBarnes wrote:Dang, looks like I have to recreate an account to dA again.
All your projects looks so awesome!
Flattery will get you everywhere.
No joke: I have overflowing inboxes all over the internet right now...
Why don't any of my paintings or comics get this kind of attention?

Although that saw might be superior than the dremel. I've just never used one like that before.
I've had bad luck with dremel tools and plastic.
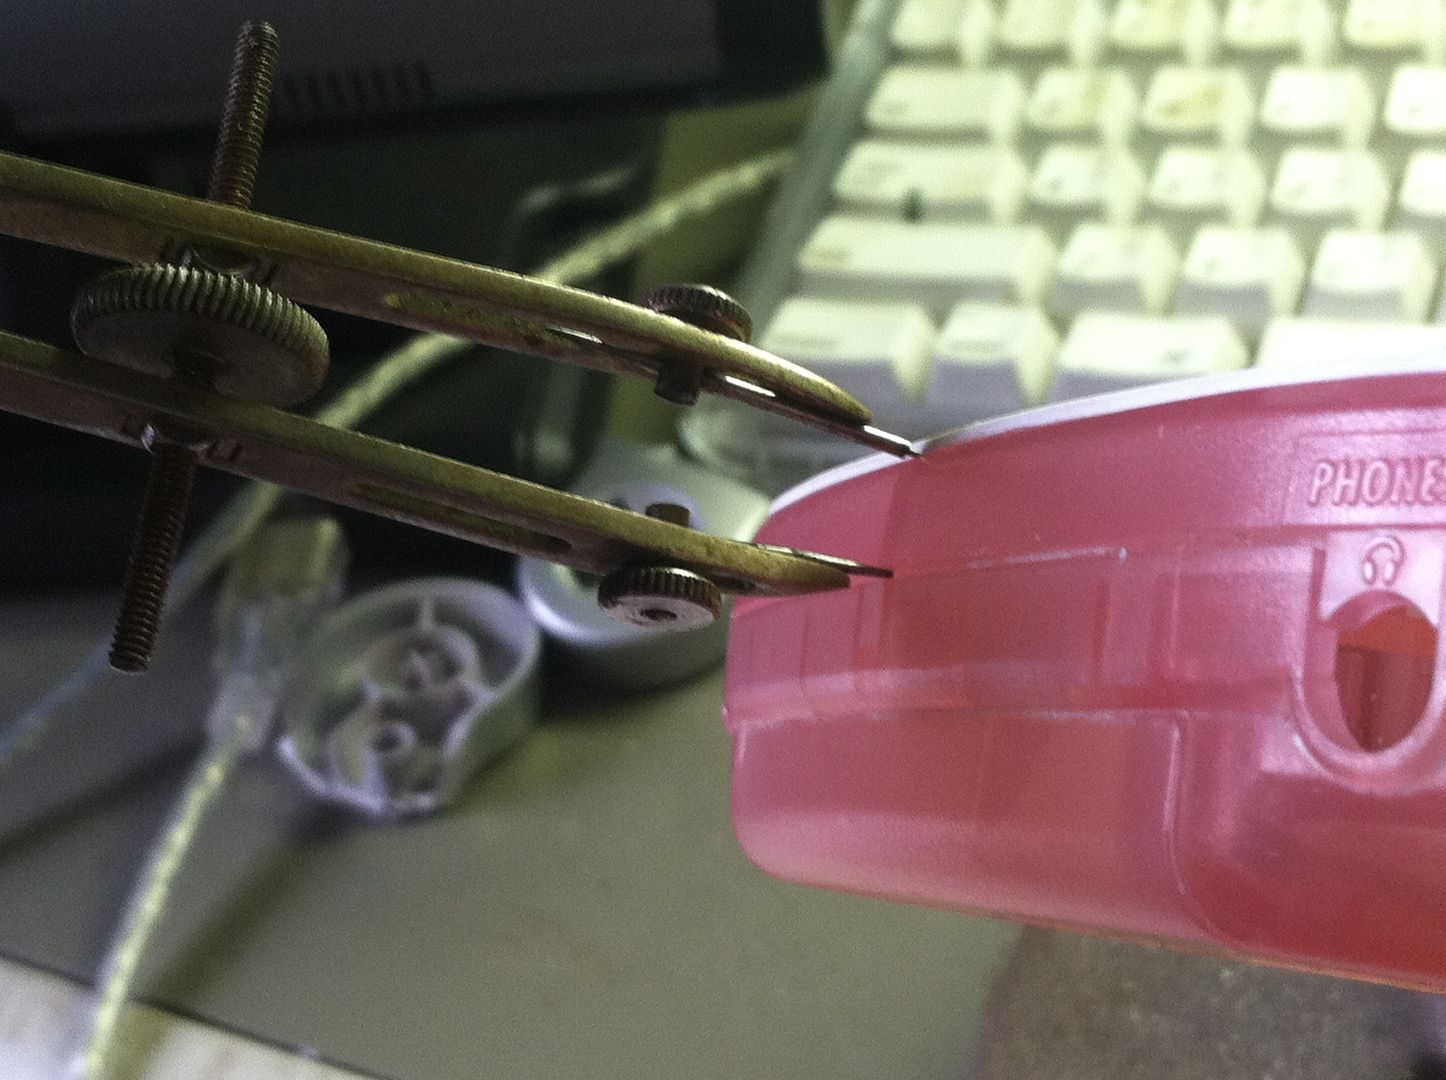
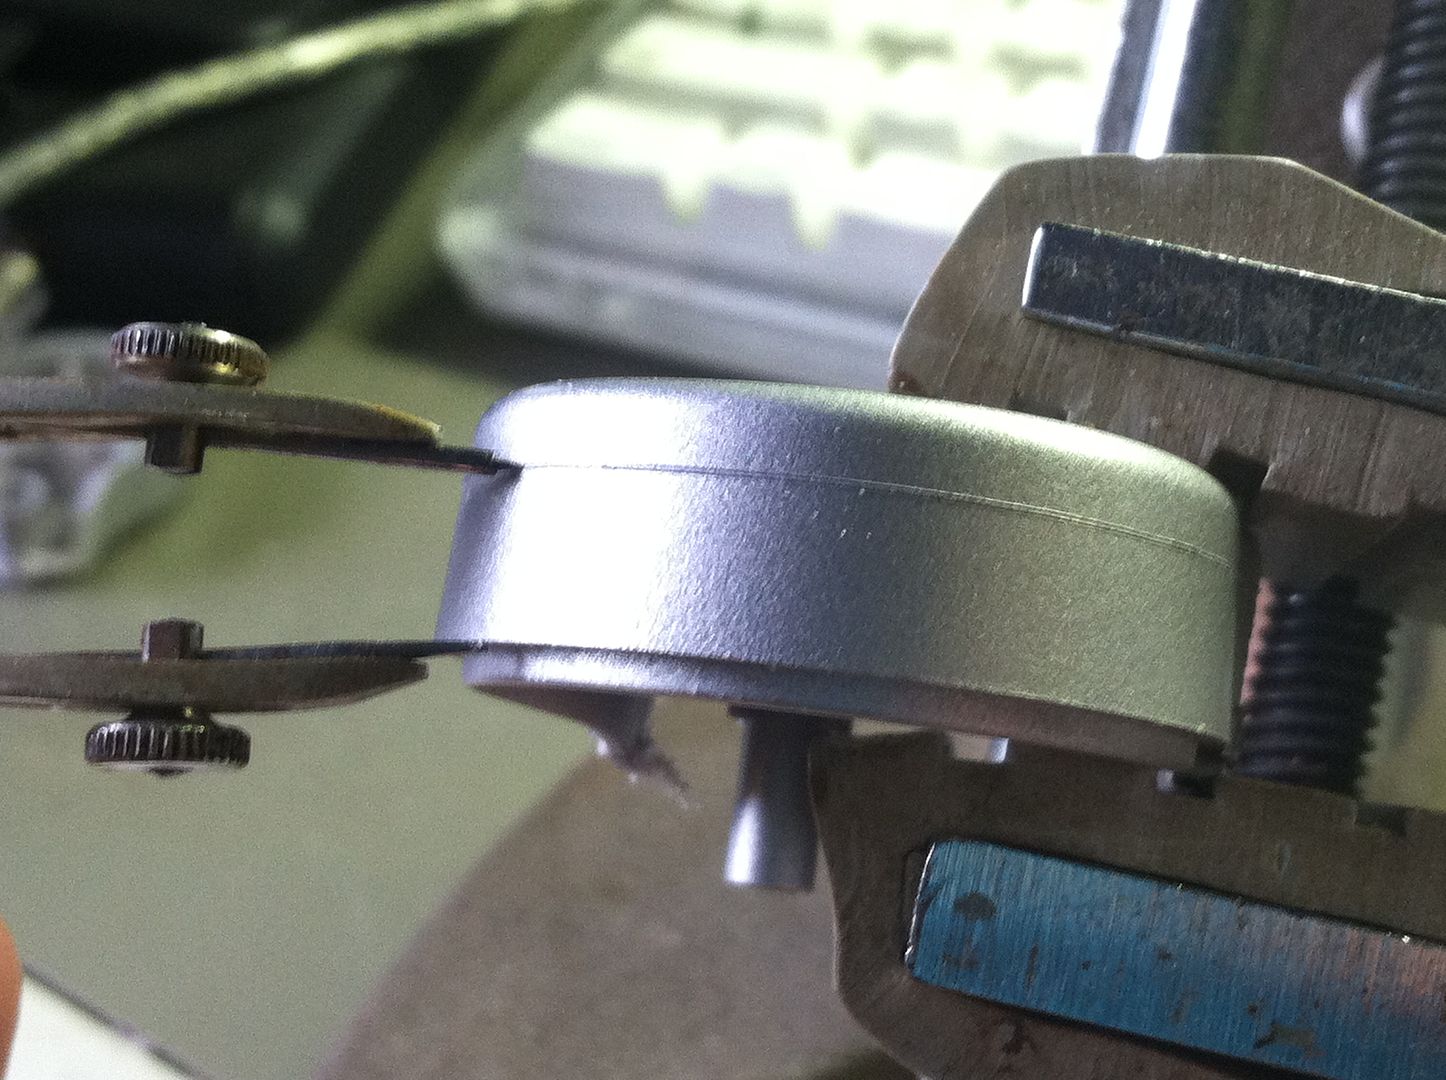
My saw is 0.38 millimeters thick.
What are you using to make all those fine plastic cuts? Looks great!
These are my tools for all of my delicate plastic work:
Luthier miter saw
X-acto knife #11
5mm jewelers file
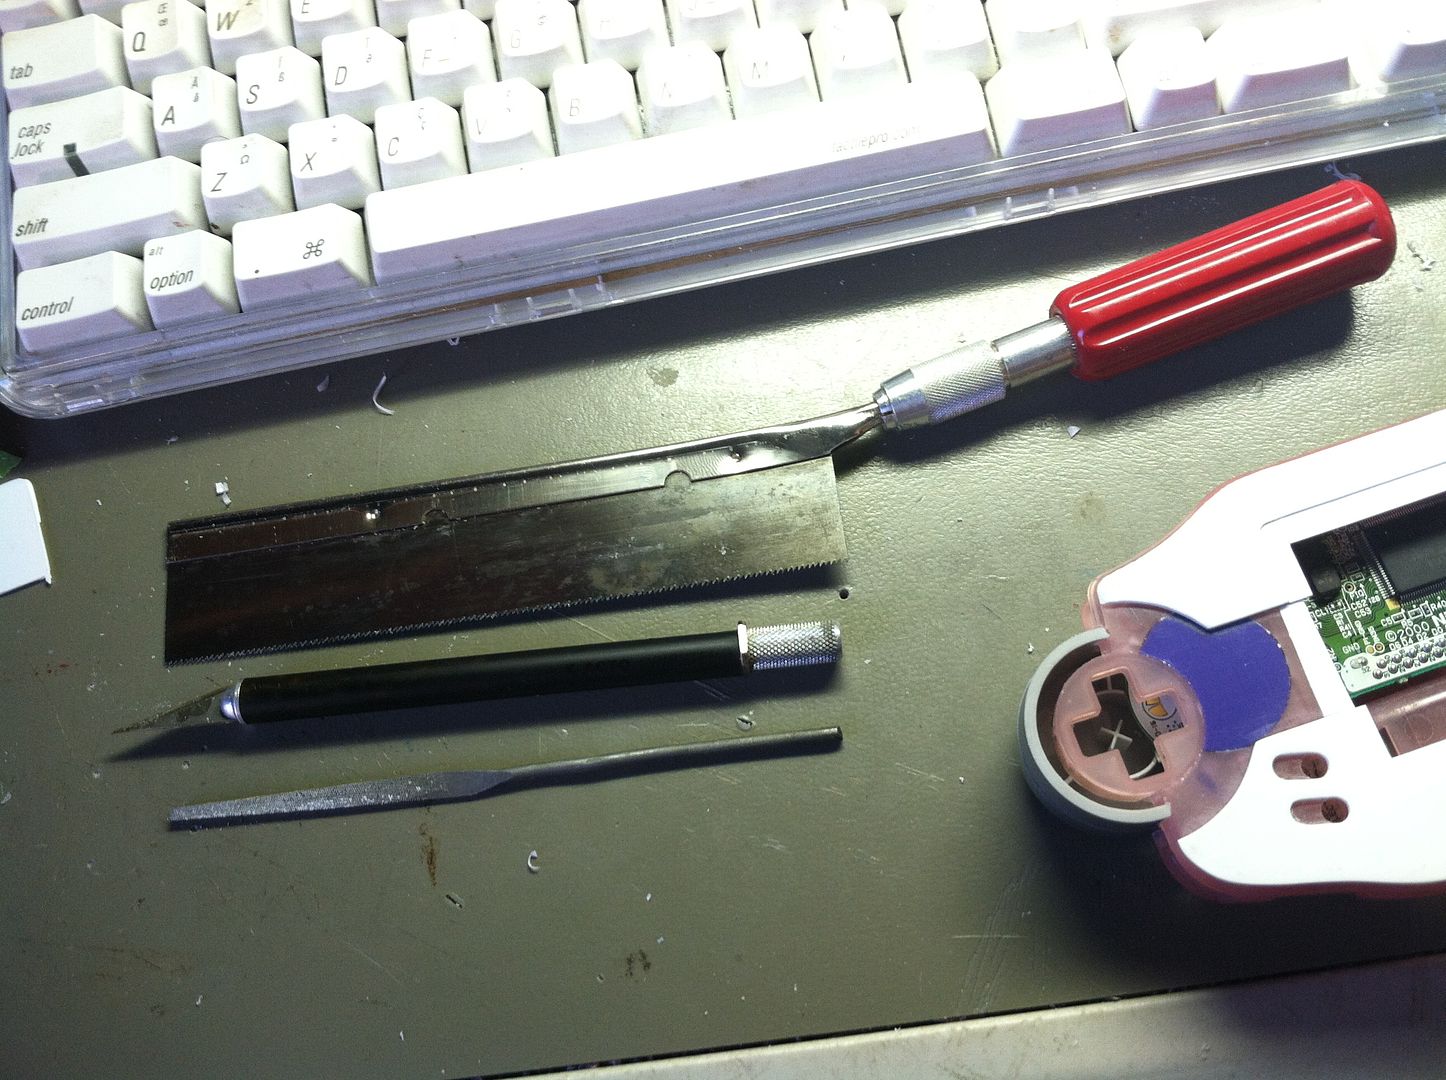
I also have a vast amount of patience and a steady hand from decades of model building.
EDIT: also various light grits of sand paper.
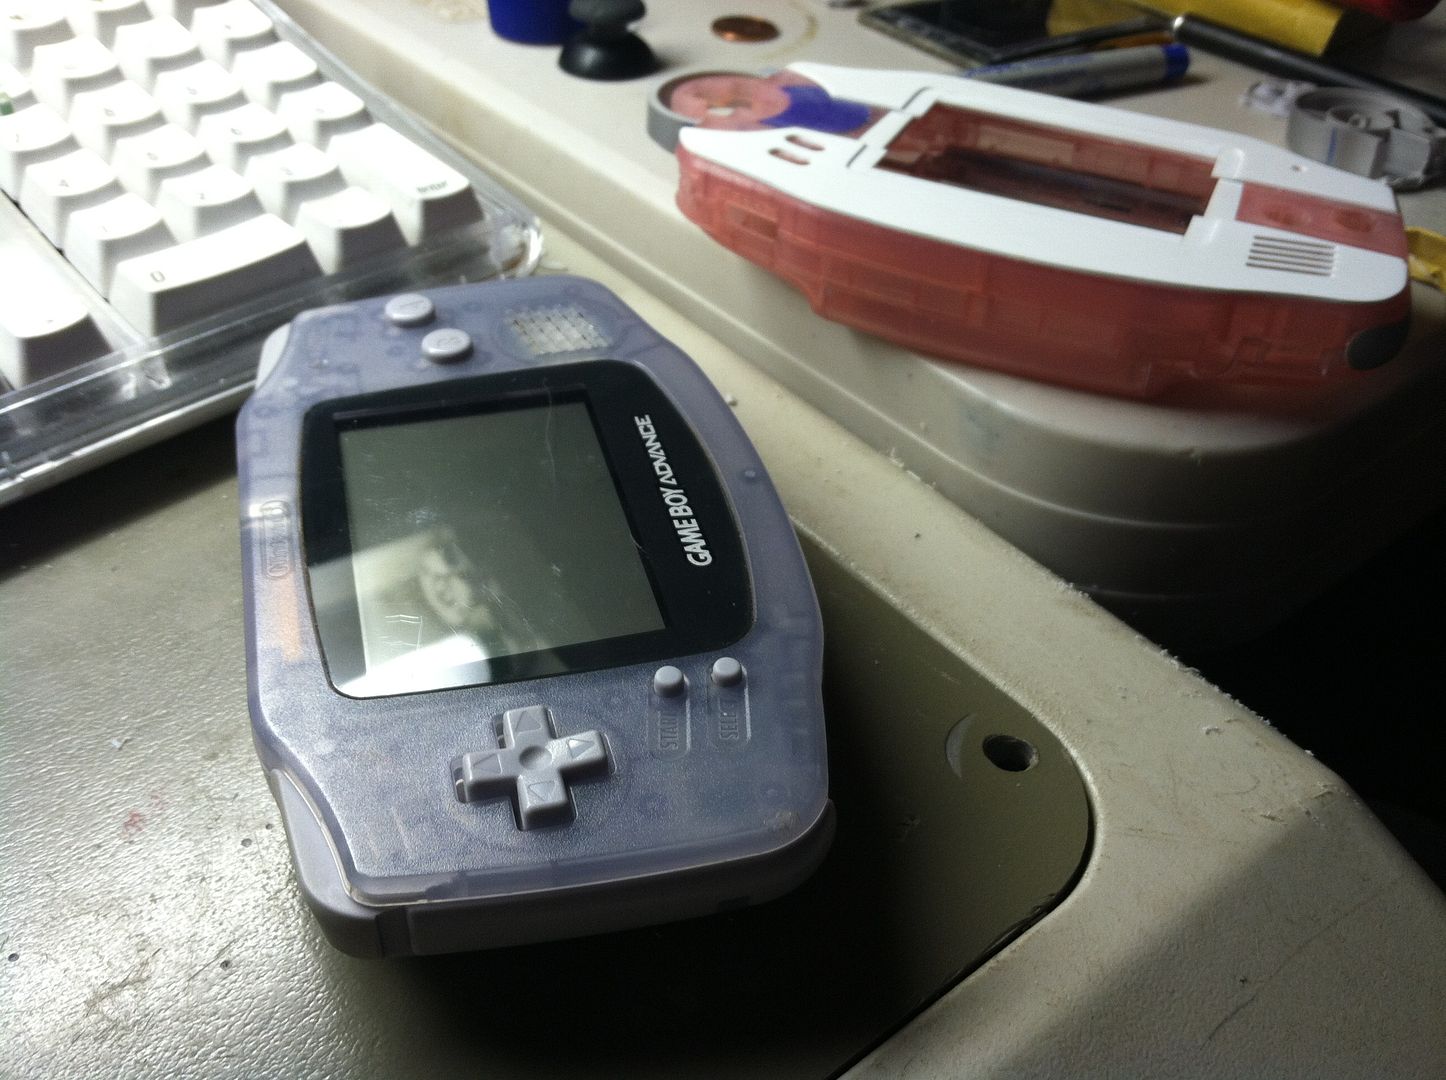
Went and picked up another GBA off CL.
But we don't need that just yet.
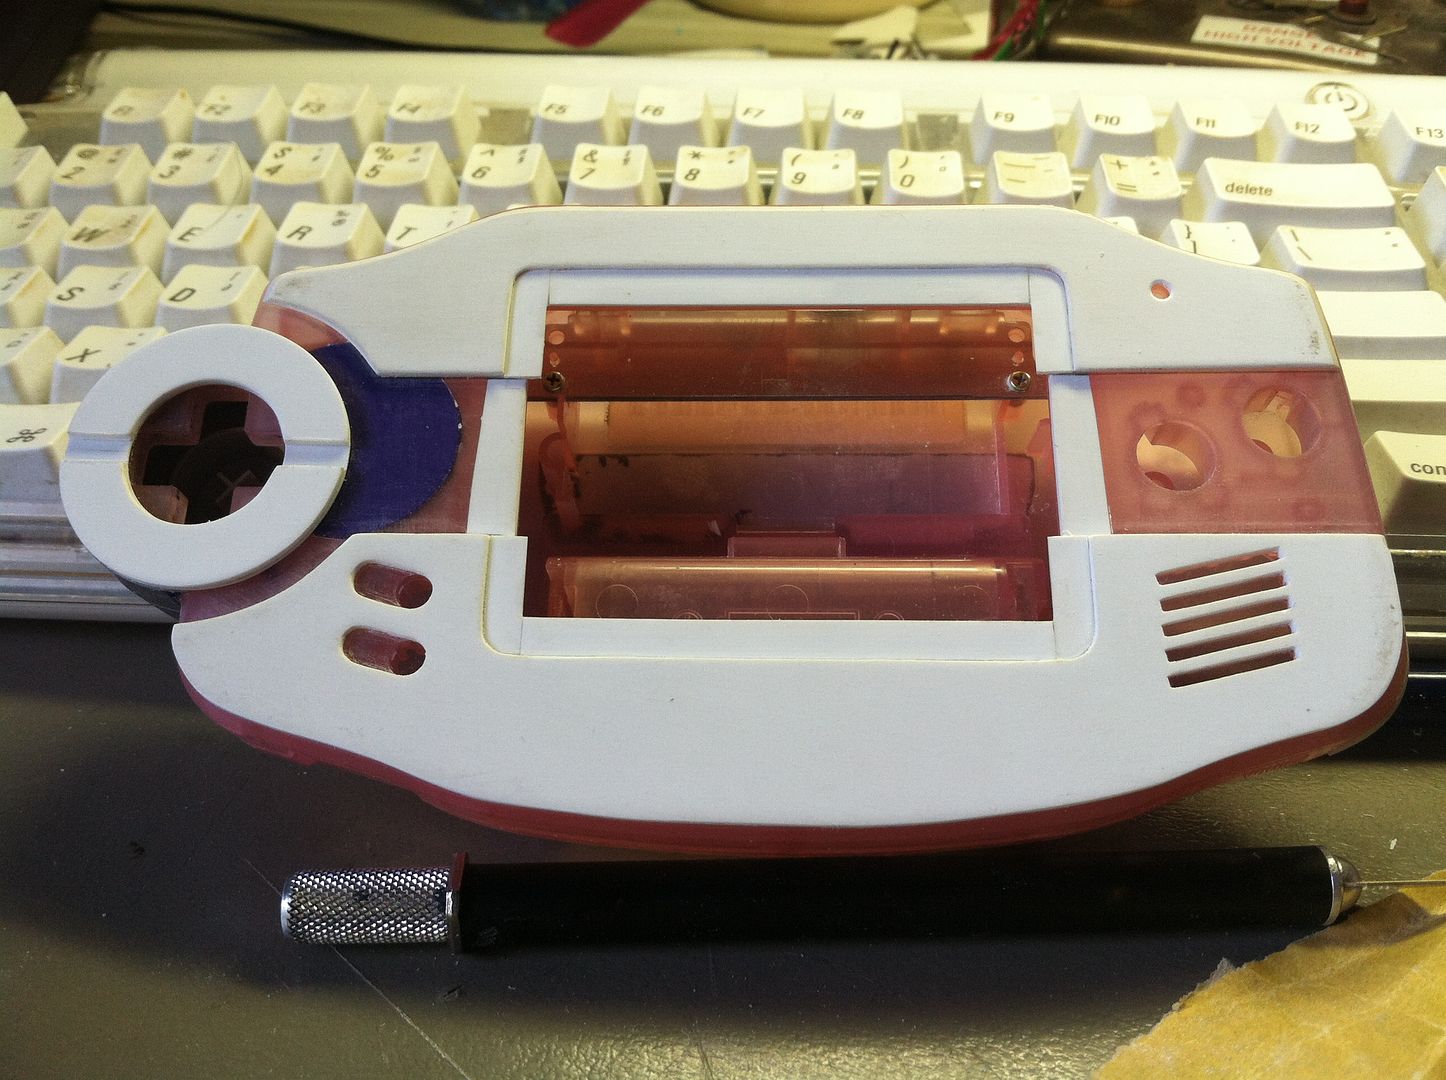
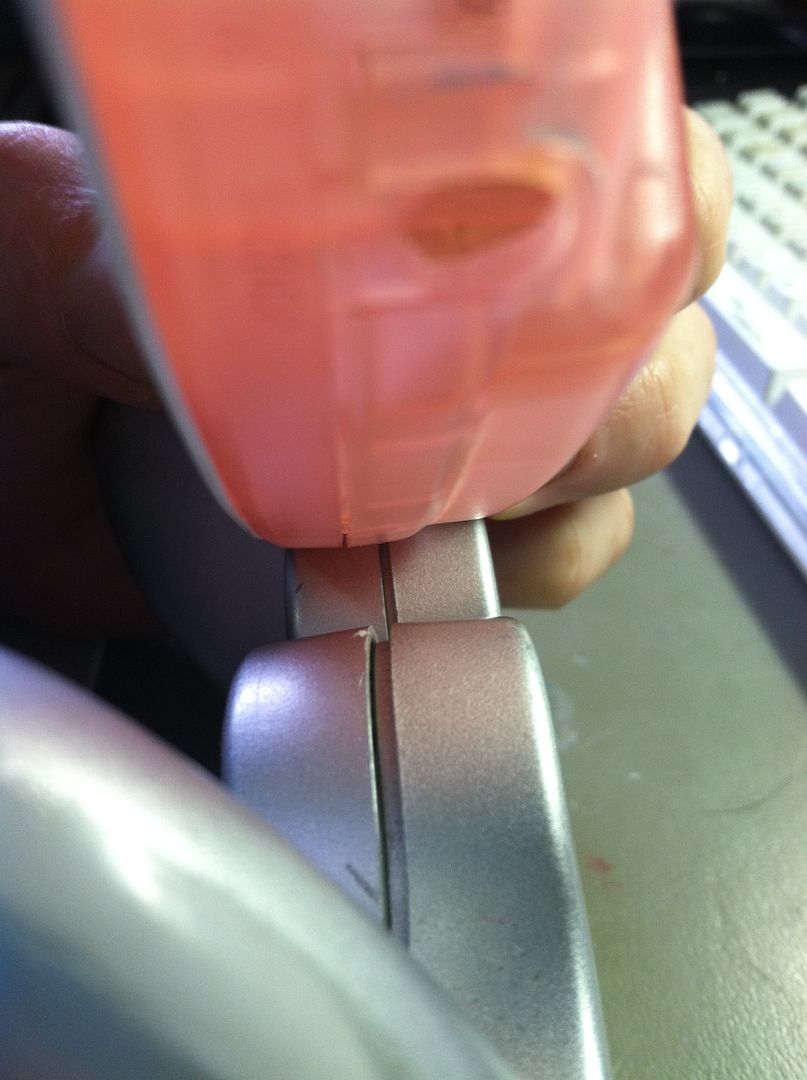
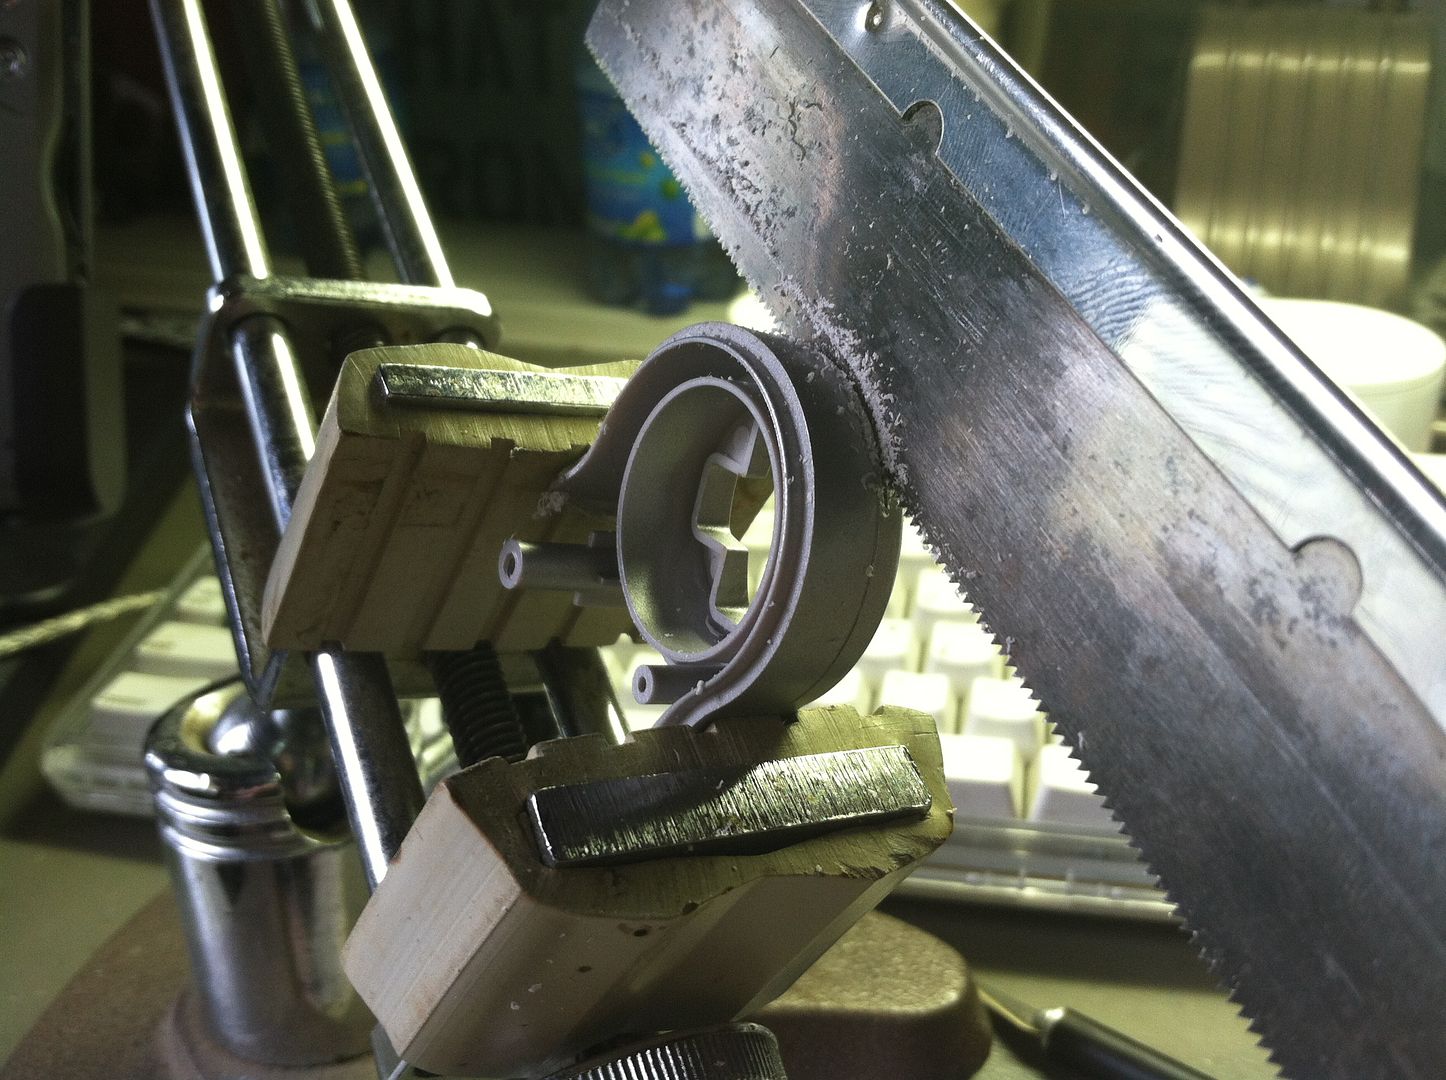
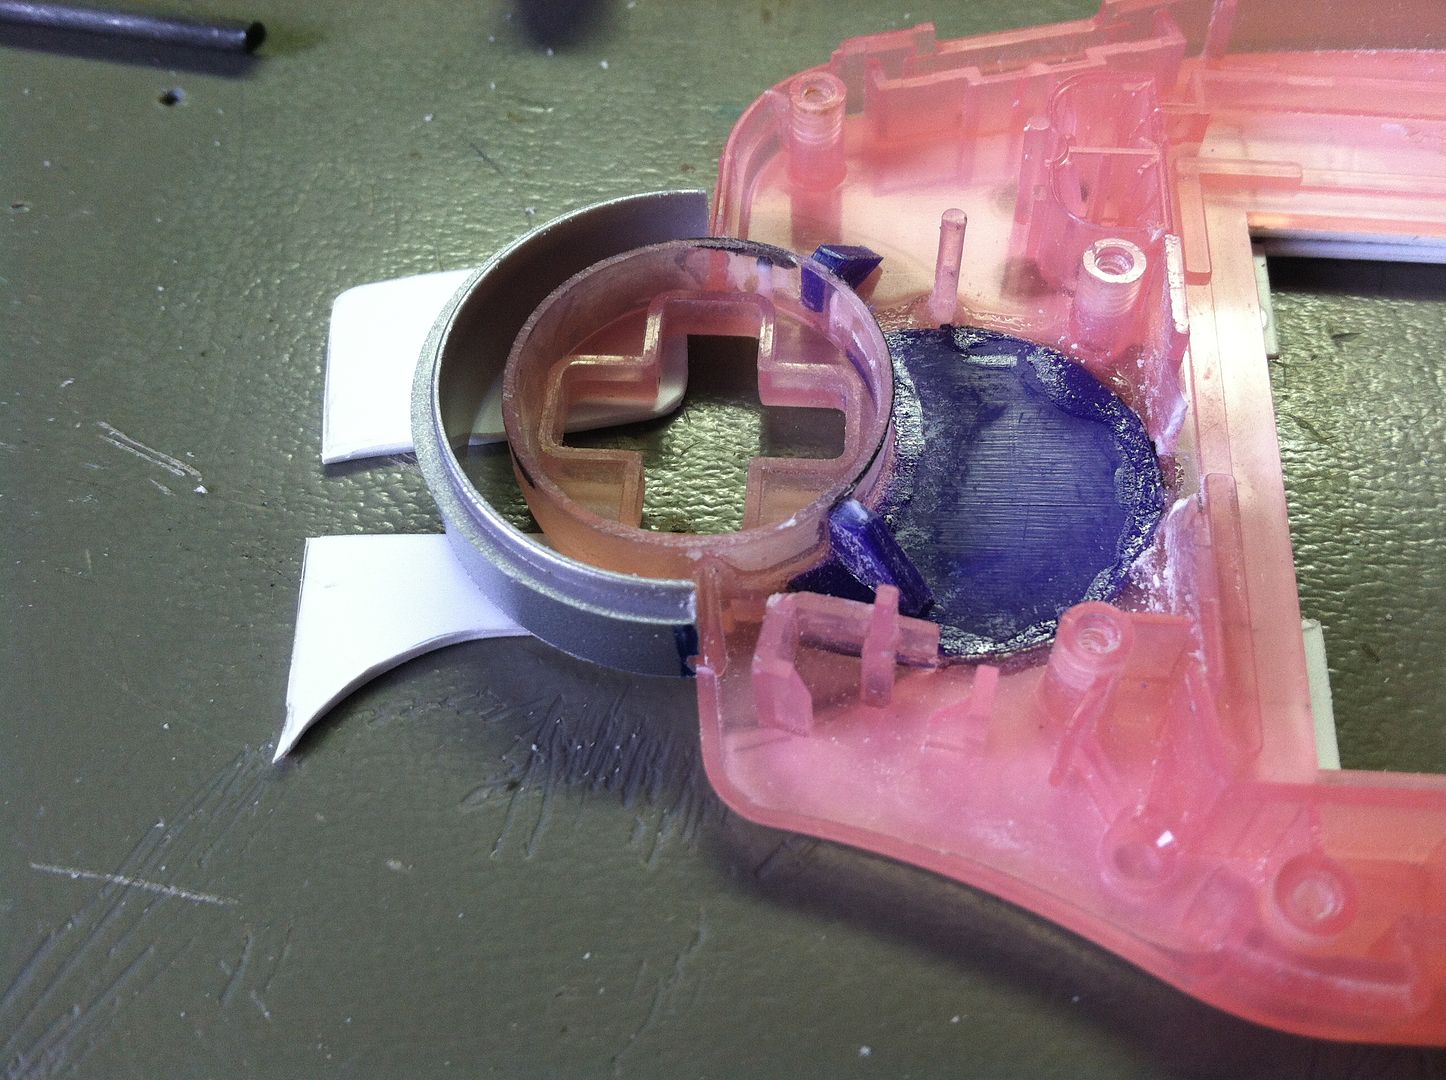
Time to fit the rear half of the D-pad housing.
Observe.
This was actually a little fidgety to cut out.
Now I need to do some shimming, sanding, and figuring out how to mount everything in there and get it to look right.
Are you going to make bottom shoulder buttons to duplicate select and start buttons?
Nope, that would involve an entirely new level of complication that I don't want to have to deal with on this build.
Then there was that one time when that I didn't plan my order of operations, and I suddenly had to build the part that should have been done first.

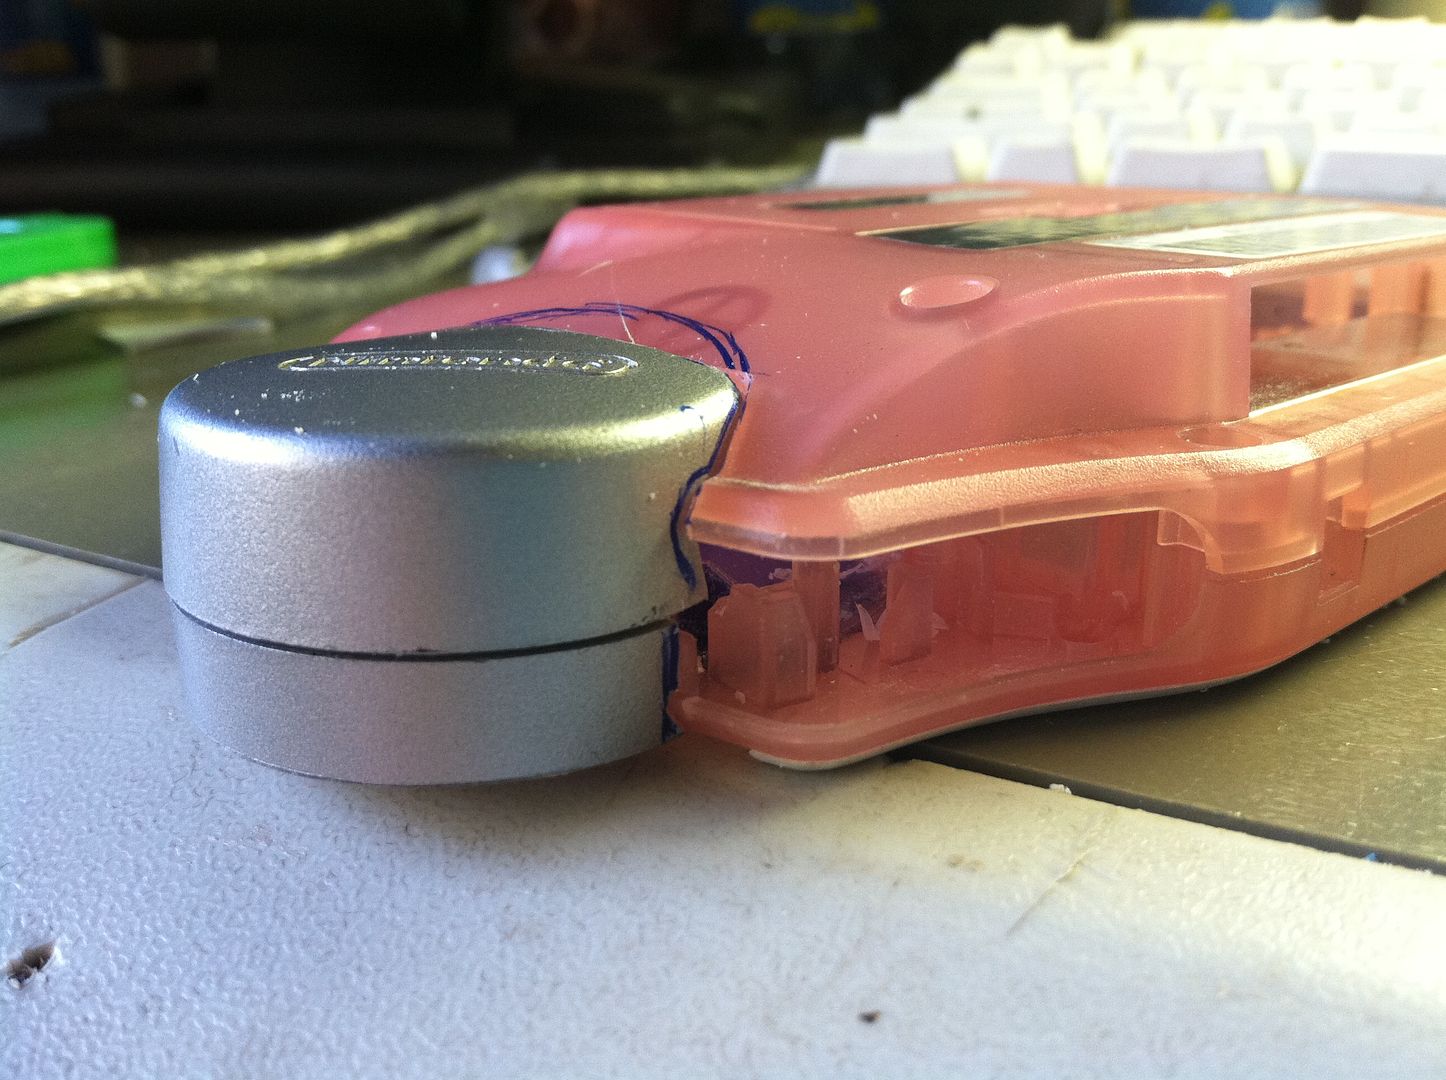
I need housing for the D-pad/Lens/Whatever.
This broken Gamecube controller looks like it will work nicely.
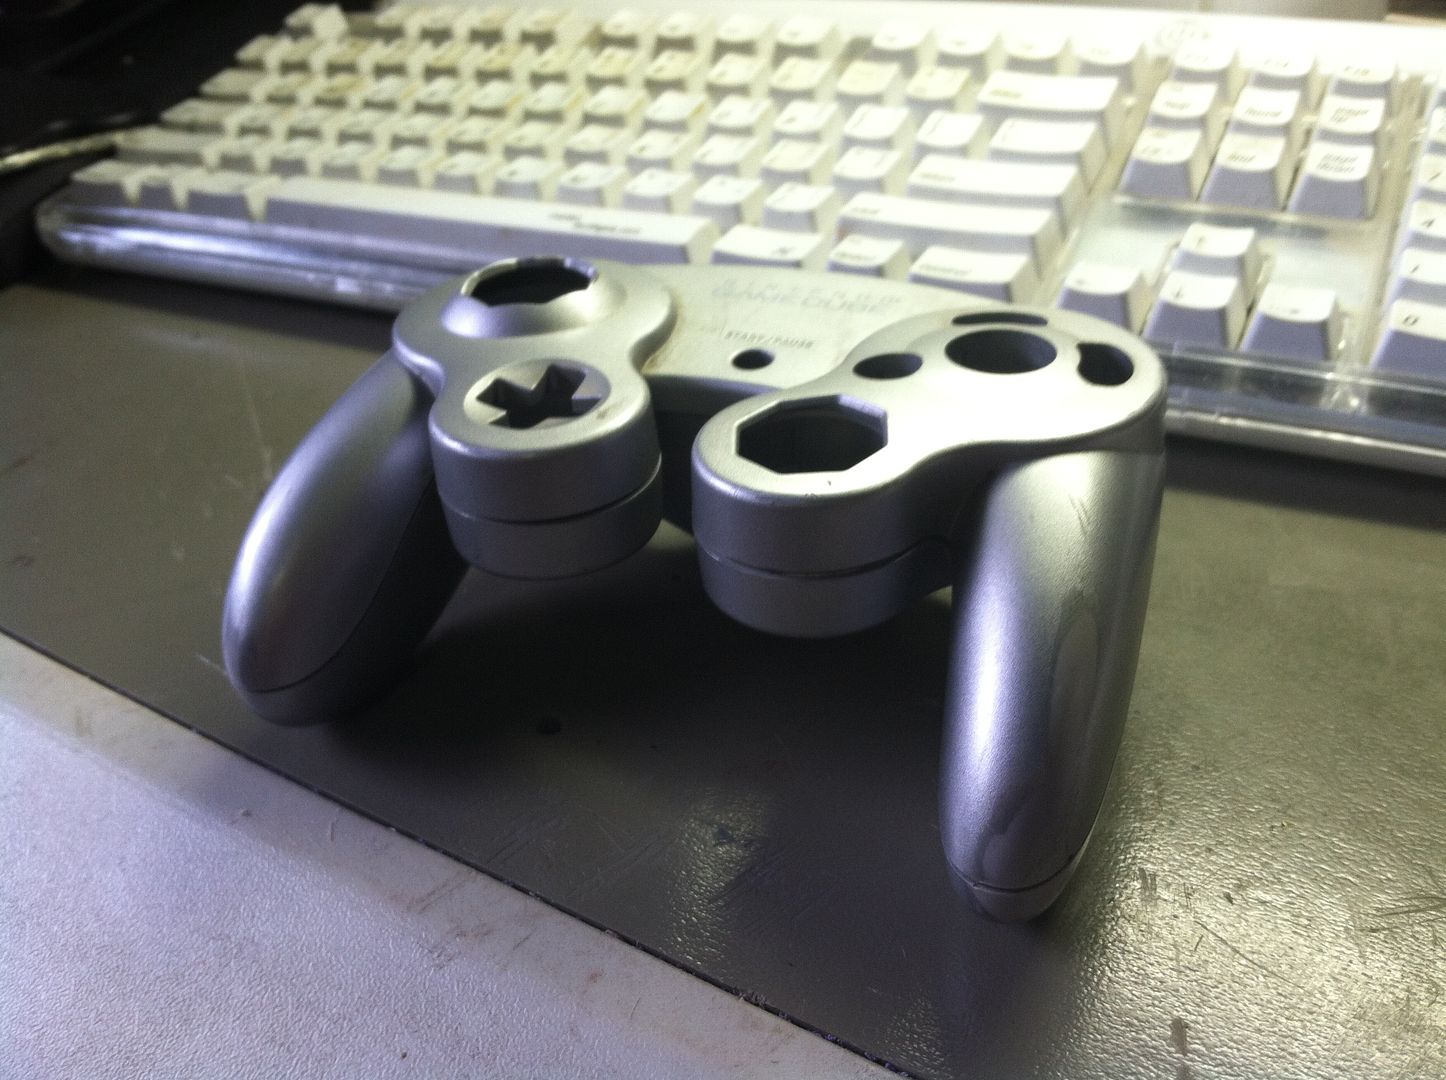
Thickness is pretty much perfect.
Time to hack away at it with reckless abandon (like I always do)
The top half needs to be the correct depth so I can have both halves close back together as if it were a manufactured product.
Amateur videogame surgery is one of my favorite games to play.
And now I have to go out and pick up another GBA I found on CL for $10... I need working internals and another set of shoulder buttons to go on the bottom.
I'll be back later.
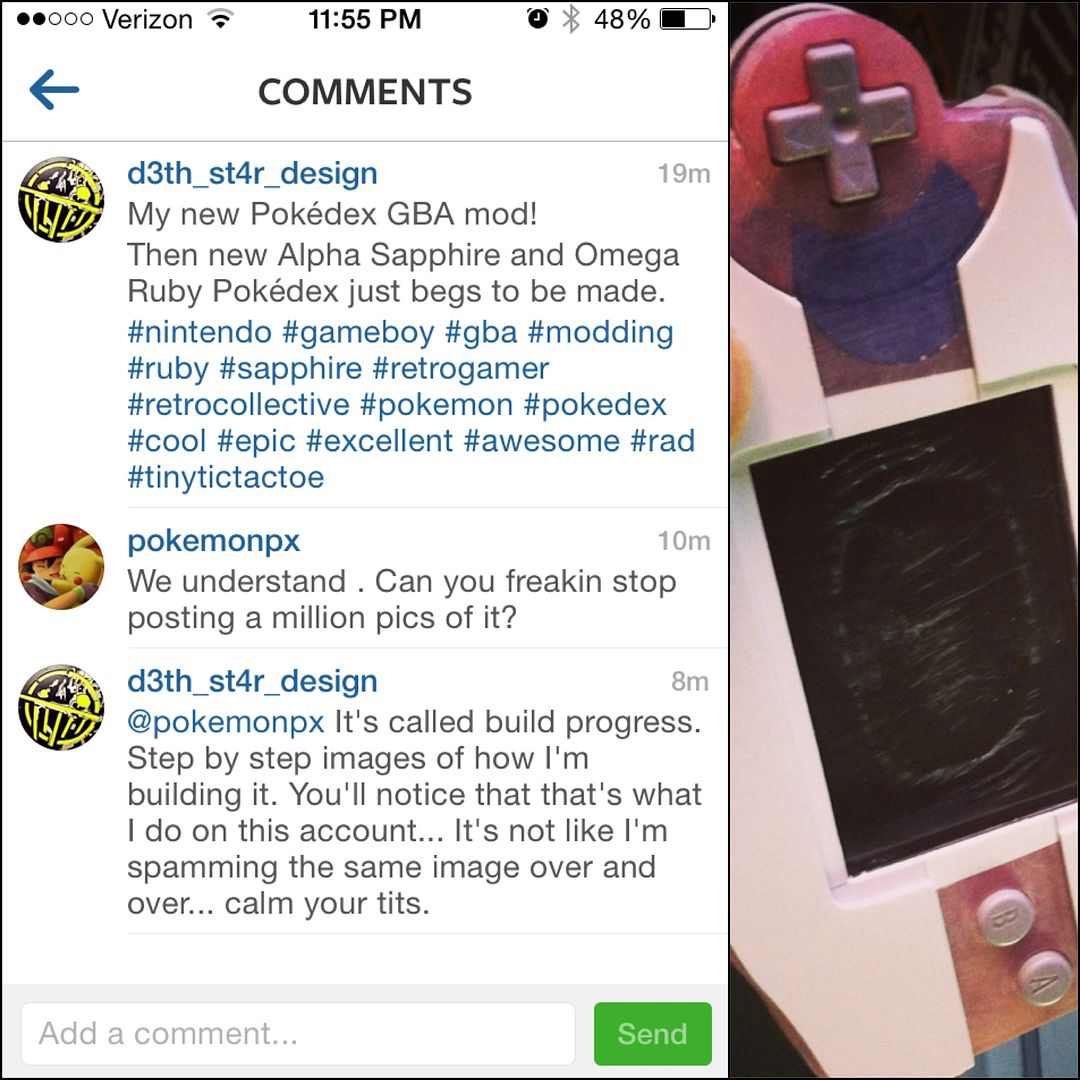
Wow, people on instagram can be whiny pussies!
To a level I never thought was possible.
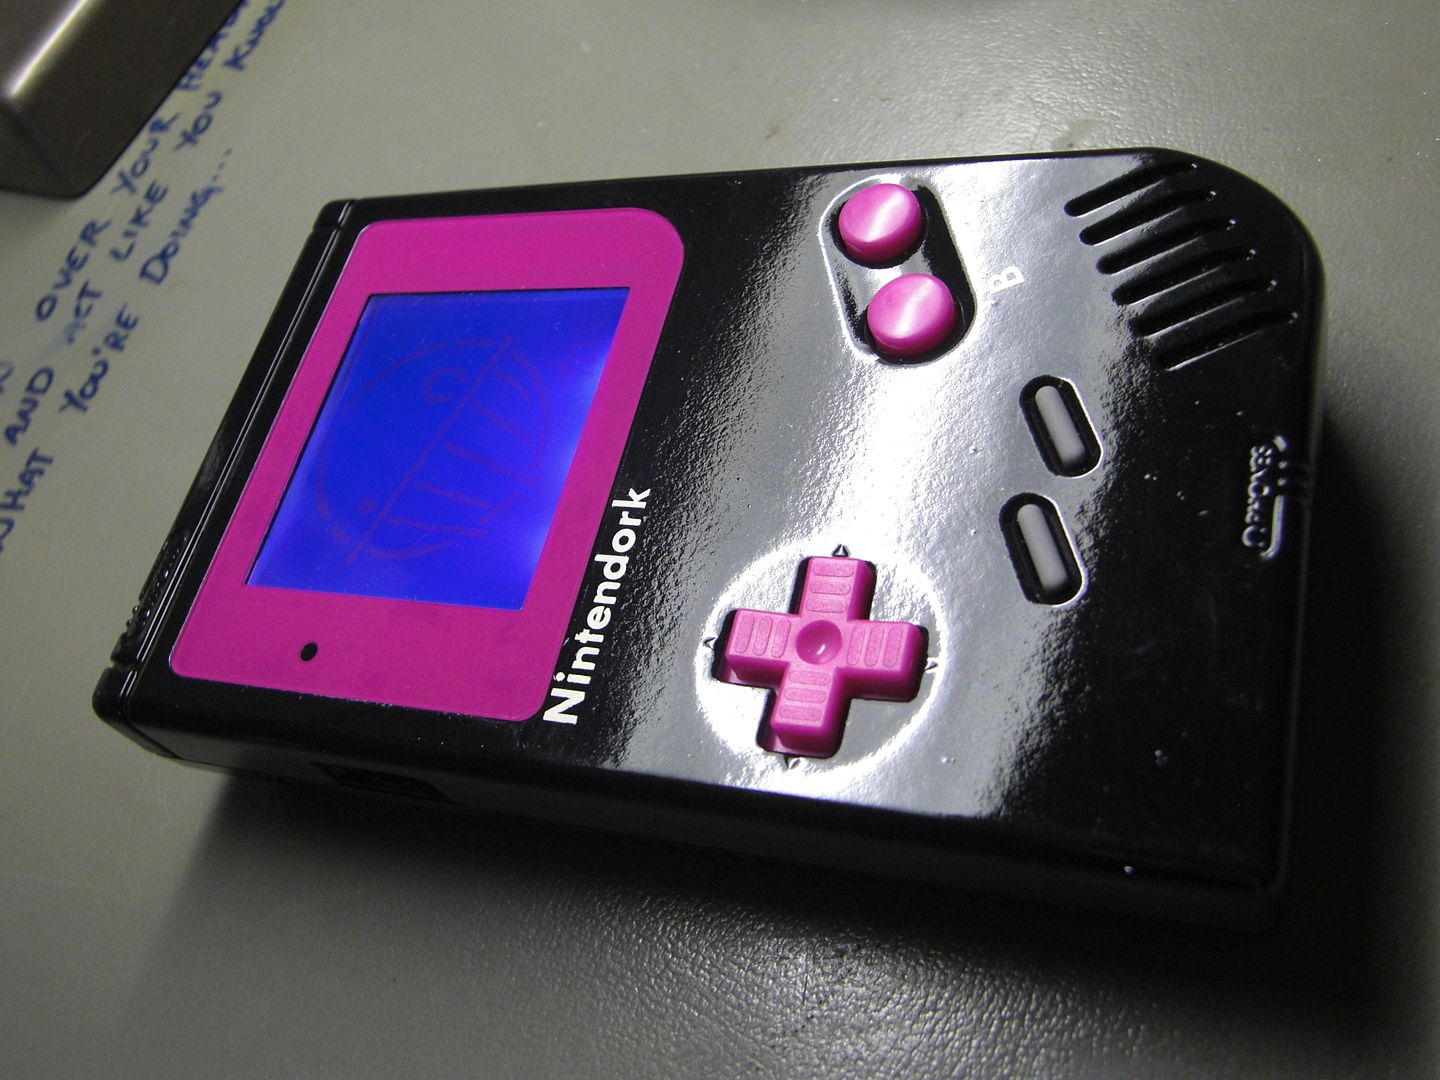
That GBA looks ace as heck! Can't wait to see a backlight in that thing
I ordered the backlit AGS-101 screen this morning. It'll look TITS!
LOL!
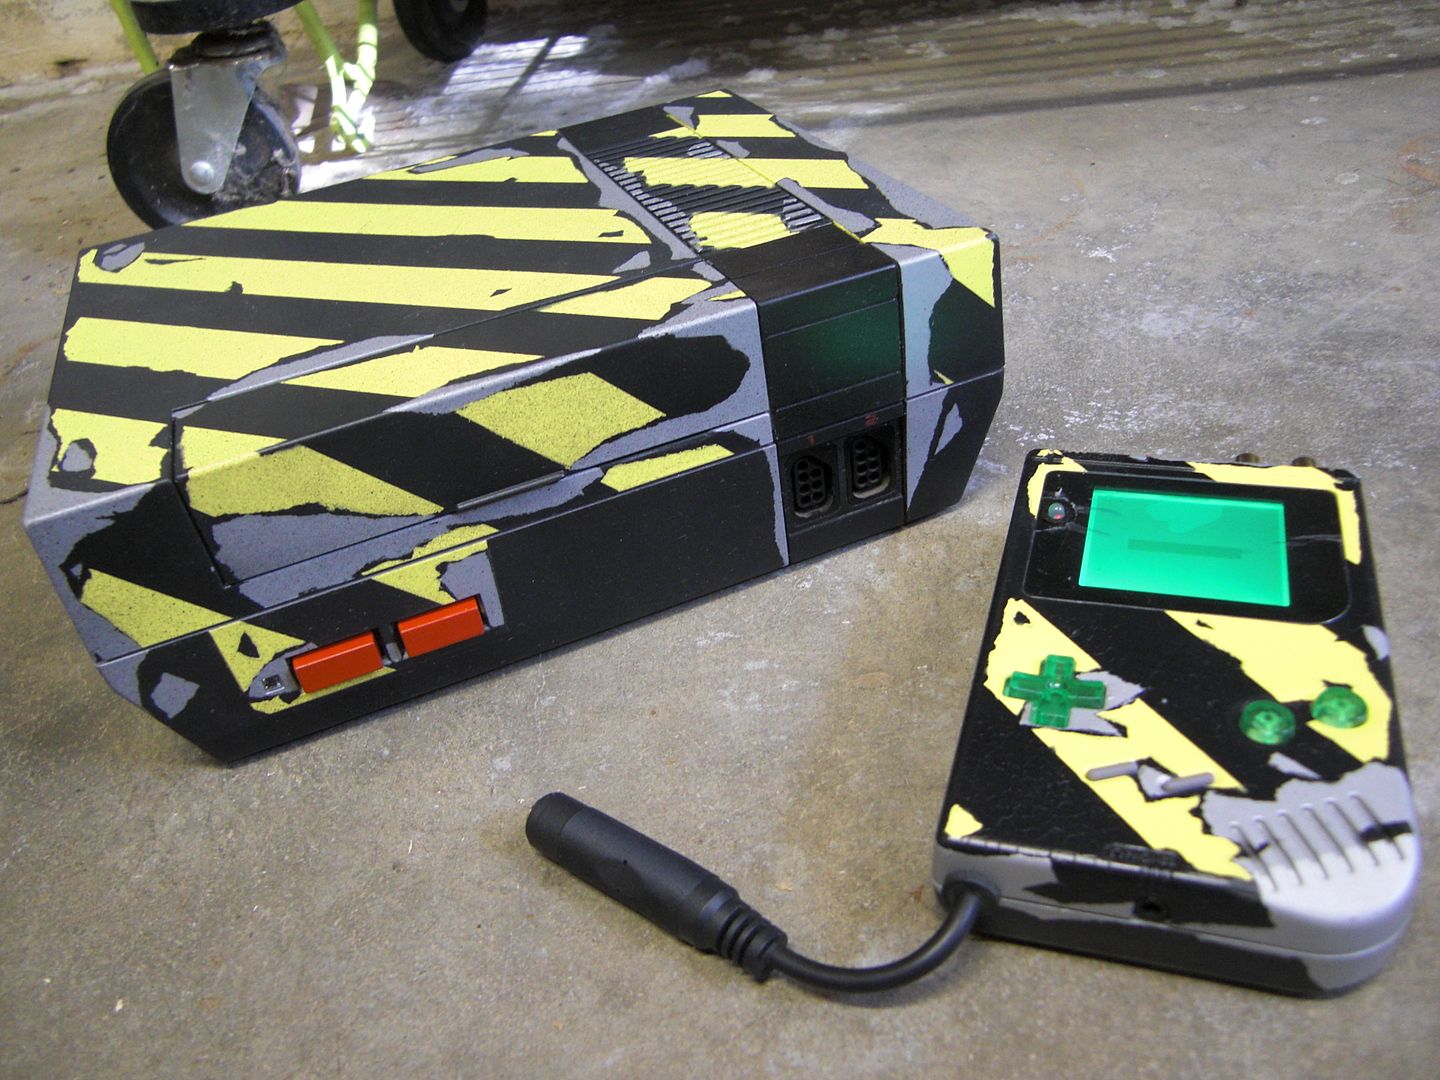
Looks like some people on instagram don't like seeing how things get made.
It's weird because they're POKEMON FANS! They have a Pokemon fan account! You'd think they'd be interested in knowing the steps so they could make one of their own.
Let me dig around in my closet. I think I have a spare SMS-II floating around in a box.
dsv101 wrote:It sounds like you didn't clear coat it when finished. Just get a spray clan of matte or gloss clear coat depending upon what kind of finish you're trying to achieve. After several thin coats of paint have been applied, spray two or three thin coats of clear coat.
You're right. I didn't figure I'd need one. Guess i should do that.
If the paint on your work doesn't feel like it's quite done, DO NOT SPRAY CLEAR COAT ON IT.
You're paint will wrinkle up like a Scirocco dashboard.
If you are going to use a clear coat, use a lacquer clear, not acrylic.
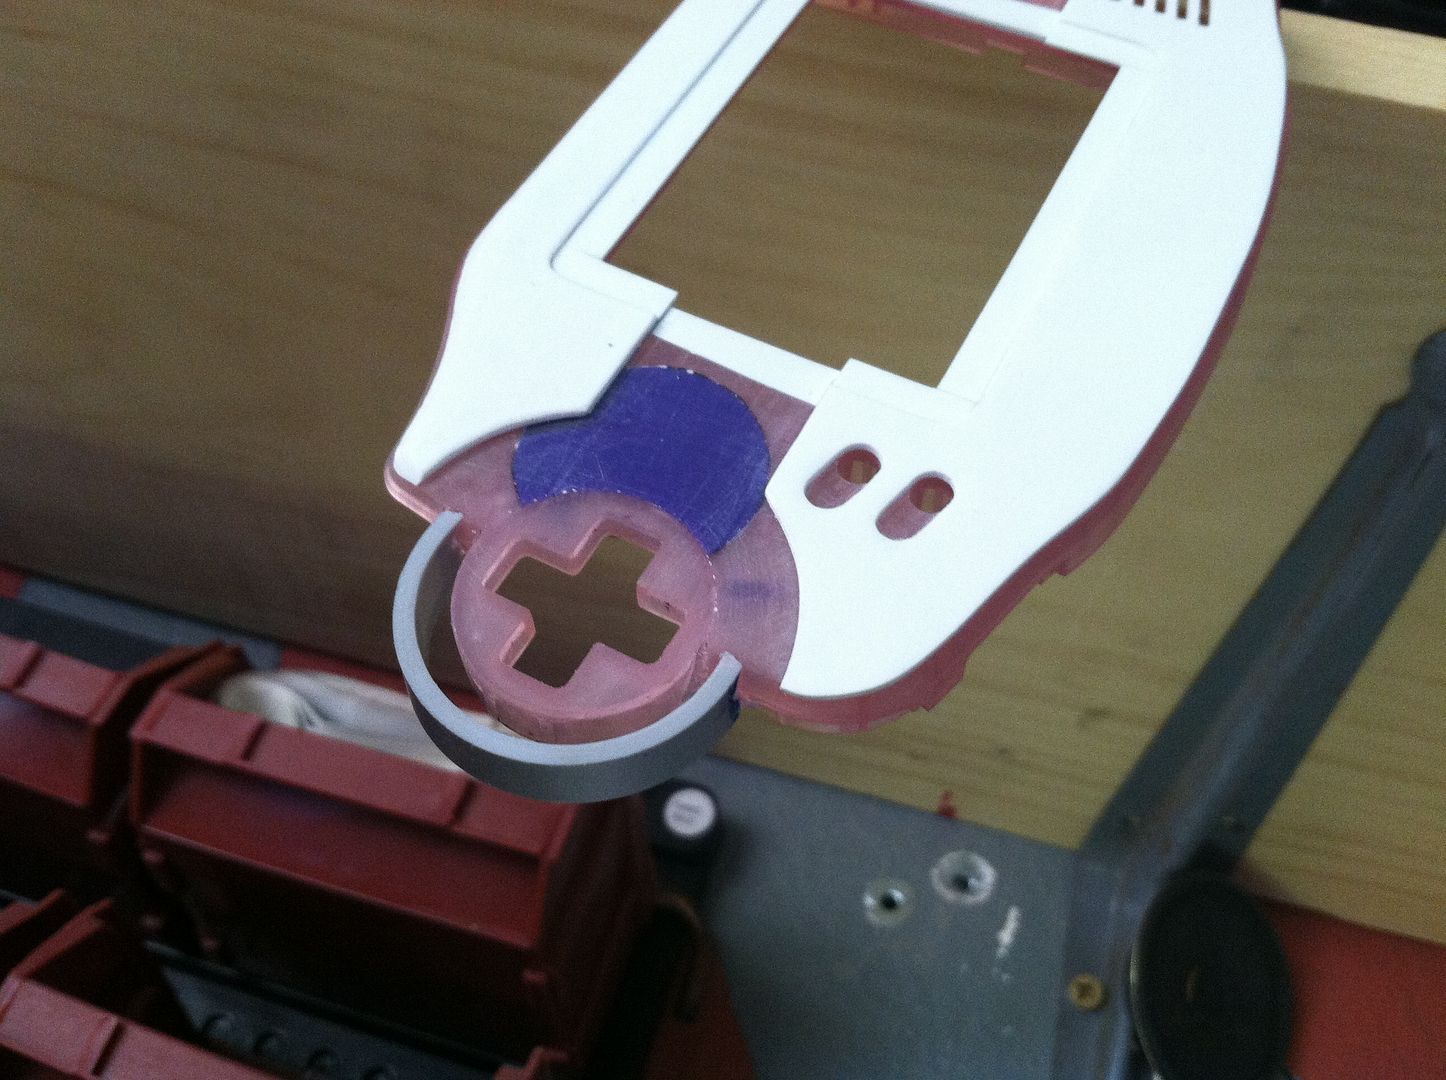
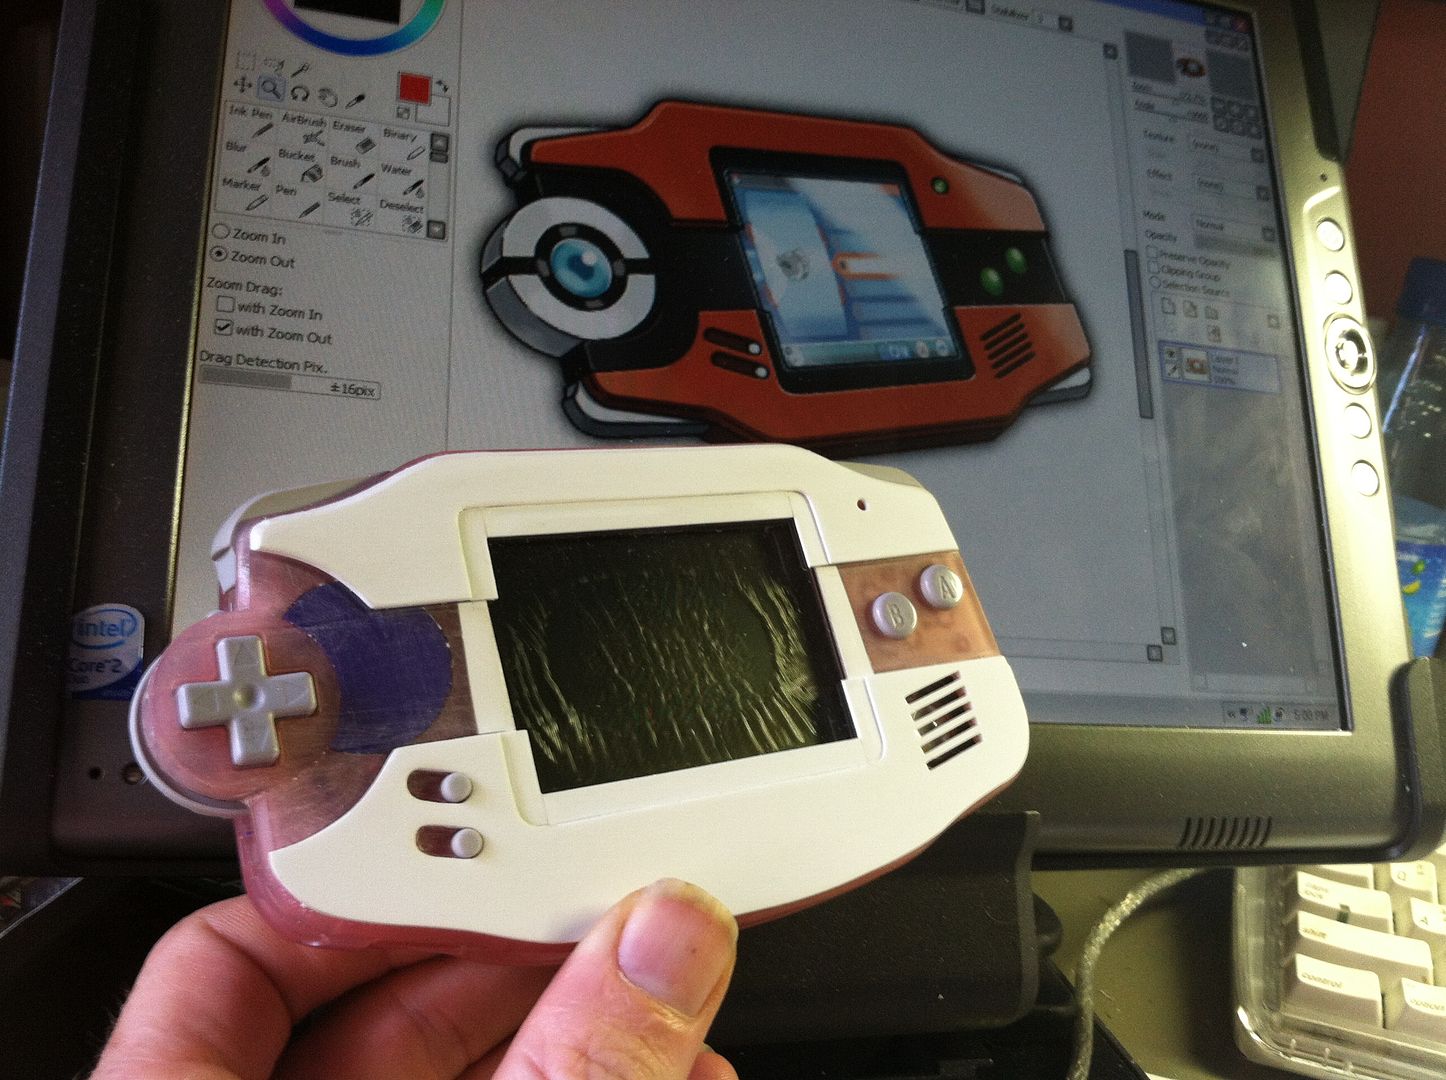
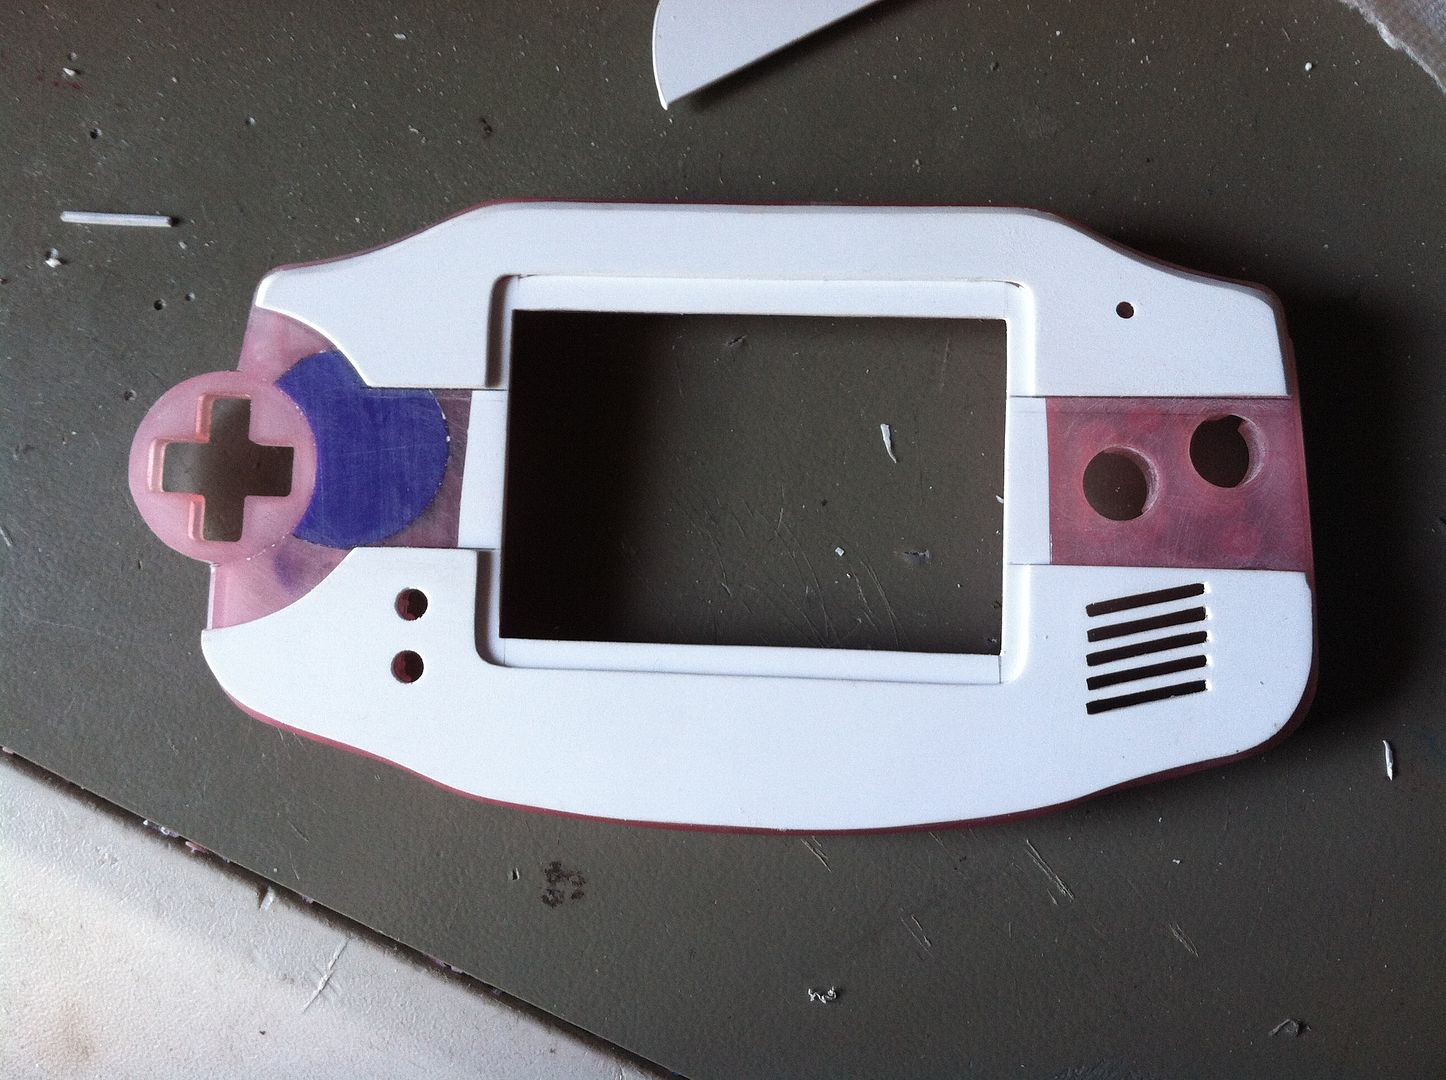
I cut and installed the frame edges.
I was planning on getting a piece of gorilla glass to go with this thing (and I might still do that) but the lens was in pretty good shape, so I simply cut it to fit.
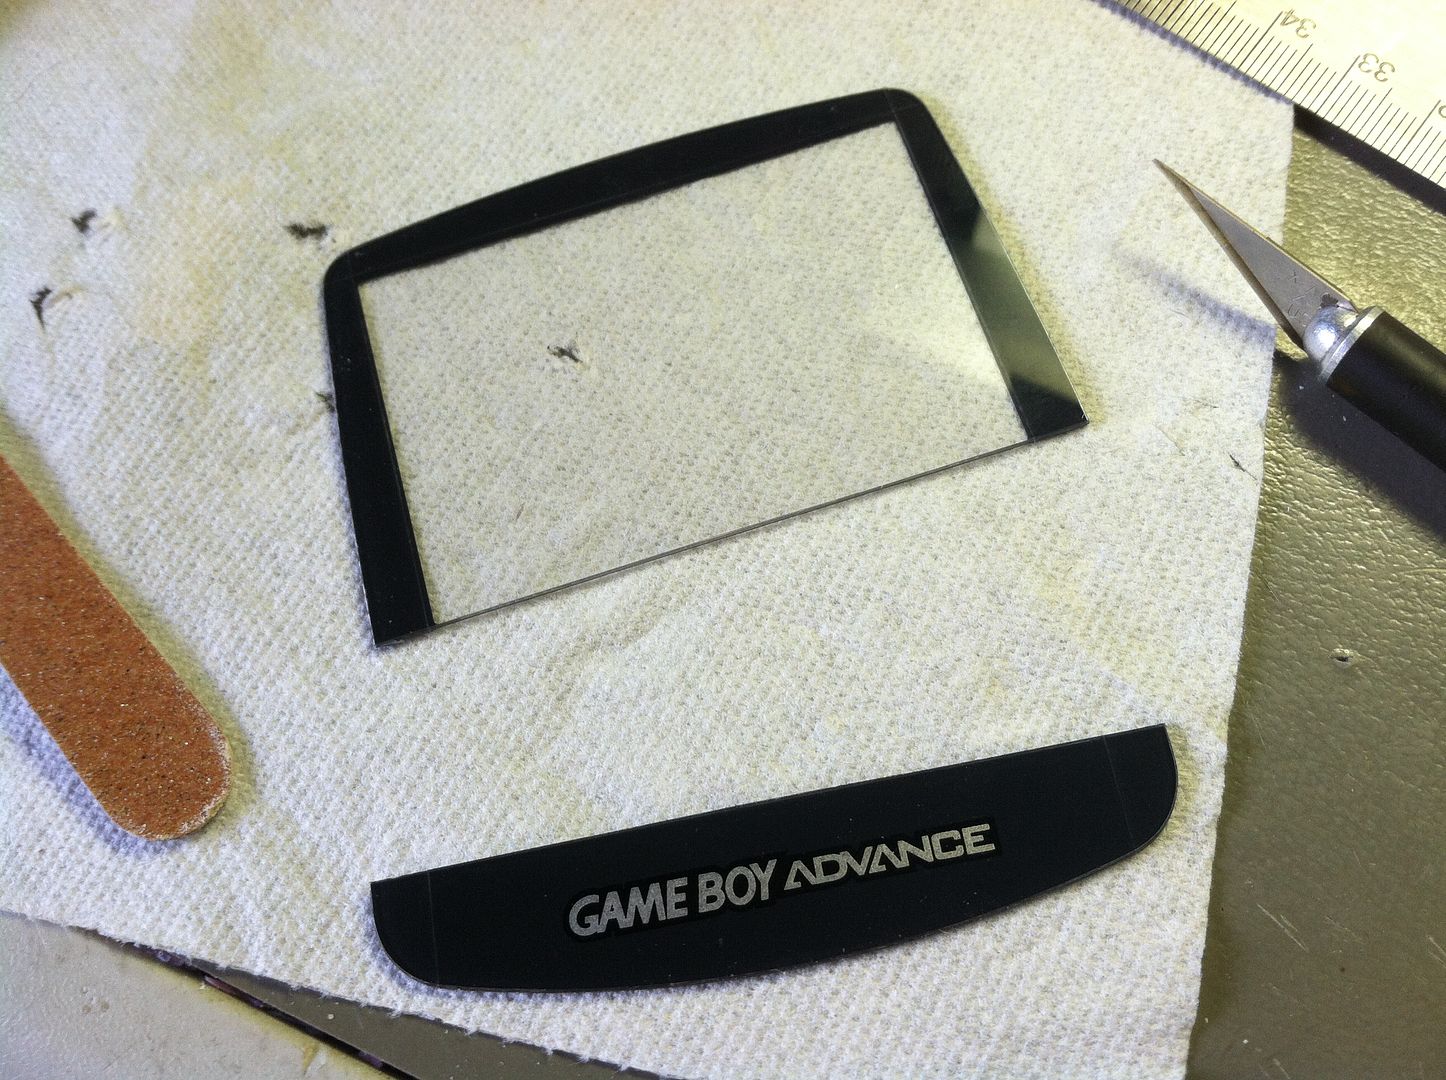
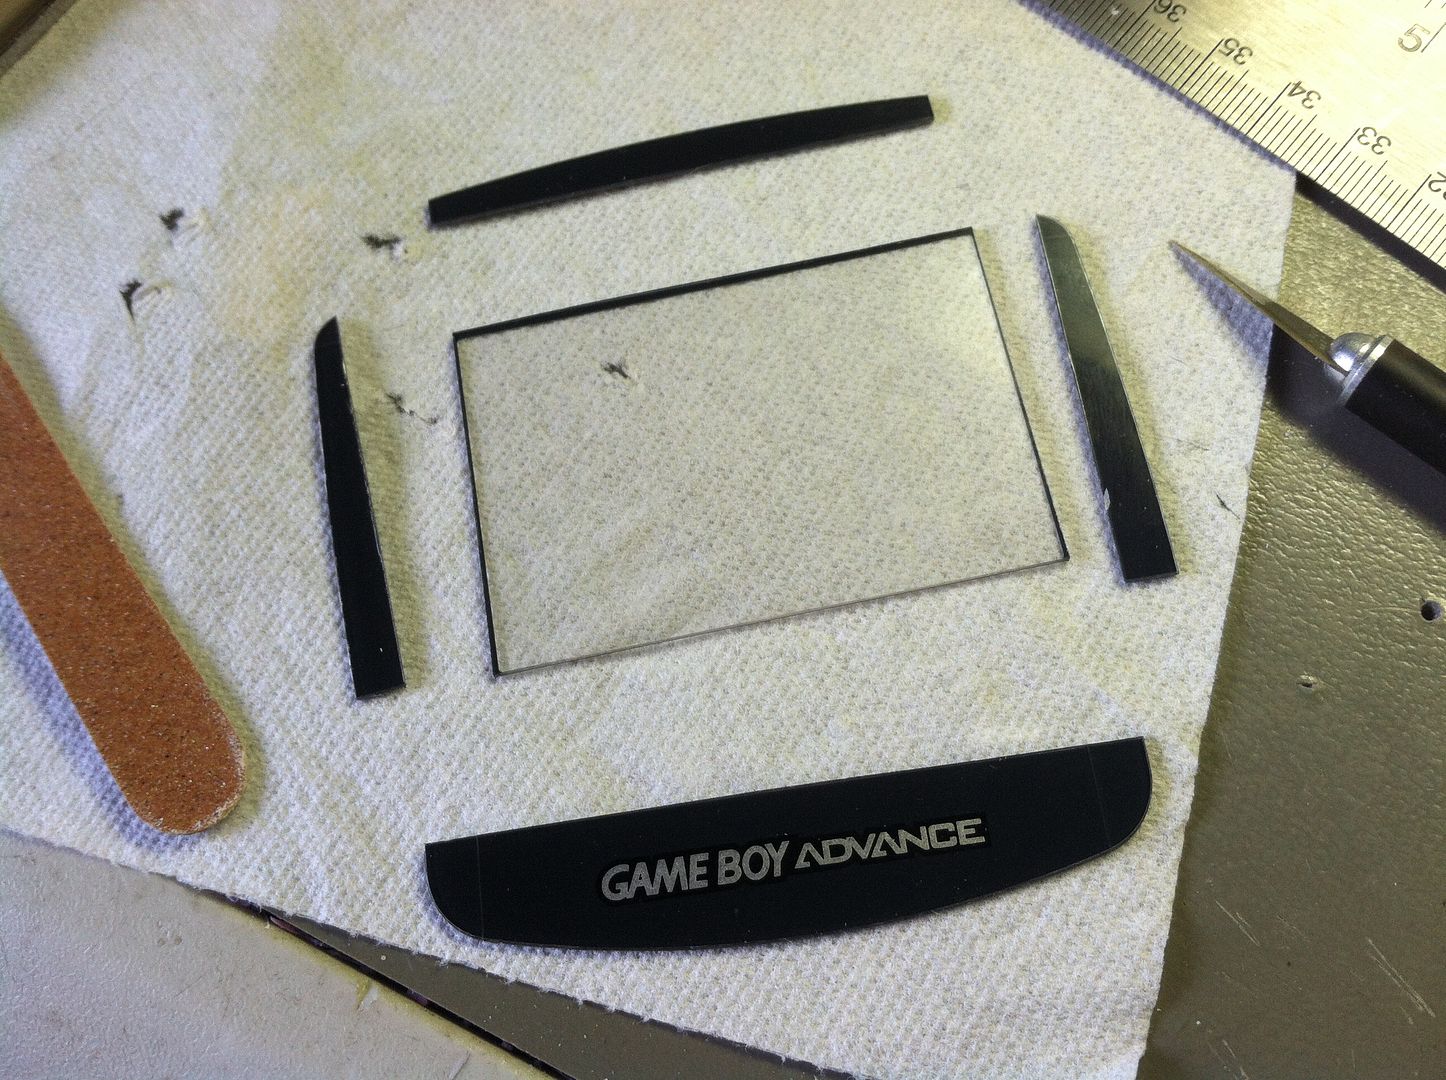
I did a little sanding and cleanup just to make it look a little more crisp.
What do you guys think so far?
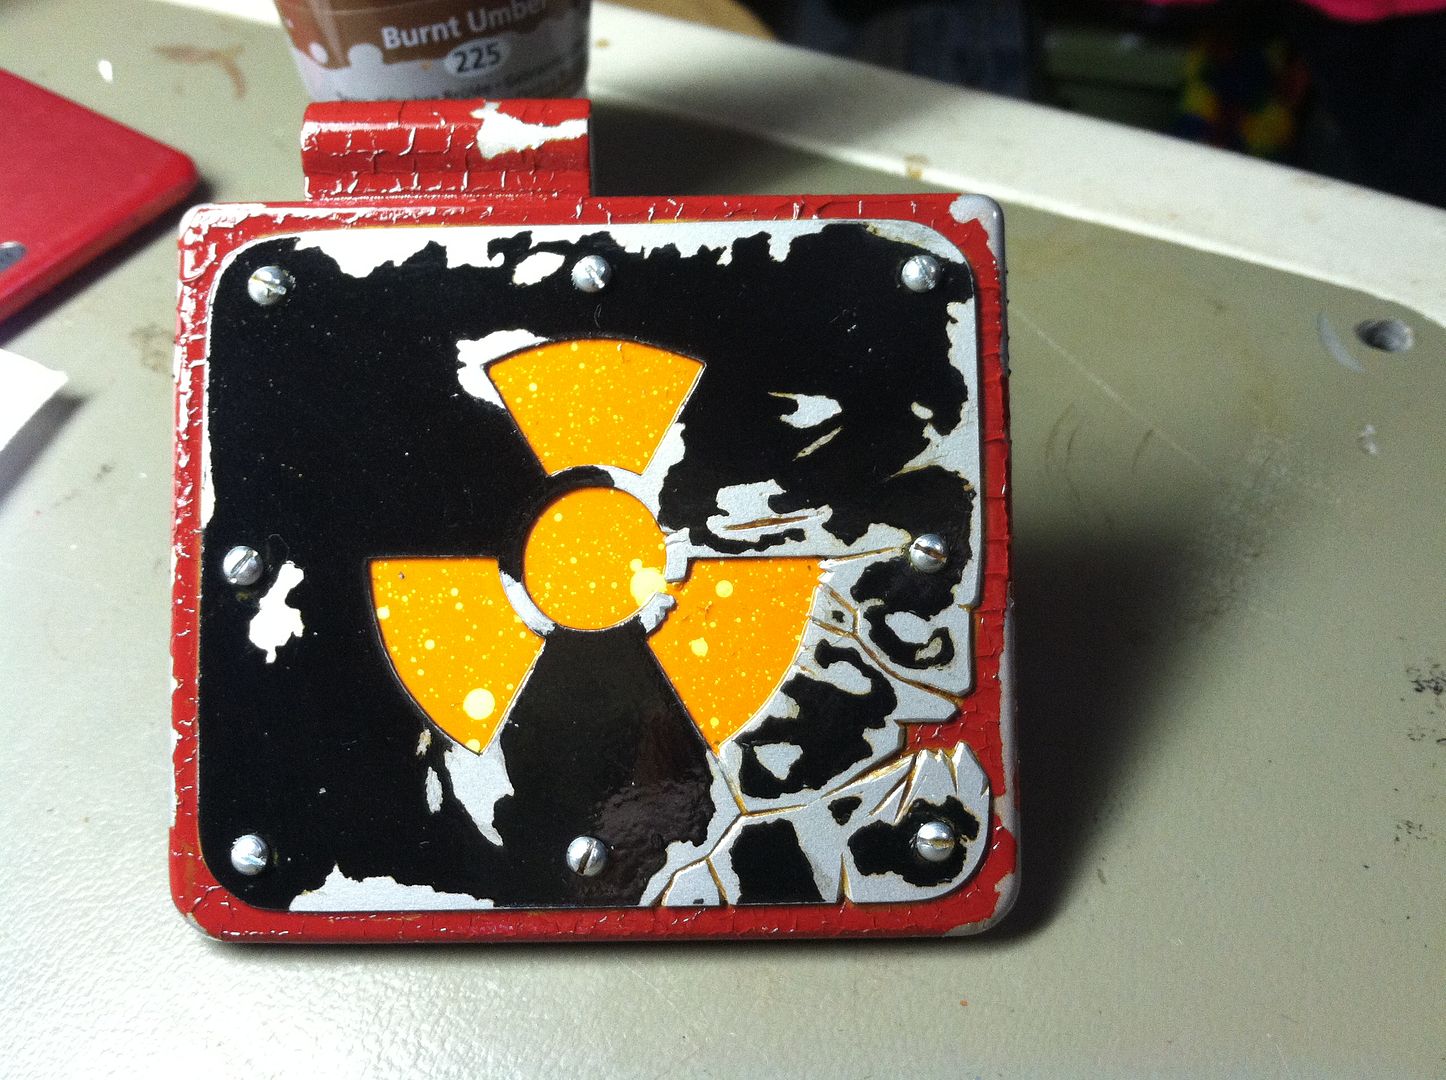
I generally use Rust-O-Leum Painters touch. I do light coats 4-5 hours apart, and allow them to dry in a warm place outside, but not in direct sunlight. I also make sure the pieces are warm before I lay down the first coat. A light primer coat also helps the paint cure properly.
The paint usually has a funny feel for a couple of days after painting.
Examples:
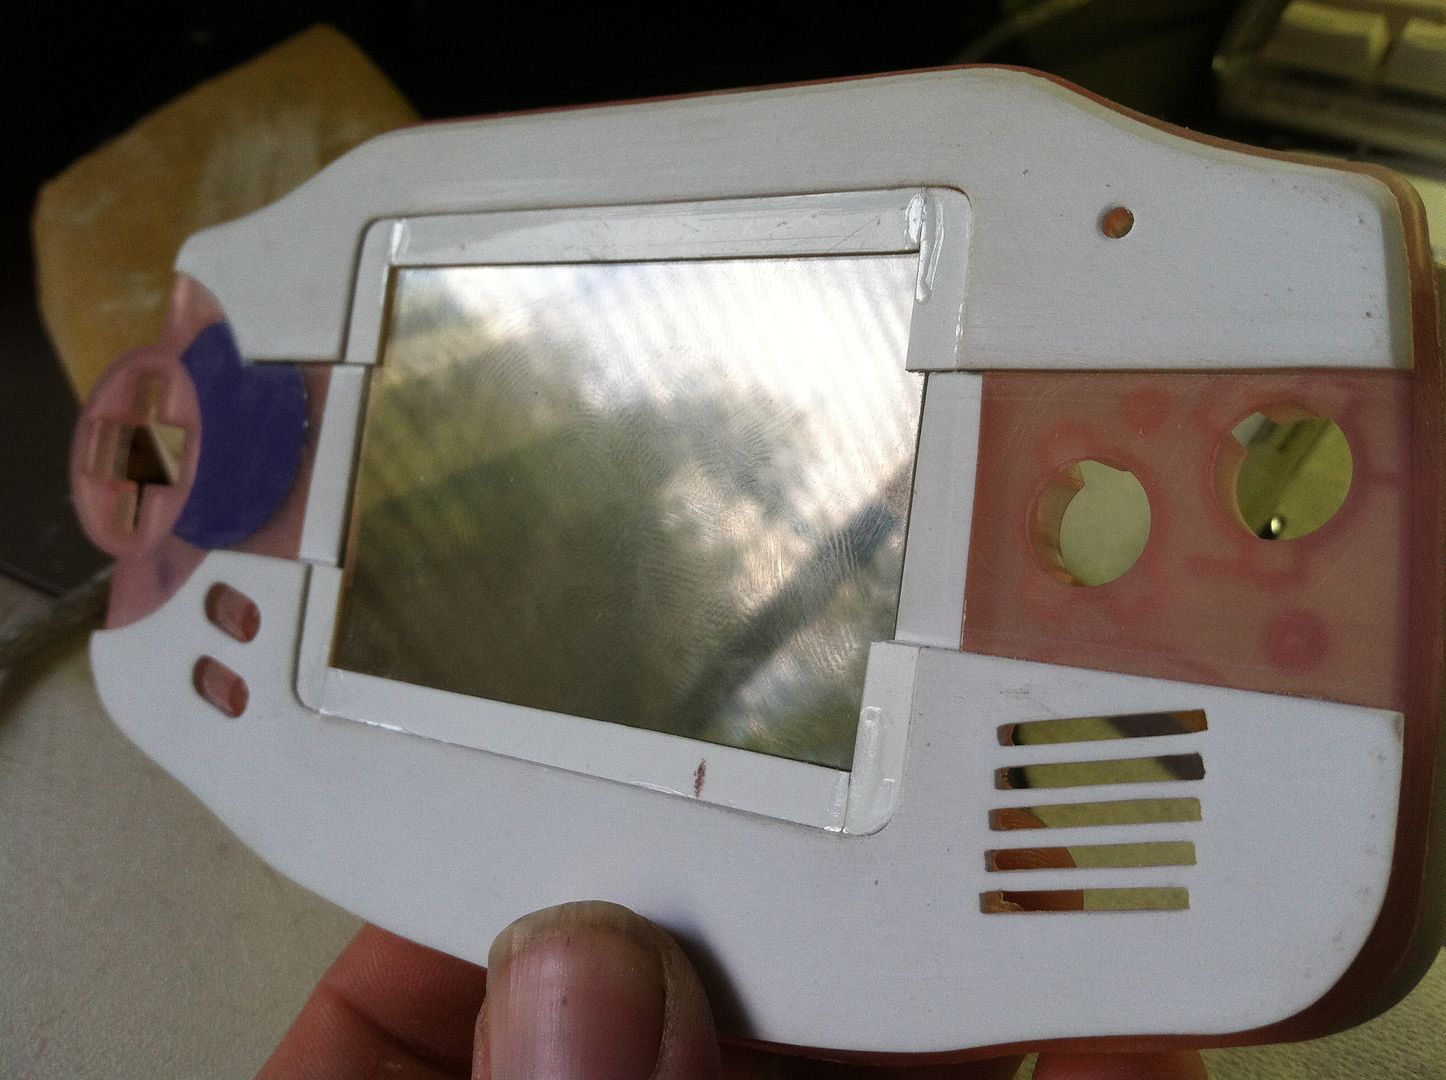
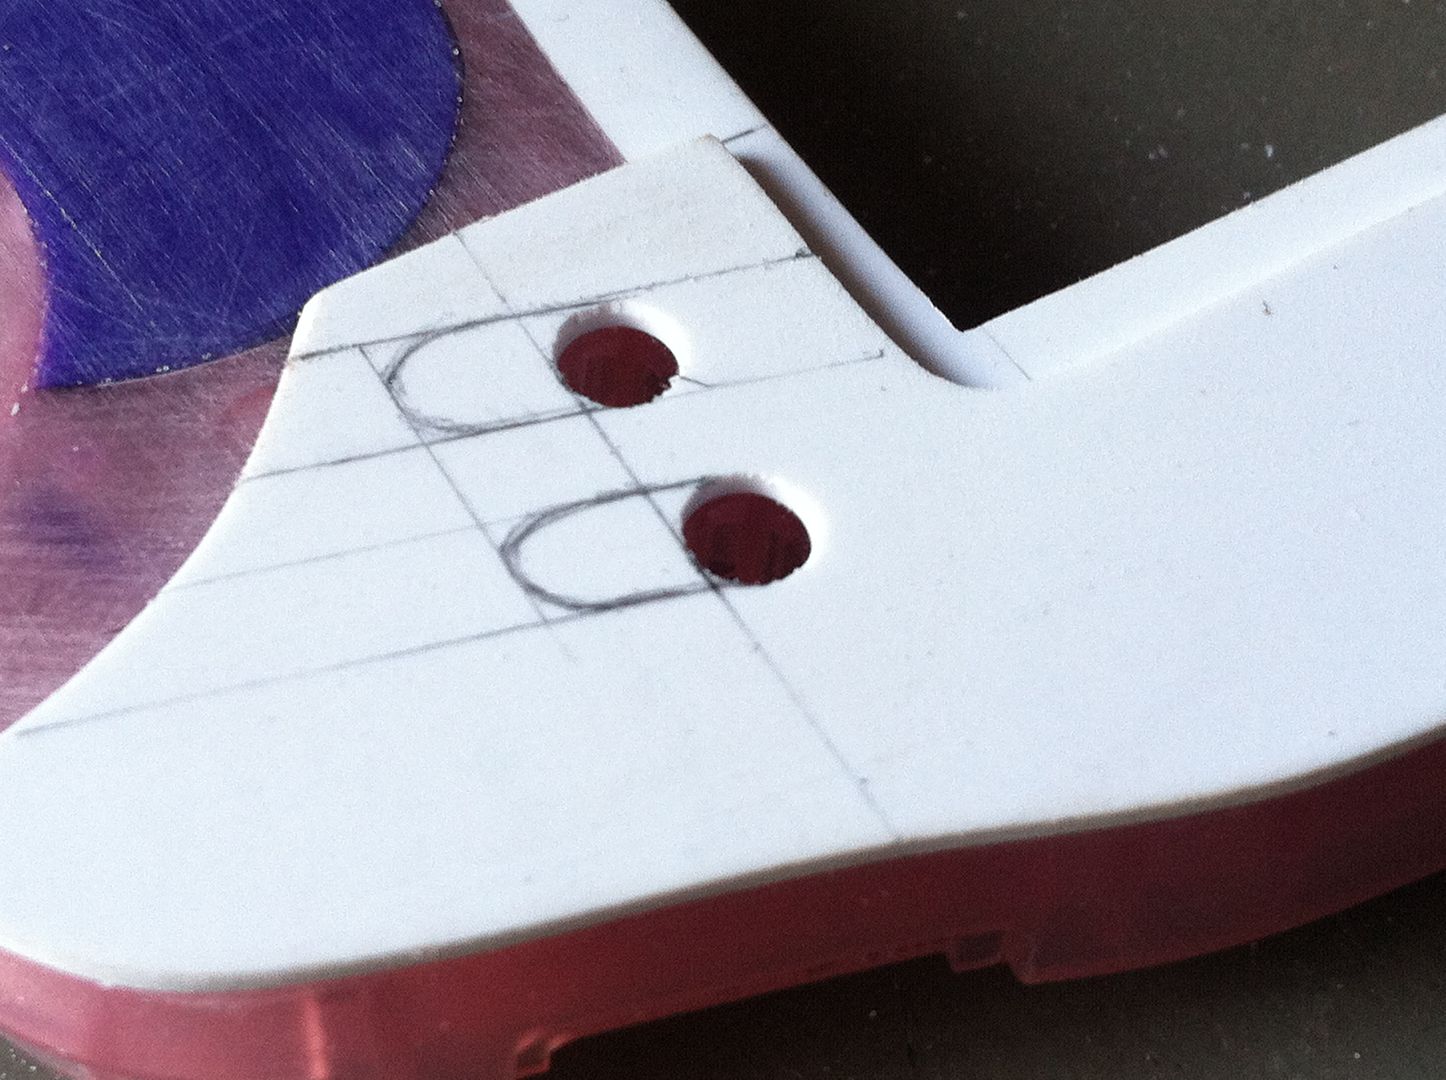
Just doing a little more detail on the face plates.
I found that it was easier to glue the bottom plate in, and the drill and cut with it in place.
Patience and a steady hand serves me well.

Pics are back up!
ChipMusic.org / Forums / Posts by Teh D3th St4r