yep! trying to catch up on some out of stock stuff this week
Awesome, I'll go ahead and order one of your kits to save the hassle of buying the caps individually.
I have some questions about some minor things that hopefully you guys could help with,
-I'd like some suggestions for cleaning supplies for the DMG case, I want it to look as nice as possible. The case also a few spots where dabs super glue were applied, mostly for mounting SMD LED's, but I decided to remove those LED's and now I'm trying to remove the fogged up parts of the shell. I have a Dremel with buffing tips, but should I use that or some other cleaning method?
-I feel like this is a dumb question, but could one of the more experienced modders give me the name and/or gauge of wire that they prefer to use? I typically use the same wire for all of my mods, just a 15 foot, 16 stranded wire ribbon cable from the electronics store, never really put much thought into that because those wires always worked well for me in the past so there wasn't a need for any other wire. The wires I have attached already will work fine, but there's still quite a few wires to add and I'm going to need something different.
-On the Prosound jacks, which wiring method would work best? I've used 2 different methods when modding. I either make a small pcb attached to the prosound solder points that all the audio jacks are also attached to, or I have the prosound solder points going to the 1/4", and the 1/4" also leads to the 1/8" jack, and the 1/8" then leads up to the RCA's. I've never had problems with either of those methods, but would one work better than the other?
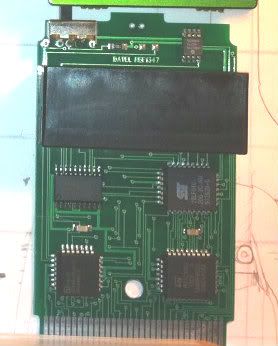
-I'm trying to figure out how I'm going to get the Mega Memory Card in there, so I was thinking I would just build a custom PCB with the Mega Memory Card components (without the cart connector of course), instead of modifying the original PCB. I don't have any experience with removing CPU's from PCB's but I've read that they can be removed with a heat gun, has anyone tried that? I thought after I removed those, I would used a conductive ink pen to draw the traces on the custom pcb, and then cut it to fit in the DMG. Would that be more trouble than it's worth?
-I haven't ever made a DMG with an internal ArduinoBoy that also had the LTC Clock Control Mod, and I'm wondering if I need to have a cutoff for the LTC's power whenever the AB is powered on? If you had both on at the same time, wouldn't the DMG and/or LSDJ crash?
I really appreciate all the help everyone has provided me with, and thanks in advance for the future assistance!