It's not a stupid question. That's some elaborate wire for what you're doing! The RCA jacks will have the metal flanges that go under the nut like elongated washers. You want those connected together and then wired to ground. I would get some much thinner wire if I were you though. I use 30AWG solid core. It's very nice for fitting in a Game Boy. Just use some hot glue so they don't break off when you go to close it.
241 Sep 6, 2013 12:50 pm
Re: RCA-mod: 3 wires with each their shield? (3 replies, posted in Nintendo Handhelds)
242 Sep 6, 2013 1:13 am
Re: NEW ARDUINO BOY PREORDER (304 replies, posted in Trading Post)
Hey!
I have a couple IK Multimedia iRig MIDI kits for sale. I picked a bunch up, one for myself, one for a customer(who backed out) and another because I figured they would be cool to use with an Arduino Boy with a Game Boy. I haven't fully messed with mine yet but I'm looking forward to it!
Here they are:
243 Sep 1, 2013 7:21 pm
Re: Should I make another HEX switch? (19 replies, posted in Nintendo Handhelds)
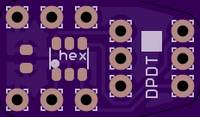
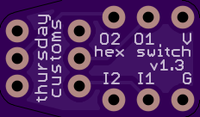
I also might as well show you the Hex Switch v1.3 which will be available very soon:
All I've done with this one is make the switch pads in a pattern that allows you to use a push switch exactly like the RGB Switches and Variable Clock v4. With a push buttons switch it will be a lot easier to install as there wont be 6 additional wires and it fits nicely in the top right portion of a DMG. This is optional though and any other switch can be wired up to the pads.
244 Aug 30, 2013 10:43 pm
Re: Should I make another HEX switch? (19 replies, posted in Nintendo Handhelds)
I rather like the discussion. I will see how this saving is useful, because I use really small components. Yes It will certainly be good for your eyes (decent size IC)
Right on. I don't see a resistor or capacitor. How are you switching it? Just a straight up short?
245 Aug 30, 2013 8:19 pm
Re: Should I make another HEX switch? (19 replies, posted in Nintendo Handhelds)
nice clean design.
I like your trough hole design, just had a problem to source 1 small enough chip (dual, quads are so big) so it will be using 2 single ones.
size of a my and your board are there there. mine with this huge signature is 13x11 mm (without could be 13x8 mm)I see you are using same IC (true logic) as I am
XOR gates
, just that you went with a quad
Man you kidnapped my tread
joking
Haha sorry man ![]()
Using two separate ICs is a cool idea for saving space. I just figured it would make tracing and assembly more annoying. This way the kit is pretty simple for me to design and build.
246 Aug 30, 2013 8:16 pm
Re: Should I make another HEX switch? (19 replies, posted in Nintendo Handhelds)
On one hand I'm kind of surprised no one did a PCB version of the XOR mod, on the other hand, I'm kind of not. What is the use of this mod? The point of inventing it for me was to use for experimentation, to be able to quickly flick between the two modes. But when would you need/want to this in a finished installation?
I had customers asking for a hex switch mod years ago. So many were asking for it that I needed to make the mod easier on myself. So I came out with the Hex Switch kit and started selling it. It's been a big hit so I guess you would really have to ask other people.
I came up with this one to make the actual switching component easier. Personally I don't have a lot of mods in my Game Boys but a lot of people like stuff like this. Most Game Boy mods that are popular aren't exactly useful but I think aesthetics are a big thing for people.
247 Aug 30, 2013 6:23 pm
Re: Should I make another HEX switch? (19 replies, posted in Nintendo Handhelds)
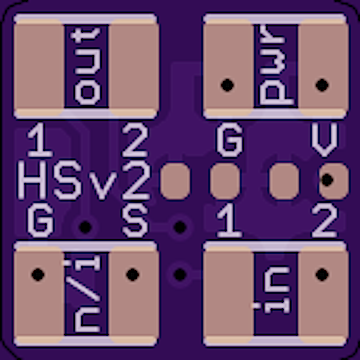
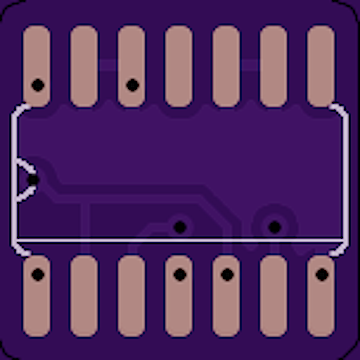
Since it's out there I might as well show you what I'm working on.
I decided to do away with through holes for once because it saves a lot of space with such a big IC. Regardless of the IC this PCB would have still needed to be about 3/8" x 3/8". Which is how big it is now. If I'm happy with this batch then this kit should be released in a bout a month.
248 Aug 30, 2013 3:17 pm
Re: Should I make another HEX switch? (19 replies, posted in Nintendo Handhelds)
It's a good idea for sure. The PCB is WAY bigger than it needs to be. But my soon to be released Hex Switch v1.3 AND Hex Switch v2 will solve all these problems.
249 Aug 29, 2013 5:32 pm
Re: Introducing: Nintendo '2'DS (30 replies, posted in Nintendo Handhelds)
I'm so freaking excited about this. I never have the 3D turned on. It's a pain to hold it still. I was actually going to make one of these and call is a DStablet.
Guess I don't have to now!
The only thing I don't like is the name. 2DS just makes it sound like a down grade(since it is). Should have called it DSslate, DStablet or something to make it sound new. Not old.
250 Aug 28, 2013 12:32 am
Re: Laser Engraving on a GBC (24 replies, posted in Nintendo Handhelds)
Can you etch my logo into a shell as well as text? Would be very interested.
251 Aug 27, 2013 4:00 pm
Re: TeensyBoy released (48 replies, posted in Nintendo Handhelds)
EDIT : Revision 2 SMD pcb
Idea for the Teensyboy Shield SMD :
I used a resistor array because easy and fast to solder .. (but more expensive)..
The size is only bit bigger than the teensy ... the Green PCB is a Teensy.What do you think ? prefer a trough hole version ? (could be bigger) or the sme but with trough hole leds ??
This is pretty cool. I made pretty much the same thing for the Arduino Pro-mini board. I would recommend using through hole LEDs and a single strong resistor. It really simplifies the whole design. Then you could mount the whole kit to a case and it would be easier to display the LEDs. On mine I use a single 1kohm resistor on the ground line of the LEDs since most of the time there is only one LED illuminated.
252 Aug 27, 2013 3:56 pm
Re: TeensyBoy released (48 replies, posted in Nintendo Handhelds)
thursdaycustoms wrote:My hero! I have a few teensy's and i need them to work properly since I don't actually need MIDI data for my own use. I just need USB sync. Thank you!
If sync is all you need what is wrong with little scale's $16 teensy midi sync? It work's well on DMG if you use a pulldown resistor on pin 3 of the link port.
Little-Scales teensy sync doesn't work for me. I have to have LSDJ in MIDI mode, take it out of MIDI mode, put it directly back into MIDI mode then start LSDJ and then start Ableton. THEN it will start and sync. Otherwise it just wont start LSDJ. I'm not sure why and I haven't really had the time to figure it out at all.
253 Aug 25, 2013 5:25 pm
Re: Kitsch-Bent.com Updates (latest newsletter!) (1,485 replies, posted in Trading Post)
Here's the new thursdaycustoms stuff for you non-clickers ![]()
http://store.kitsch-bent.com/category/b … y-customs:
All this and more can be found right here:
http://store.kitsch-bent.com/category/b … ay-customs
254 Aug 25, 2013 5:16 pm
Re: Boutique Noise and Chip Shop - Arduinoboys, Kits, and PCBs (69 replies, posted in Trading Post)
Here's some pics of my unit.
yeah it was very tight, which is what I aim for.
But seriously. That looks really awesome!
255 Aug 23, 2013 9:13 pm
Re: Asm Retro Density help (7 replies, posted in Tutorials, Mods & How-To's)
It also depends on the color. Some colors like blue can be weird. When installed "normal", blue looks better to adjust the contrast so that it appears "inverted".
256 Aug 22, 2013 5:34 pm
Re: Removing leftover residue from dmg lcd (7 replies, posted in Nintendo Handhelds)
I'm a big fan of denatured alcohol. That stuff will clean just about anything off of any part of a Game Boy. Just don't let it touch the ribbon cables because sometimes it will dissolve the glue holding them to the LCD.


.jpeg)
.jpeg)
.jpeg)
.jpeg)
.jpeg)
.jpeg)
.jpeg)
.jpeg)
.jpeg)
.jpeg)