Jazzmarazz wrote:

Surely, but I despise the idea. Too many chances of shorts and too much environmental exposure IMO. While Im at it, I ought to redesign the GameGear altogether! What a peice of crap that was...but what incredible potential and what an innovative design considering the time!

About that... Pin 1 +34V, the LCD drive voltage, which for some reason they saw fit to route out to the cartridge. Inserting the cartridge at an angle (especially a risk with a board only solution like NL) you might short it over to one of the adjacent pins with some bad luck. Even for a regular PCB, I'd probably not even put copper on pin 1, just simply leave it out, to reduce the risk for accidents as much as possible.

There's always little-scale's SMSM, which will work for GG as well.

http://little-scale.blogspot.com.au/201 … -midi.html
http://little-scale.blogspot.com.au/201 … -gear.html

An idea: I wonder if it wouldn't be possible to make a GG cartridge with a GB cartridge slot, to act as an adapter. The physical interface and general memory map is about the same, which means the CPU should be able to access the memory just fine. What is different is the memory mapping, which means that commercial ROMs bigger than 32 kB will not work using this method. But this might be a convenient way to kickstart the Game Gear software scene.

Now, I have a request for you, katsumbhong. Get these pic off of Photobucket and onto a better service, like Flickr. I have a personal problem with Photobucket because they tend to break Google Image search by making the direct image links redirect to the photo info page, and then the image sometimes won't load. But apart from that, I expect them to delete the images if you don't log in for a certain period of time. Nothing more annoying than broken links...

Nintendo Power official white cartridge
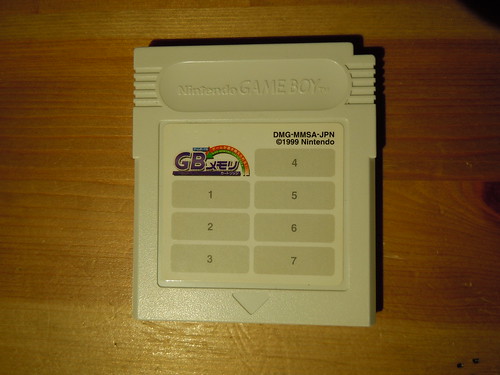

White Nintendo Power Gameboy cartridge
Higher res versions
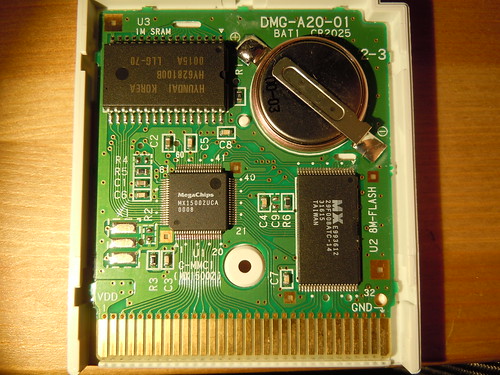

Nintendo Power Gameboy white cartridge
Higher res versions

Yellow Nanoloop cartridge
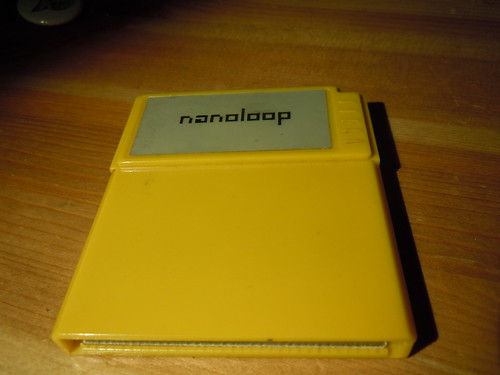

Yellow Nanoloop cartridge
Higher res versions
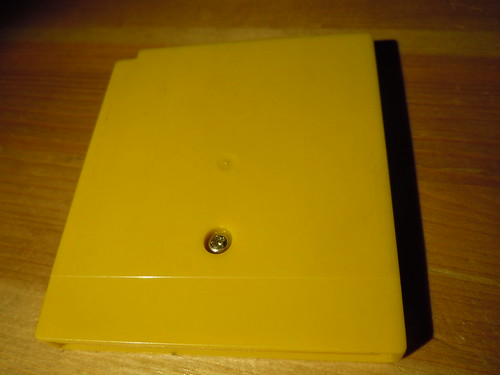

Yellow Nanoloop cartridge back side
Higher res versions
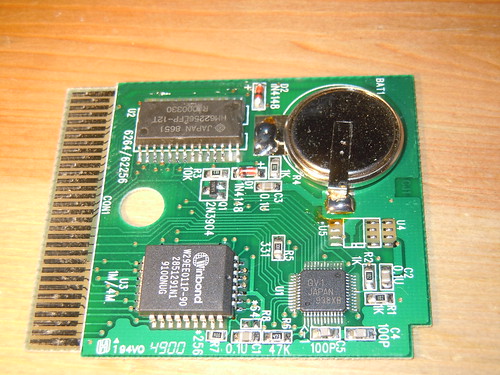

Yellow Nanoloop cartridge PCB front
Higher res versions
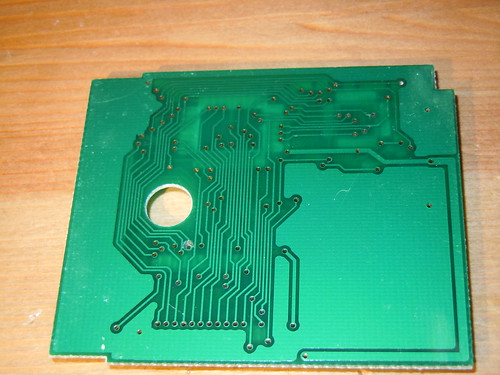

Yellow Nanoloop cartridge PCB back
Higher res versions

Different EMS cartridges
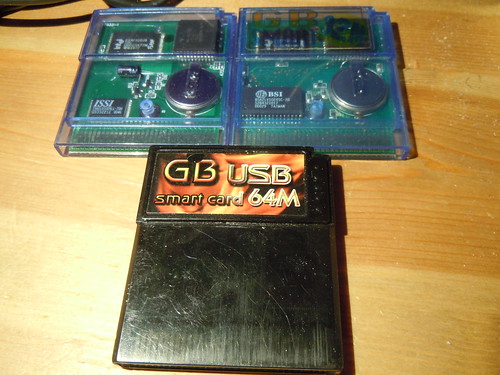

EMS Gameboy cartridges
Higher res versions

EMS 64M USB cartridge (Different board revision from above)
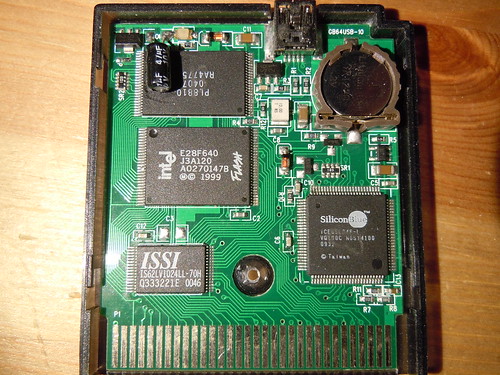

Inside EMS 64M USB Gameboy cartridge
Higher res versions

EMS 32M blue cartridge, two board revisions
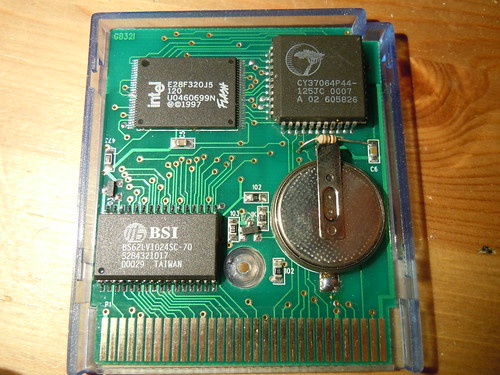

Inside EMS 32M rev 1 Gameboy cartridge
Higher res versions
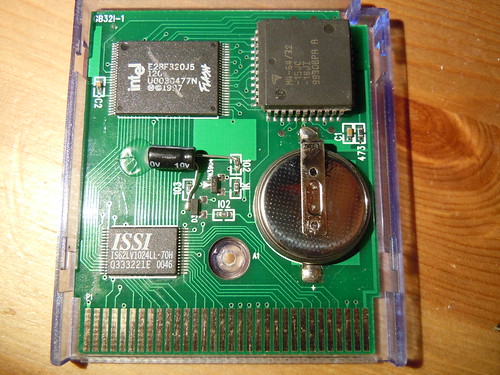

Inside EMS 32M rev 2 Gameboy cartridge
Higher res versions

Bonus pics, various cartridge mods/fixes:
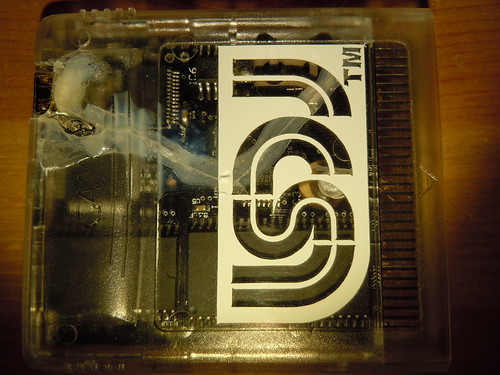

Bleepbloop cartridge, fixed crack
Higher res versions
This is someone's cartridge where I was asked to fix a problem, not this crack. The crack had happened because the USB connector is applying stress to the top part of the shell on bleepbloop carts. When I got the cartridge, it was smaller, but I tried to cut open the case to release the stress. That's when the crack opened up more. I had to improvise and fixed it with some super glue.


Gameboy cartridge cap reserve
Higher res versions
This is a cartridge that this guy sent me for free way back in 2008. However, he had chosen the wrong kind of SRAM chip which drained the battery in just a few months instead of many years. He generously did offer me to send it back and have this fixed for free (thanks) but I opted for a different solution as I already had another GB cartridge with working saving at that point. I added a big capacitor bank that is charged when you power up the cartridge. This lasts for a couple of minutes, which is enough for the various experiments I uses this cartridge for.
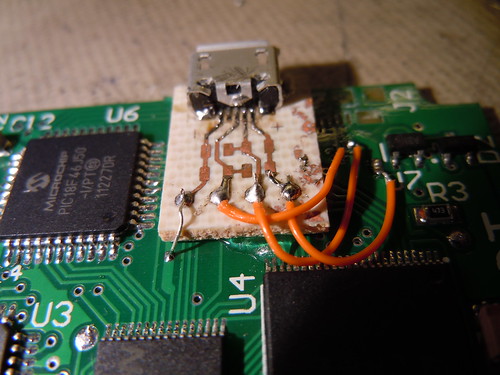

Derpie USB fix
Higher res versions
This is a drag'n'derp cartridge where the USB connector. I want to stress that this is not a manufacturing problem or product deficiency. I was literally doing a drop test of a Gameboy, with the cartridge inserted, from 0.5-1 m heights. What I didn't think would matter was that I had a very short micro USB cable connected, but it did. (Ooops!) The micro USB socket on the board came off, and brought the PCB pads with it, so I couldn't simply resolder it. To the rescue, a friend of mine had micro USB adapter boards he had designed for USB charger adapters of some kind which did the job perfectly. This derp cart PCB now sits in a blue EMS cartridge shell, to accommodate the extra height.

693

(20 replies, posted in Nintendo Handhelds)

Could anyone please confirm whether any of what I said does anything on Windows 8?

This reminds me of one of the many thing I'm planning to try but probably never will: A voltage regulated contrast circuit which pretty much makes the contrast wheel set and forget. (Normally, the LCD supply voltage varies with the battery health and CPU load, as you can see when LSDj's CPU saving kicks in when the song isn't playing.)

I'm working on... something like this... for the Gameboy and I'm wondering if there aren't more flexible timers than HBlank on the MD Z80? Also, does the HBlank interrupt keep triggering during the VBlank period?

Try changing command /c to cmd /c

697

(19 replies, posted in Nintendo Handhelds)

You've probably connected it in parallel with the link port, and the Arduinoboy will completely drown out the signal that's coming in from the link port. My quick and dirty fix to this problem is to add two diodes between the link port and the Arduinoboy. These should be switching diodes like the good old 1N4148, not LEDs!

Unless I've made a mistake in my thinking, this is what you need to do. Keep the resistors where they are. Connect pin 5 through a diode to Arduino analog 0. Connect pin 3 through a diode to Arduino analog 1. (As before but through a diode in both cases.) The should have it's cathode connected to the Arduino in both cases. Ie, the diode should "point to" the Arduino. This should make it possible to use either the link port or the internal Arduinoboy, but take care to not use both simultaneously, which will fail.

Re: Timbob. Those extra components are there to protect the CPU and to meet RF emission regulation, but they won't actually do very much to the signal. And their absence is certainly not the problem in this case.

698

(274 replies, posted in Nintendo Handhelds)

Oh noez, you forgot the 1 in my name. tongue

You may be interested in this:
http://blog.gg8.se/wordpress/2013/01/28 … lcome-rom/

Disclaimer: I'm not saying this is the perfect setup, but it's what I use.

I killed him and stole his badge.
So, uhm, can we wait at least a month before we make this thread again?

You're a couple of years late.

http://launch.groups.yahoo.com/group/lsdj/message/9577

702

(20 replies, posted in Nintendo Handhelds)

Hmm, looking further, I found this link: http://forums.mydigitallife.info/thread … -Windows-8

Disabling driver signature enforcement *should* still work on Windows 8, just not through DSEO. Use thi to do it manually instead "bcdedit -set TESTSIGNING ON"
However, 1) you need to do it from an administrator command prompt 2) you still need to sign the driver manually.

Otherwise, try my other bcdedit line and see if that makes the boot menu show up at boot time. (You can even put a value of 10 just for testing since yo can change it later.) This should definitely allow you to press F8 on boot, which should simplify the process at least a little. Again, you need to do this from an administrator/elevated command prompt window.
Look here to see how to open an elevated command prompt: http://pcsupport.about.com/od/windows-8 … dows-8.htm

One of these days I need to install Windows 8 so I can try these things directly and don't have to rely on other people's sources, though. tongue

Edit: Note that disabling signature checks, and enabling test mode are two different things. Disabling signature checks completely is considered dangerous because any application can now load kernel drivers, so it needs to be done at boot time every time you boot. All the timeout line does (hopefully) is allow you to get into the boot menu without doing the ritual with the troubleshooting menu.

Test mode doesn't eliminate the signature checks, but allows users to sign drivers themselves. This can be permanently enabled, but shows a warning text in the lower right corner of the desktop and also requires the extra step of manually signing the driver in order for it to work.

703

(20 replies, posted in Nintendo Handhelds)

Doesn't DSEO work with Windows 8? I guess not since it's not listed in the compatible OSs. Otherwise, can't you press F8 when booting, like you can with Windows 7?
If Windows 8 is anything like Windows 7, you could try opening an administrator command prompt and doing the following command. This should make the Windows boot manager show up for 1 second on each boot, which should allow you to press F8, again, unless Windows 8 is different in this regard.

bcdedit /set {bootmgr} timeout 1

So here's the problem. The only sane offers for 128 kB FRAM you can find is Ramtron's FM20L08. However, this chip is 3.3V only. Drag'n'derp solves this by using only 3.3V chips and using level shifters near the cartridge bus. This poses a problem for a genuine MBC5 cartridge since the MBC5 nominally wants a 5V supply, so you still need a bunch of level shifter chips if you want to do everything kosher. I personally still think FRAM is a bad tradeoff for this reason, unless you go the full way, like Abrasive did with Drag'n'derp.

A decently sized cartridge battery will last something like 10 years before it needs to be replaced. The only time having a cartridge battery is a problem is if the battery has a too low capacity, or you choose an SRAM chip which is not meant for battery applications (not low power) so that it drains the battery too quickly. The typical will suffer from RAM corruption for other reasons before the battery runs dry.