577

(24 replies, posted in Audio Production)

Auxcide wrote:

So what I ended up doing was:
-Master gameboy (center)
-Slave gameboy (center)
-Master gameboy slight pan to the right a miniscule amount of time after (center) master
-Slave gameboy slight pan to the left a miniscule amount of time after (center) slave.
(Both with less volume)
example
Through mono it sounds like a really short delay effect. In stereo it makes the audio wide. I (personally) like how it came out.

If I'm not mistaken what your are implementing is called The Haas Effect. It is a dangerous game sometimes if you don't know what you're doing. 

I like your track btw.

yeah it was very tight, which is what I aim for.
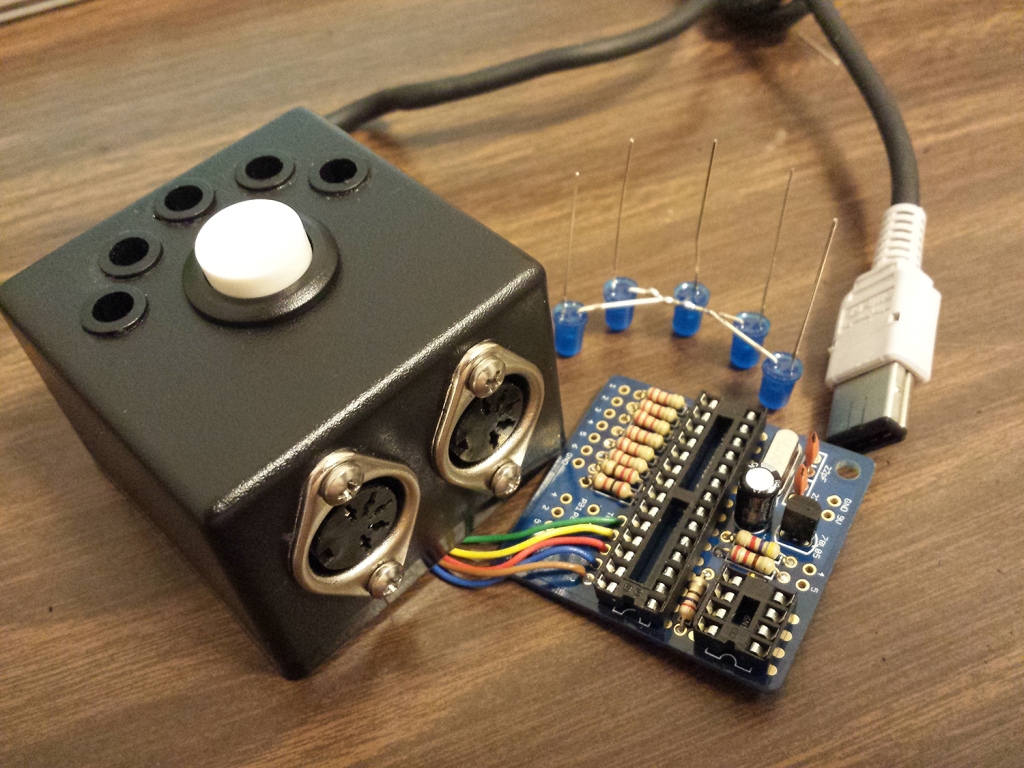
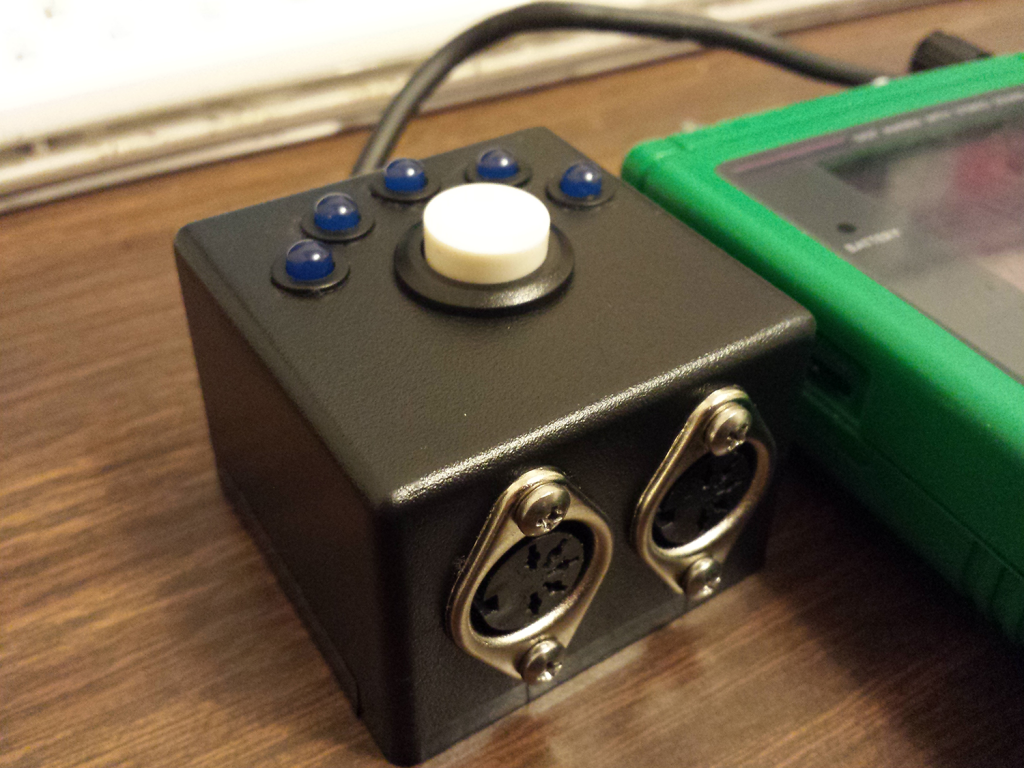
The only reason I could get away with such a small enclosure was cause I used the DMG-07 cable for power. So that got rid of the need to include the 6 pin din and the power jack. Both of which take up valuable real estate.

The only thing that really gave me trouble though was finding a spot for the ferrite bead on the DMG-07 cable, I eventually stuffed it into a corner by the LEDs tongue

You'll prolly have noticed I also omitted the status LED, didn't need/want that either.

I bought an arduinoboy kit from your shop a short time ago. Very easy to build. You did great on this pcb! Here's some pics of my unit.

Nothing in particular really. And it wouldn't be for a while, but I'm eventually going to be looking for an artist for an NES decal featuring a C64 pallet.

You comfortable with dithering and antialiasing? I noticed your work doesn't really feature any of that

582

(4 replies, posted in Nintendo Handhelds)

That happens to me a lot when switching from stock clock to a pitchbend clock or a half clock crystal whilst the software running. Do as it say's and 'Don't Panic!' tongue

583

(48 replies, posted in Nintendo Handhelds)

thursdaycustoms wrote:

My hero! I have a few teensy's and i need them to work properly since I don't actually need MIDI data for my own use. I just need USB sync. Thank you!

If sync is all you need what is wrong with little scale's $16 teensy midi sync? It work's well on DMG if you use a pulldown resistor on pin 3 of the link port.

584

(11 replies, posted in Nintendo Handhelds)

So that's where GBC frontlights come from. I never knew.

No, that's not how it works at all. Try to forget the idea of instrument and synth numbers. It's all one big instrument. here's a little bit on how frames work....

Synth 00 will cause the default frame your notes will play to be frame 00. Choosing synth 01 on the instrument screen will instead cause frame 10 to be the default frame for that instrument. All the F command actually does is move the number of frames designated by the value you choose. For example if I have an instrument using synth 00 and enter F02 as my  command, this will cause the waveform 02 to play. But if I had instead chosen synth 01 on my instrument screen and placed F02 as my command, my note would be playing frame 12 instead.  This is because the F command only shifts the wave frame by the value you enter. If you want the F value to match the waveframe number you must choose synth 00 on your instrument screen.

Also if you add an F command without retriggering the note, the frames will be shifted from the current frame being played.  So if I play a note using synth 00 and F02 as my command frame 02 starts playing. If I then add the command F02 again without retriggering my note, frame 04 will start playing

I highly reccomend reading the user manual. I've read it through several times and still find helpful new things I hadn't soaked in the first time reading it. I also recommend just downloading the songfile/template I posted for this and just experiment/practice following along with the tutorial.
I used Ableton Live 7.14 for the softsynth/oscilloscope demo. I used Adobe Illustrator CS4 for the graphs and drawings.

The only order I put the frames in was my order of preference. I grouped the related waves together starting with the lowest octave rising to the highest. The static fixed volume ones are all lumped together, the modulated ghost volume ones are together, as are the modulated sine volume ones. If you are referring to the instrument screen settings, the SYNTH number must be set to 00 if you want your F commands to correspond to the exact frame you want to choose. And the mode is set to manual.

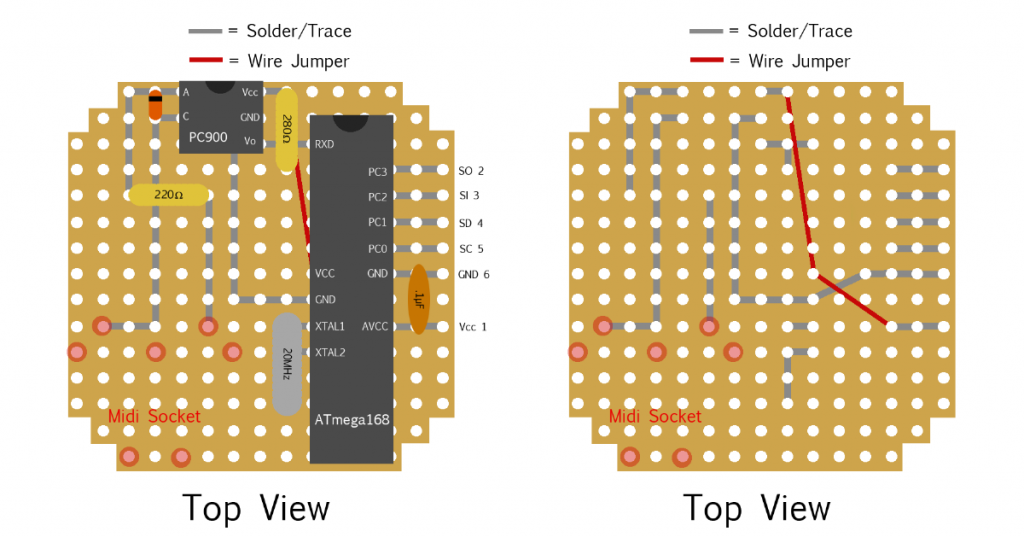
Here is my pcb layout if interested.

I'll record a video in a couple days or so.

So I ended up figuring it out. I had a bad cable. I ripped up another one and now things are working. The above code is correct. and sending the firmware update through SysEx Librarian worked like a charm.

Has anyone had success with building one of these? More specifically flashing the AVR? http://spritesmods.com/?art=gbamidi

I have a programmer and have been trying to get it to work with no luck. His readme text says to use the makefile, but I'm getting errors when I try that. prolly cause I'm not using WinAVR like he is (I'm using mac).  I've been just using avrdude to set the fuses and upload the .hex file provided. I still can't get any mutiboot response out of it though.  I'm actually a beginner, so I don't know anything past what I've been able to piece together from tutorials/forums/help texts. If anyone with actual knowledge and experience with this could tell me if I'm doing things right/wrong I would be very grateful. Here's what I've been executing. 

 $ avrdude -c usbtiny -p m168 -u -U flash:w:gbamidi.hex -U lock:w:0x2f:m -U hfuse:w:0xdF:m -U lfuse:w:0xFf:m -U efuse:w:0x00:m 

I found those fuse bit values inside his makefile.

One thing that struck me as odd is that when I use terminal mode in avrdude and 'dump flash 0 16800' the lines 0000 all the way through 3800 are all 'ff', which if I'm not mistaken, that means blank. Though it might have something to do with something else I saw in the makefile. near the top under where he declares the MCU, it says 'BOOTLOADER_ADDRESS=0x3800'. Like I said I'm a beginner so I don't know much about any of this stuff. All I wanted was a MIDIboy Advance sad

590

(20 replies, posted in Nintendo Handhelds)

IndigoChild wrote:

Im thinking if you could add some sort of analogue resister that you can change with the contrast wheel while holding B+A that would be ideal for LSDJ, But this is strictly thinking about LSDj

B+A is already used for erasing notes and such. Holding B then hitting A will execute this operation. Maybe something like Holding A and tapping B instead to cycle through colors might work for you.

591

(19 replies, posted in Nintendo Handhelds)

Sweet! Great to hear. I can't wait for this app sir. Once I moved to android I was disappointed to find there wasn't already a iPhone lsdj patchbook equivalent.

592

(19 replies, posted in Nintendo Handhelds)

This looks way better than the iPhone one. One thing I would love to see in this is a way to upload and attach a sample preview to each save so we could audition the sounds and know what each patch sounds like. I am fairly confident that most people, me included, can't remember what a lot of our old patches sound like just from looking at the name/tables/settings/etc. One thing that the iPhone version does have that is useful is a notes section. Just a little text box where we can scribble some instructions or something down, like "Best if used on note C5" or "This patch is meant to be  used in tandem with patch xxx"
And to answer one of your questions "should it store groove tables?"....YES. I have some instrument tables that have some specific rhythms that are designed around specific groove tables. it would be nice to store a groove to each patch or table.